Storage Sense on Windows 10 configured with Intune

In a modern management scenario, enabling end-points to perform automatic maintenance tasks will reduce TCO by avoiding scenarios that might result in support calls. Storage Sense in Windows 10 is a great way to manage free disk space on PCs by clearing caches, temporary files, old downloads, Windows Update cleanup, previous Windows Versions, and more, but it it’s not fully enabled by default. Storage Sense can potentially remove gigabytes of data, freeing up valuable space on smaller drives.
Here’s how to enable this feature on Windows 10 PCs enrolled in Microsoft Intune.
Storage Sense Settings
Storage Sense can be found in the Windows 10 Settings app and has only a few settings that can be changed. Typically a user may enable Storage Sense and accept the default settings and for most PCs, the defaults are likely good enough. Here’s what’s available in Windows 10 1803:
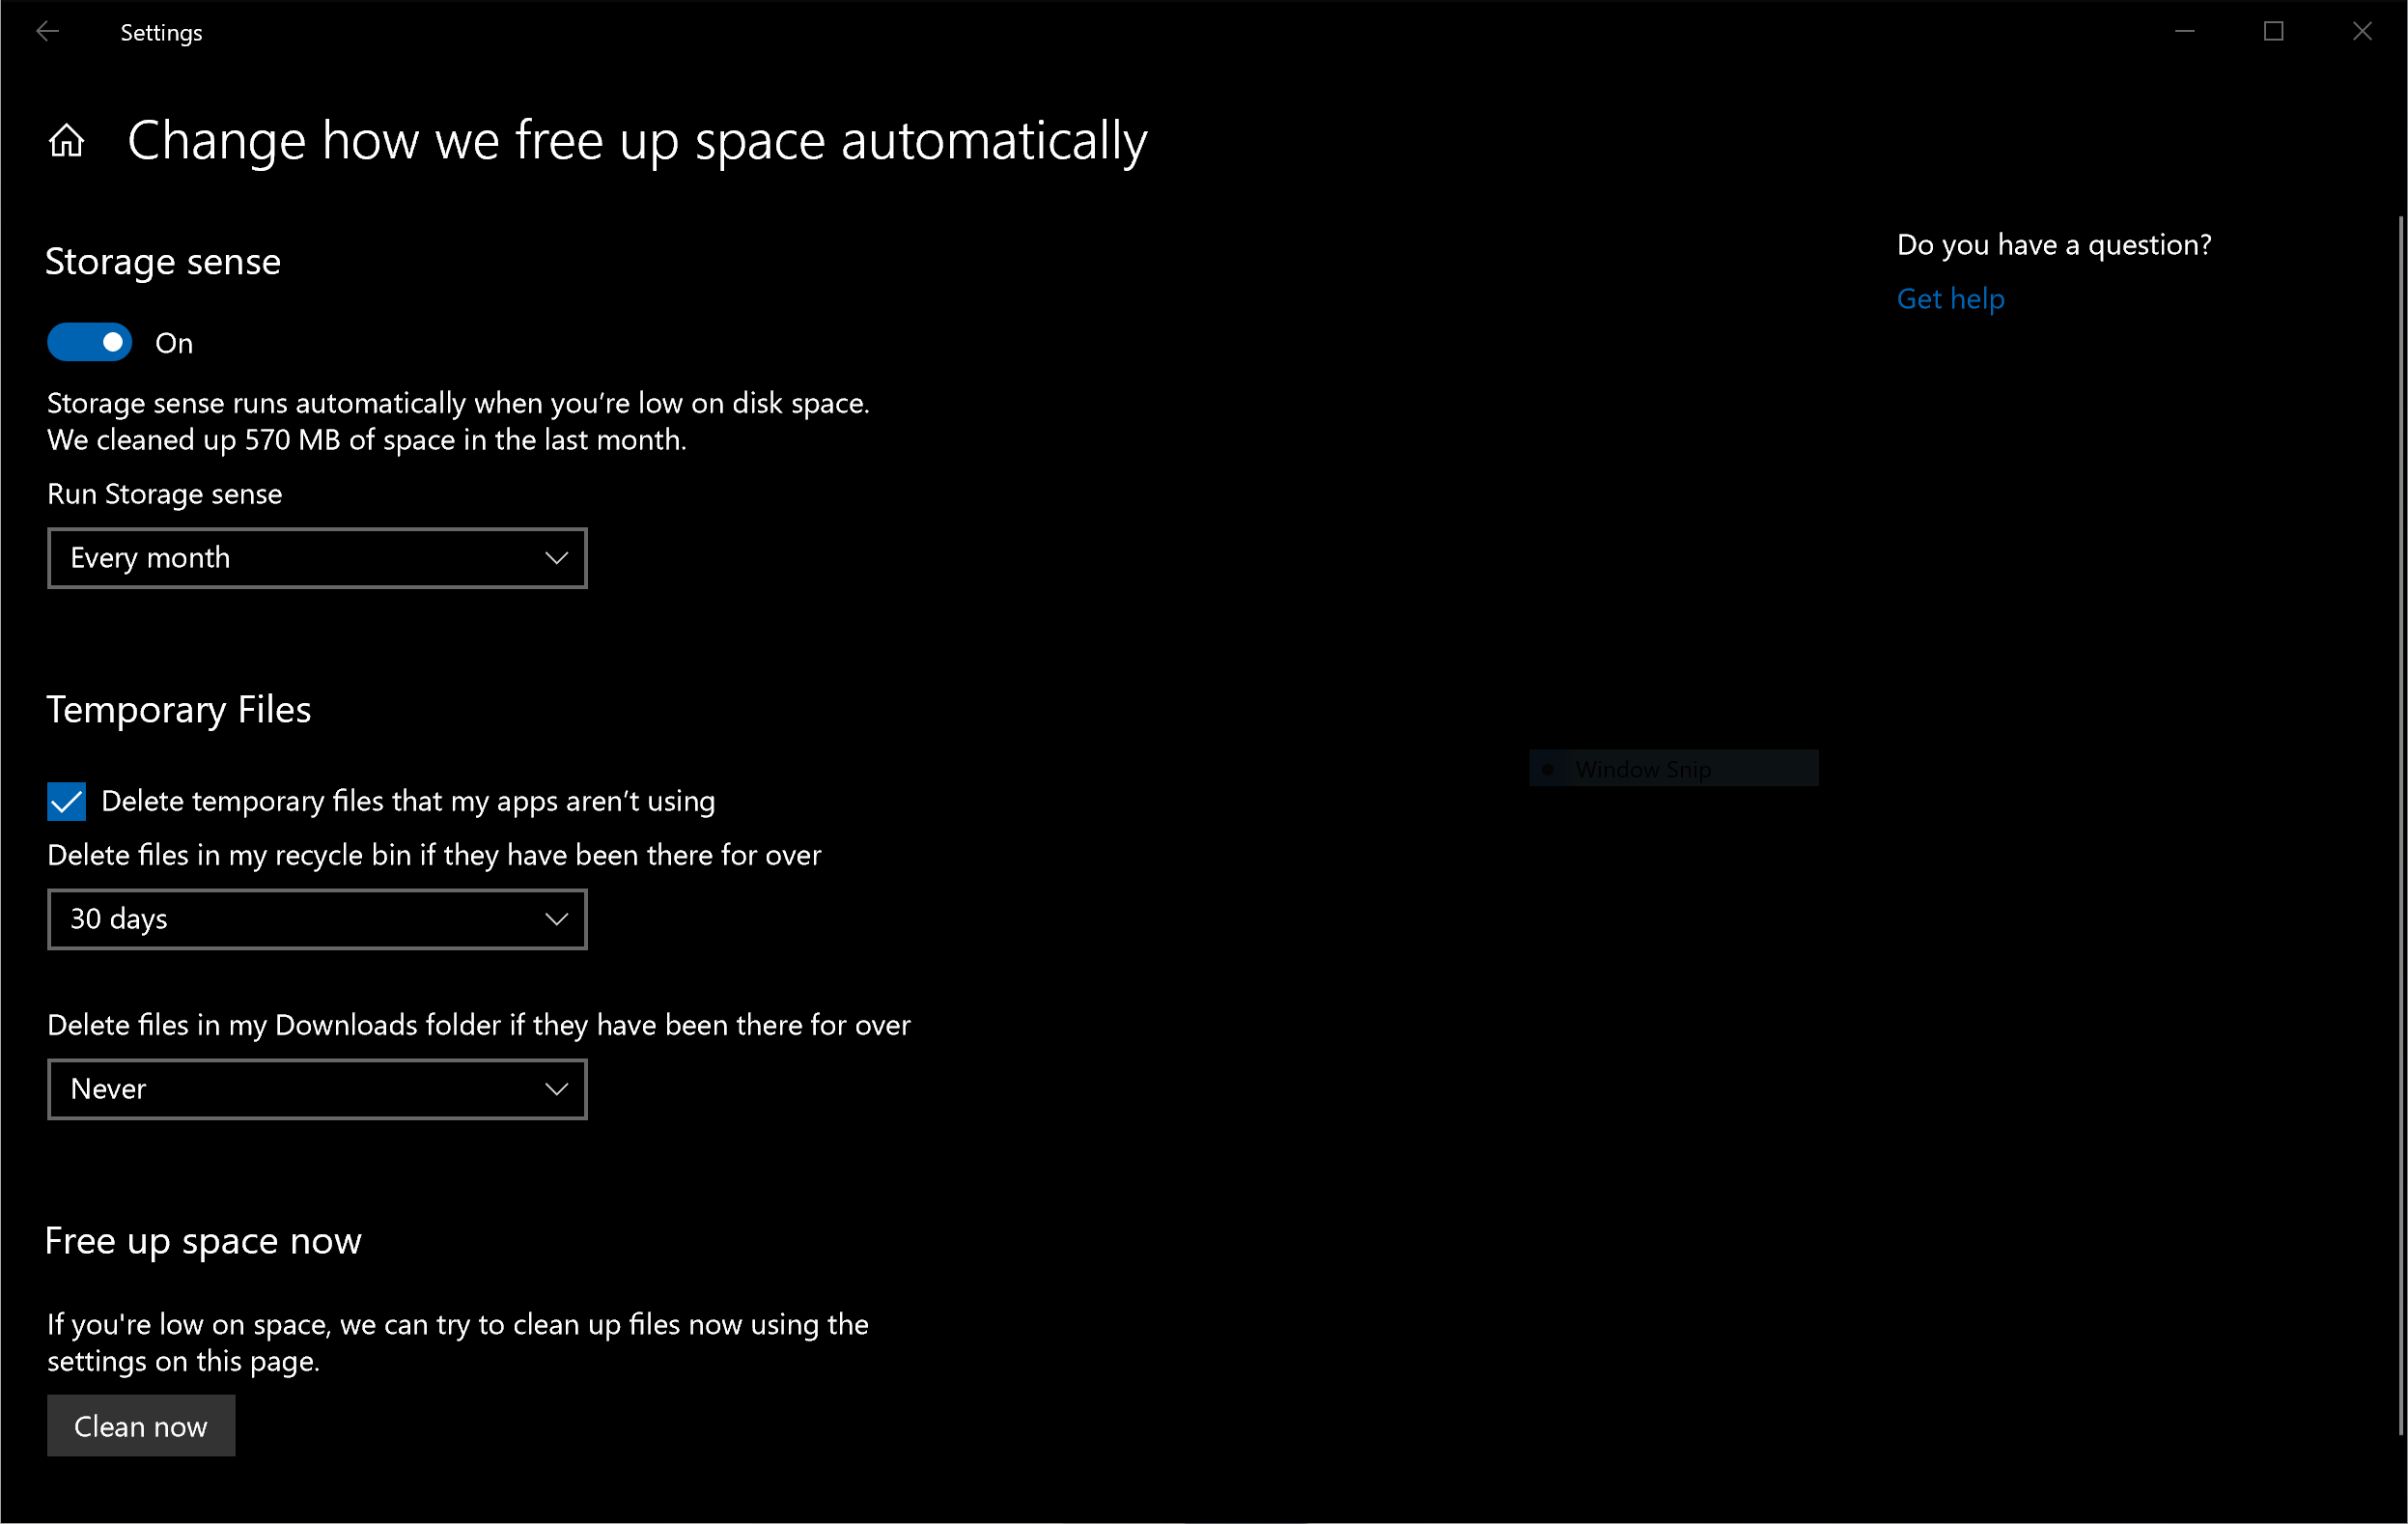
Enabling Storage Sense in Windows 10 Settings
Settings are stored in the user profile at:
HKEY_CURRENT_USER\Software\Microsoft\Windows\CurrentVersion\StorageSense\Parameters\StoragePolicy
Settings are stored somewhat cryptically with numbers representing various options.

Storage Sense settings in the Registry
These values translate to following options and values in the table below:
| Setting | Registry Value | Option | Registry Data |
|---|---|---|---|
| Storage Sense | 01 | Off | 0 |
| On | 1 | ||
| Run Storage Sense | 2048 | Every Day | 1 |
| Every Week | 7 | ||
| Every Month | 30 | ||
| When Windows decides | 0 | ||
| Delete temporary files that my apps aren’t using | 04 | Selected | 0 |
| Not selected | 1 | ||
| Delete files in my recycle bin if they have been there for over | 08 | Off | 0 |
| On | 1 | ||
| 256 | Never | 0 | |
| 1 day | 1 | ||
| 14 days | 14 | ||
| 30 days | 30 | ||
| 60 days | 60 | ||
| Delete files in my Downloads folder if they have been there for over | 32 | Off | 0 |
| On | 1 | ||
| 512 | Never | 0 | |
| 1 day | 1 | ||
| 14 days | 14 | ||
| 30 days | 30 | ||
| 60 days | 60 |
Now that we know what the options are, we can decide on what to deploy and deliver them to enrolled end-points.
Configure via PowerShell
Using the values from the table above, a PowerShell script can be deployed via Intune to configure our desired settings. The script below will enable Storage Sense along with several settings to regularly remove outdated or temporary files.
## Enable Storage Sense
## Ensure the StorageSense key exists
$key = "HKCU:\SOFTWARE\Microsoft\Windows\CurrentVersion\StorageSense"
If (!(Test-Path "$key")) {
    New-Item -Path "$key" | Out-Null
}
If (!(Test-Path "$key\Parameters")) {
    New-Item -Path "$key\Parameters" | Out-Null
}
If (!(Test-Path "$key\Parameters\StoragePolicy")) {
    New-Item -Path "$key\Parameters\StoragePolicy" | Out-Null
}

## Set Storage Sense settings
## Enable Storage Sense
Set-ItemProperty -Path "$key\Parameters\StoragePolicy" -Name "01" -Type DWord -Value 1

## Set 'Run Storage Sense' to Every Week
Set-ItemProperty -Path "$key\Parameters\StoragePolicy" -Name "2048" -Type DWord -Value 7

## Enable 'Delete temporary files that my apps aren't using'
Set-ItemProperty -Path "$key\Parameters\StoragePolicy" -Name "04" -Type DWord -Value 1

## Set 'Delete files in my recycle bin if they have been there for over' to 14 days
Set-ItemProperty -Path "$key\Parameters\StoragePolicy" -Name "08" -Type DWord -Value 1
Set-ItemProperty -Path "$key\Parameters\StoragePolicy" -Name "256" -Type DWord -Value 14

## Set 'Delete files in my Downloads folder if they have been there for over' to 60 days
Set-ItemProperty -Path "$key\Parameters\StoragePolicy" -Name "32" -Type DWord -Value 1
Set-ItemProperty -Path "$key\Parameters\StoragePolicy" -Name "512" -Type DWord -Value 60

## Set value that Storage Sense has already notified the user
Set-ItemProperty -Path "$key\Parameters\StoragePolicy" -Name "StoragePoliciesNotified" -Type DWord -Value 1
Modify the script as desired - at the very least the script should enable Storage Sense and leave the remaining settings as default. Save the script as a PowerShell file and deploy via the Intune console in the Azure portal. Ensure that the script runs with the logged on user’s credentials because it will write to HKCU.
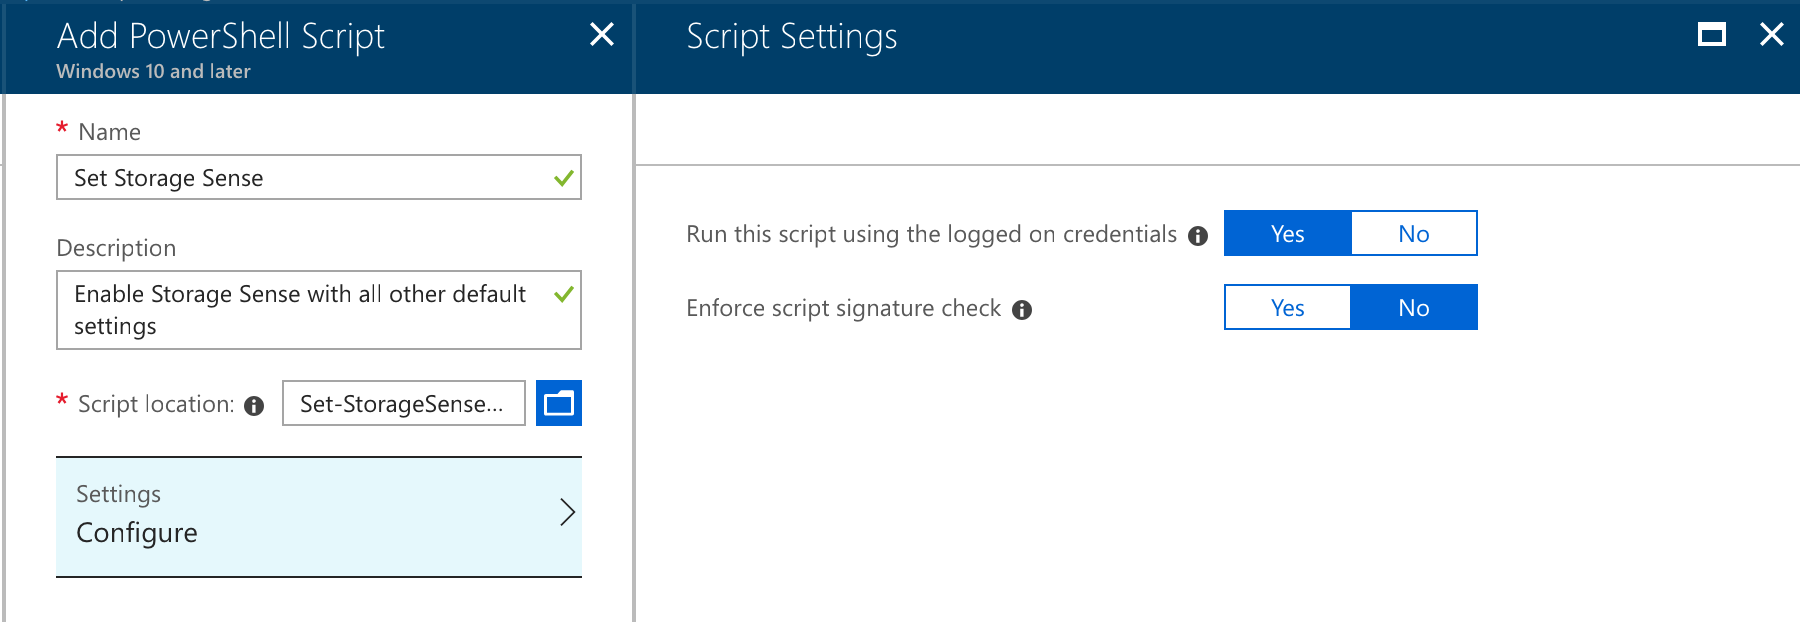
Enabling Storage Sense with a PowerShell script in Intune
Assign the script to All Users and their PC will receive the script. It’s important to note that, because the settings are stored in HKCU and are not policies, the user can either disable Storage Sense or change other settings.
Wrapping Up
Storage Sense is a great feature to enable on Windows 10 PCs for both personal and corporate PCs. In a modern management scenario, it’s another tool in our kit for enabling end-points to be self-sufficient, so I highly recommend testing and enabling the feature by default. This article has shown you how to configure Storage Sense via Intune and PowerShell with all of the possible combinations required to configure it to suit your requirements.
Hold On
Storage Sense shows you how much disk capacity has been cleaned in the previous month in the Settings app. For a bit of a laugh, you can modify the value where this is stored so that Settings displays spaced saved that’s clearly not genuine.

Messing around with the value of saved space
You’ll find the registry value (20180901) in this key:
HKEY_CURRENT_USER\Software\Microsoft\Windows\CurrentVersion\StorageSense\Parameters\StoragePolicy\SpaceHistory