An Intel NUC6i5SYB for My Home Lab
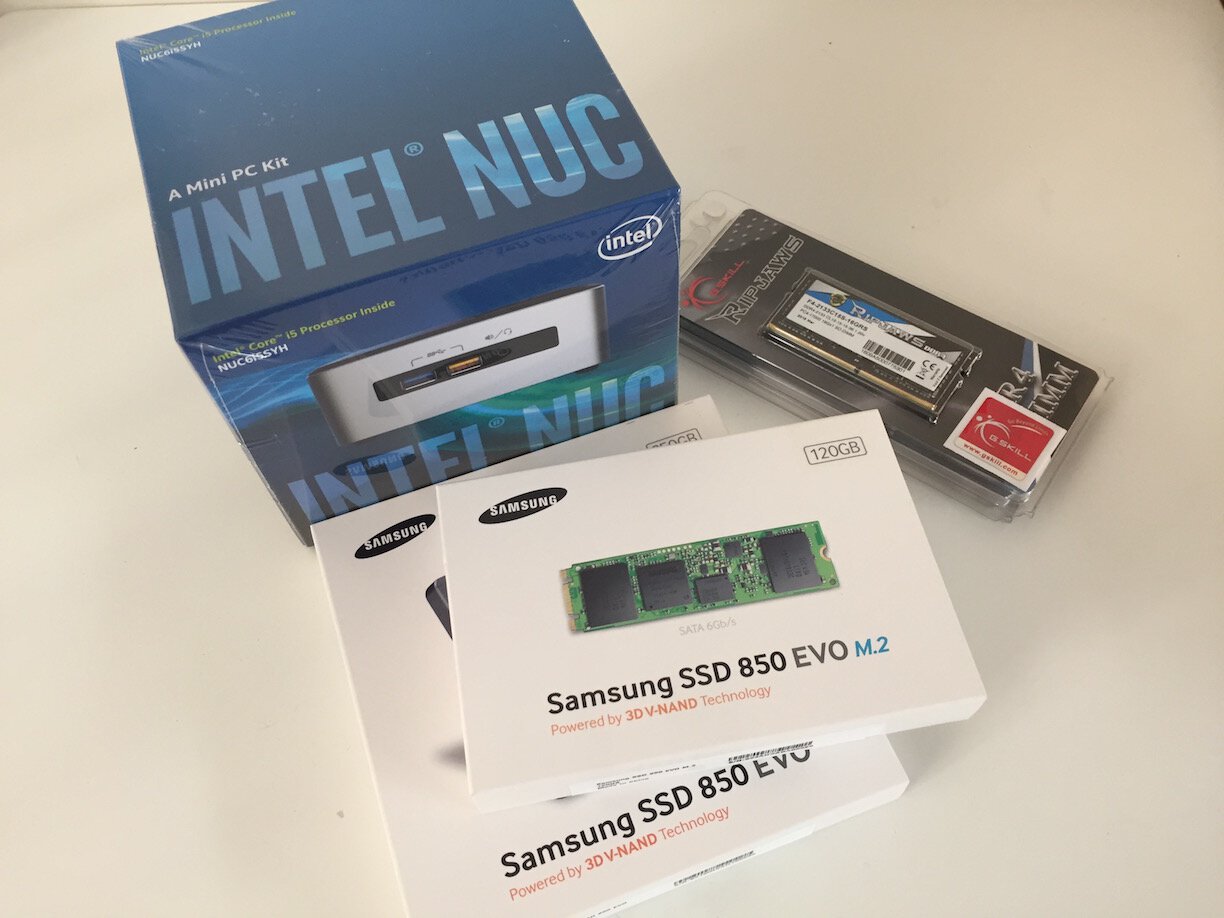
I’ve recently added a new PC to my home lab - the Intel NUC6i5SYB, to replace a Lenovo laptop that I’ve been using to host VMs on Hyper-V. In this article, I’ll cover an overview of the NUC, how I’ve configured this device and some details on performance.
For the past couple of years I’ve been using a Lenovo ThinkPad 440s ultrabook with an i5, 12GB RAM and a 256GB SSD running Windows Server 2012 R2 with Hyper-V as a host for some infrastructure VMs (XenDesktop, App-V infrastructure, vCenter, SQL Server etc.), but it’s come time to replace it. I looked at another low power device as a hypervisor host and the Intel NUC was the go to PC.
Intel NUC6i5SYB / NUC6i5SYH Hardware
This is one of the new Skylake versions of the Intel NUC. While the model I’ve purchased is the NUC6i5SYB, it seems to be the same as, or close to, the NUC6i5SYH as this model keeps coming up in searches for the NUC6i5SYB.
This version of the NUC is capable of taking two drives with one SATA and one M.2 connections. Maxing out the RAM makes this an amazing low-power hypervisor in a small package.
For this build, which I wanted to keep to a budget, I purchased:
- Intel NUC6i5SYB ($649AU)
- 2 x 16GB G.Skill Ripjaws PC4-17000 (2133MHz) DDR4 SODIMM ($298AU)
- Samsung 850 EVO 250GB SSD ($135AU)
- Samsung 850 EVO Series, m.2 (SATA) 120GB SSD ($105AU)
The total package came to $1,187.00AU.
CPU
The i5 processor in the Lenovo laptop is the previous Haswell mobile CPU (i5-4300U) and I’m replacing it with the NUC that has a Skylake i5 (i5-6260U), also a mobile processor. This CPU has a similar base clock speed at the same 15W, but the Skylake model brings support (as in supported by Intel) for 32GB of RAM.
Like its predecessor, the newer i5 has 2 cores with hyper-threading support, so I get 4 cores (or 4 threads to be more precise) to play with for VMs.
A previous generation i7 version of the Intel NUC comes with the i7-5557U; however this still only has 2 cores (unlike some desktop versions that have 4 cores) but jumps the base clock frequency to 3.1Ghz. If you need the extra performance at 28W, then it’s still a low power package but not the latest generation of CPU. This model comes in at $719AU.
A newer i7 Skylake version of the NUC is due for release in May with the i7-6770HQ that provides 4 cores. This one looks like a beast but perhaps overkill for this use case. Here’s a comparison of all 3 CPUs models.
SSDs
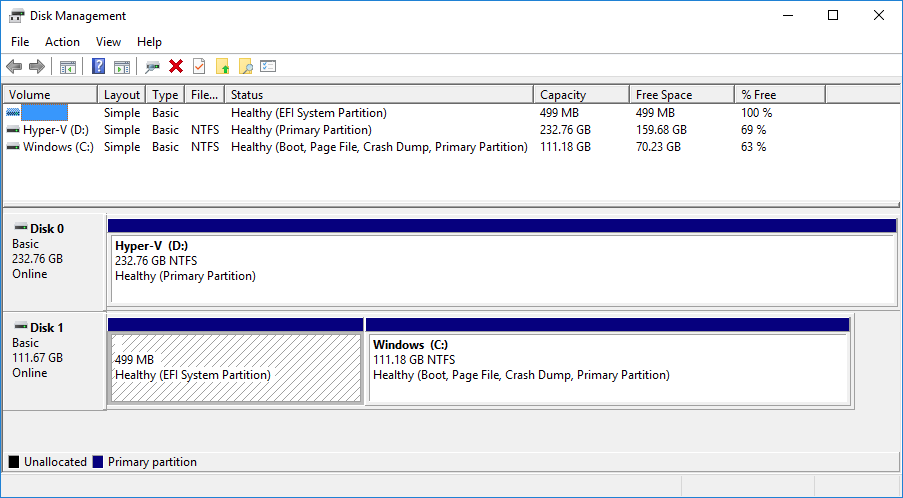
I’d originally had the idea that the M.2 SSD is for the operating system, while a larger drive would be for hosting VMs etc. Once I’ve installed the RAM and SSDs and powered on the PC, I’ve subsequently found that the SATA SSD is drive 0 while the M.2 drive is drive 1. This isn’t a show stopper (not enough to exchange the drives) and I’m still using the M.2 drive for the OS; however I would have change the configuration had I known this before purchase.
RAM
I’ve purchased G.Skill RAM previously and found them to be reliable and perform well. G.Skill often hits the middle range in terms of price when compared with other vendors, so I’ve stuck with the brand with 2 x 16GB SODIMMs.
Installing RAM and SSDs
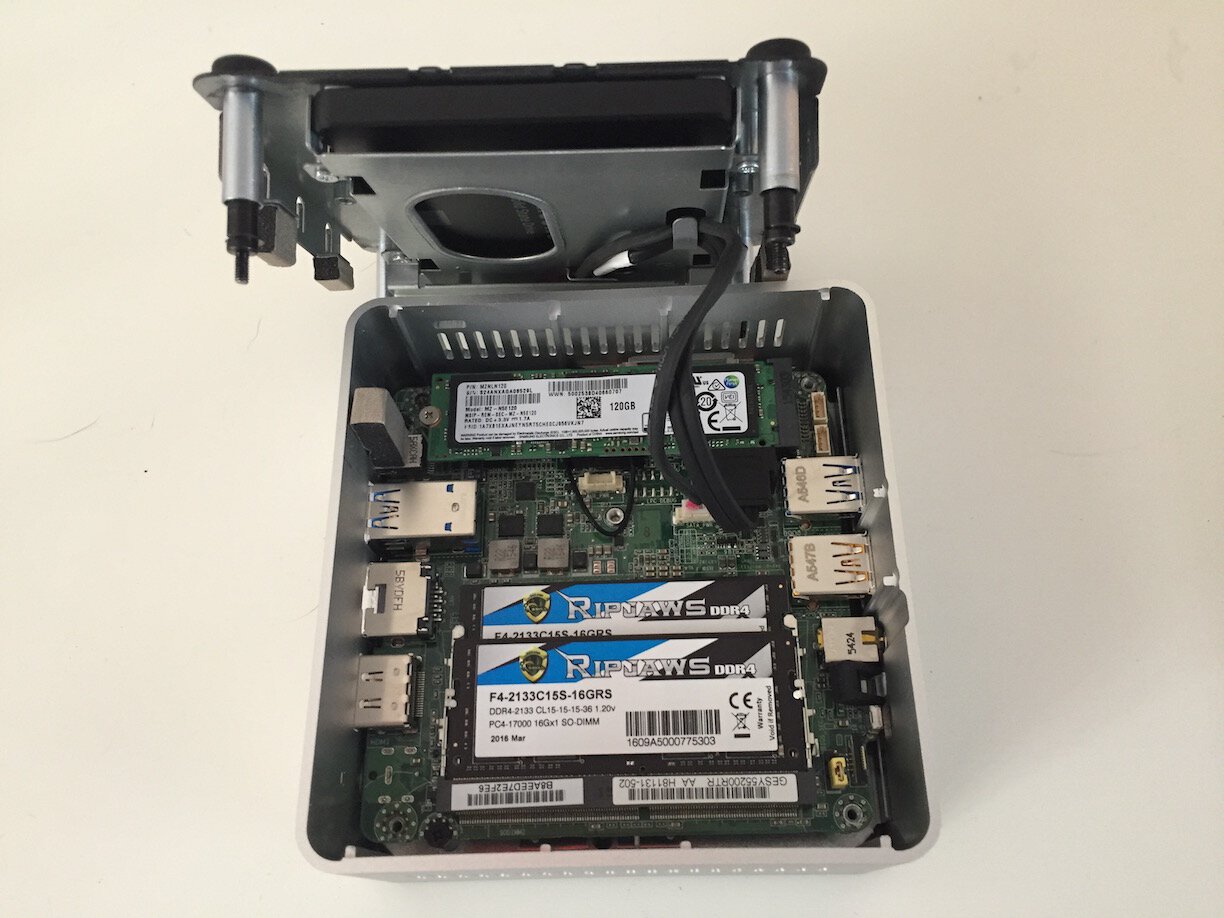
Installing the RAM and drives into a NUC is simple enough - pop the top off, install the RAM into the two slots, install the M.2 drive with a screw to keep it into place and the SATA SSD just pushes into the slot in the top of the NUC. Here’s a view of the installed hardware:
Screw the lid back on and power up the PC. The 1.5 amp power supply comes with removable adapters to suit multiple regions.
Configuration
The Intel NUC comes with the Intel Visual BIOS, which is a nice change from text-based UIs we’re used to. Here’s a short walk-through of the BIOS configuration - as a hypervisor I’ve disabled hardware such as audio, Bluetooth and Wi-Fi etc.
Installing Windows
Installing Windows 10is straight-forward, Windows 10 will recognise most devices and will require updates for the chipset and display driver. Support for Windows Server, however, is a bit more tricky.
Windows Server does not provide support for the Intel I219-V network adapter in-box. So installing manually or via an automated deployment requires a manual installation of the network driver - because the driver is not signed for Windows Server, there is no automated install.
At this time, I have Windows Server 2016 installed but I would prefer to be running Nano Server - without a signed network driver there’s no way to get Nano Server working on this PC. To get a driver signed, I’m getting a code signing certificate from DigiCert to enable me to sign the drivers. I’ll write an article in the future on getting Nano Server onto the Intel NUC.
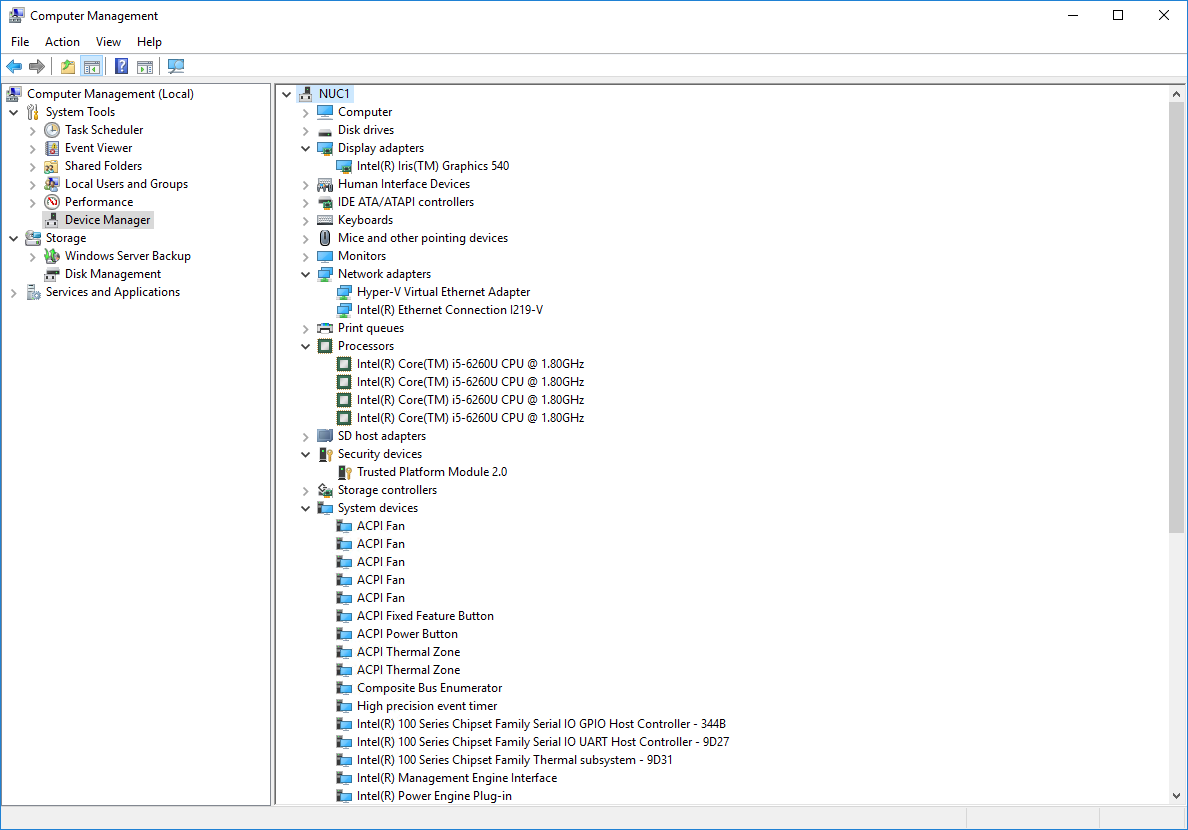
With Windows Server or Windows Server Core and with devices disabled in the BIOS, Device Manager looks like this:
With a custom automated deployment via MDT, the disk partitions resulted as follows:
Performance
I’ve done some basic performance testing on the hardware with PassMark and Iometer on Windows 10 x64. The PassMark result is above average with both disk and RAM performing very well. View the full benchmark results on the PassMark web site.
To test both SSDs, I’ve used Iometer with a 4K block size, 80% write, 80% random write. Both SSDs provide excellent results and I’ve some to expect great performance from Samsung SSDs which I’ve been using for a number of years how.
Here’s the result for the Samsung 850 EVO 120GB M.2 drive:
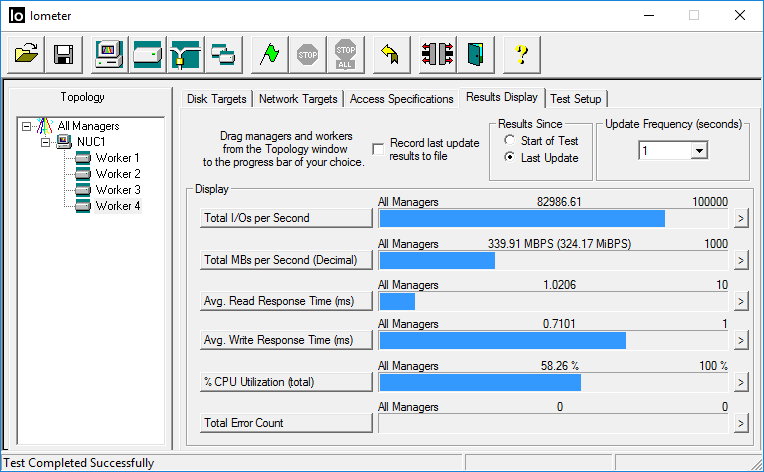
And results for the Samsung EVO 850 256GB SATA drive:
Note that both drives are the cheaper EVOs, not the EVO Pros. Spending more for the Pro version ( ~$100AU additional per drive) should provide even better results; however for use in a home lab, this type of performance is pretty good.
Conclusion
I’m very happy with the Intel NUC6i5SYB, especially with this configuration and price point. The size is excellent and it’s also low noise and low power, even under load.
I would, however, have done two things differently:
- Swapped the drive configurations - make the M.2 the larger drive for VM storage. As this is drive 1, it would simplify OS deployment to the SATA SSD as drive 0.
- Extended my budget and gone with the Samsung 50GB M.2 SSD at $235AU. While I’m using deduplication built into Windows Server, there’s not a huge price difference between the 256GB and 512GB SSDs.
Overall though this is a great addition to my home lab environment.
