Deploying an Enterprise Subordinate Certificate Authority

How to setup an Active Directory Certificate Services subordinate Certificate Authority on Windows Server 2012 R2.
- Basics
- Further Reading
- Deploying an Enterprise Subordinate Certificate Authority
- Viewing the CA configuration in Active Directory
- Conclusion
In the last article, I documented the steps for deploying an offline Root Certificate Authority on Windows Server 2012 R2. This article will continue the process and show how to install and configure a Subordinate Certificate Authority that will be used to issue certificates to users and devices.
Basics
To setup a subordinate certificate authority, especially one that will deploy certificates in an Active Directory environment, we’ll deploy to a machine running Windows Server 2012 R2 that is a member of the domain.
In this article we will:
- Install the subordinate certificate authority
- Request and approve a CA certificate from the offline root CA
- Configure the subordinate CA for the CRL to work correctly
To deploy an Enterprise Certificate Authority you’ll need to be installing certificate services as a member of the Enterprise Admins group, or have permissions delegated to your account. Remember, this means that you won’t be installing an Enterprise CA in an environment using Azure Active Directory Domain Services because you won’t have rights.
Further Reading
As in my last article, my intention is to not go into detail, rather I’m looking to document a set of recommended steps to get an Enterprise Certificate Authority up and running successfully. For more in-depth reading, here is a list of recommended articles:
Deploying an Enterprise Subordinate Certificate Authority
The following steps are taken on a virtual machine running Windows Server 2012 R2 with all current updates as an Active Directory domain member.
Installing Certificate Services
Just as with the offline Root CA, deploying Certificate Services on Windows Server 2012 R2 is simple – open Server Manager, open the Add Roles and Features wizard and choose Active Directory Certificate Services under Server Roles.
In this instance, choose to install the Certification Authority and the Certification Authority Web Enrollment services:
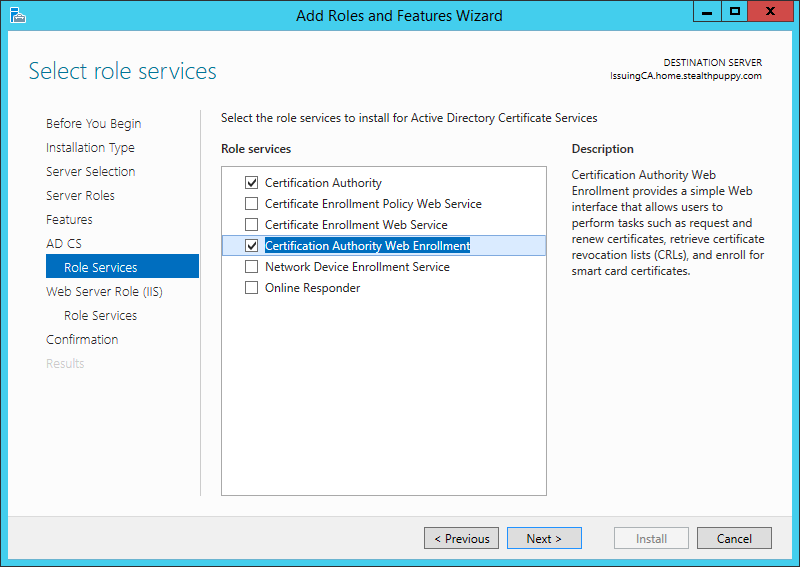
Installing the Certificate Authority components
You can choose additional certificate services roles at this point; however, these two services are recommended to get the subordinate certificate authority running. When selecting the Certification Authority Web Enrollment, the wizard will prompt you to install a set of IIS components to support this role.
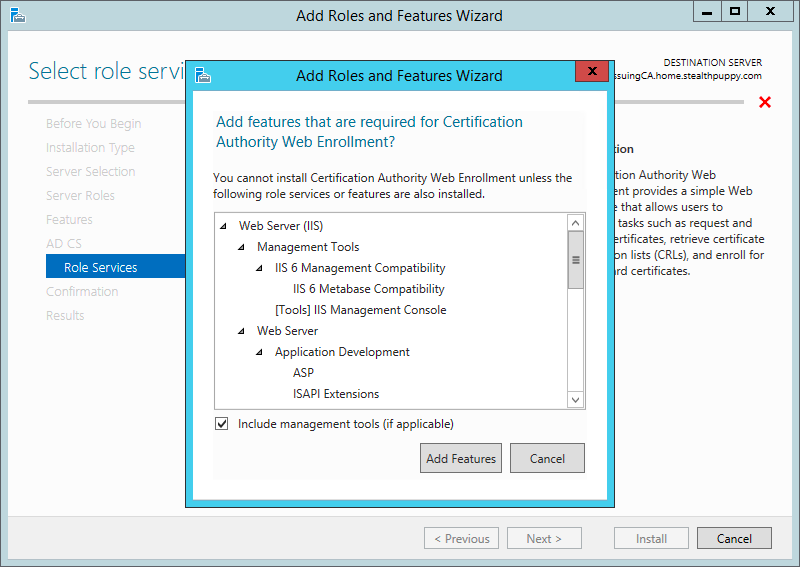
IIS components to support the Certification Authority Web Enrollment role
To simplify the installation of these roles, install via PowerShell instead. Elevate a PowerShell prompt and use the Add-WindowsFeature cmdlet:
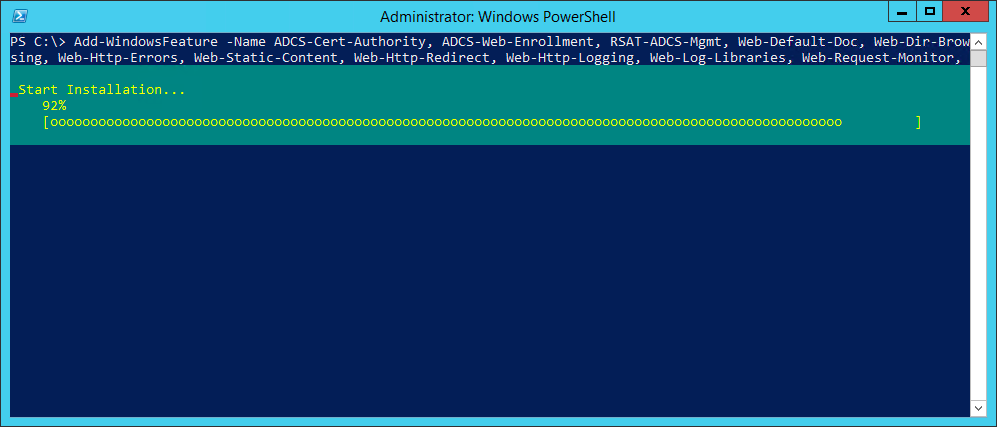
Installing the subordinate CA roles with PowerShell
Add-WindowsFeature -IncludeManagementTools -Name ADCS-Cert-Authority, `
ADCS-Web-Enrollment, Web-Default-Doc, Web-Dir-Browsing, Web-Http-Errors, `
Web-Static-Content, Web-Http-Redirect, Web-Http-Logging, Web-Log-Libraries, `
Web-Request-Monitor, Web-Http-Tracing, Web-Stat-Compression, Web-Filtering, `
Web-Windows-Auth, Web-ASP, Web-ISAPI-Ext
No reboot should be required after installing these roles.
Configure DNS
Before we go any further, remember that in setting up the Root CA, we configured the Certificate Revocation List Distribution Point using an alias to the issuing CA. In my case, I’ve configured a CNAME record - crl.home.stealthpuppy.com to point to my issuing CA hostname - issuingca.home.stealthpuppy.com.
Configure the alias in DNS now, so that it has time to propagate and be available for resolution when we configure the subordinate certificate request later. If this step is missed, you will receive ‘CRL unavailable’ errors.
Configuring Certificate Services
After the Certificate Services roles are installed, start the configuration wizard from Server Manager - click the flag and yellow icon and click the Configure Active Directory Certificate Services… link.
In the configuration wizard, set the credentials used to configure the certificate services as required. You’ll need to change this if your login account is different to the account with Enterprise Administrator rights.
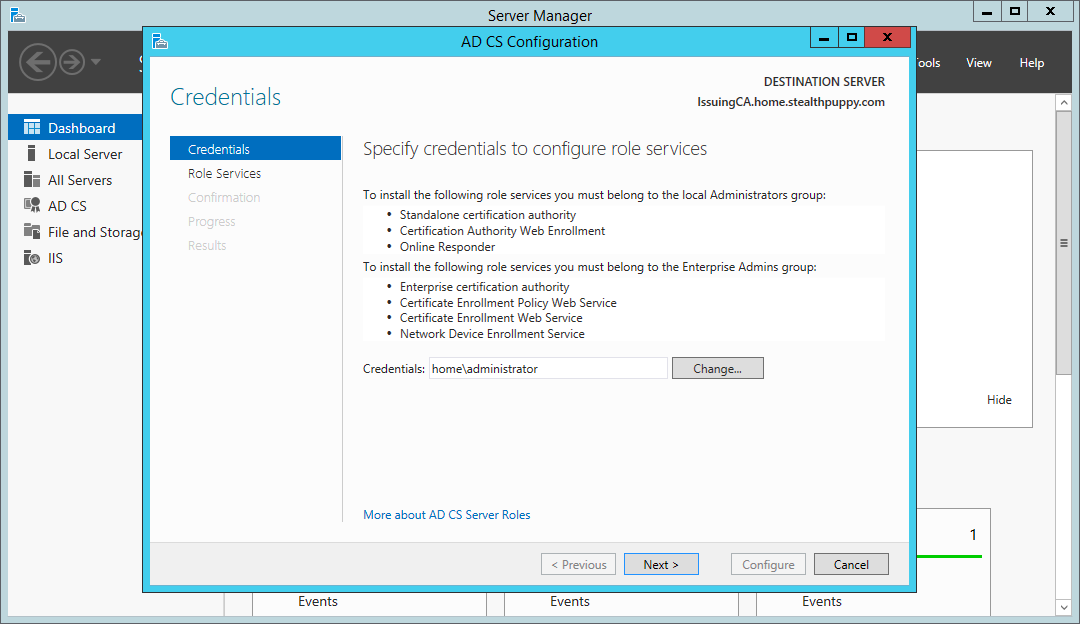
Certificate Services wizard - configuration credentials
For this server, we have two roles to configure:
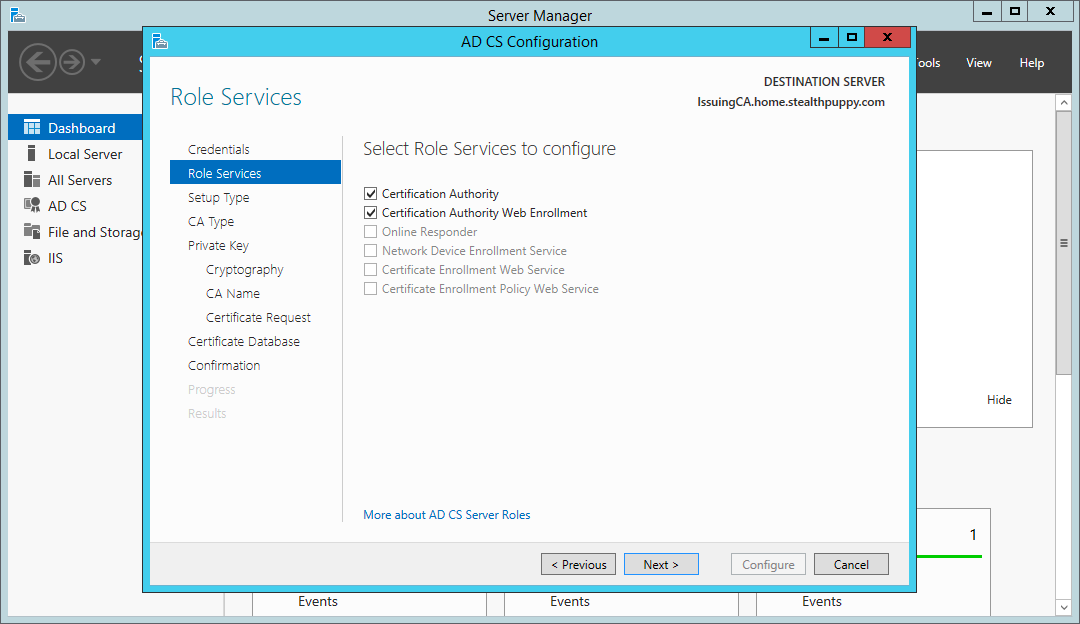
Certificate Services wizard – roles to configure
Configure this subordinate certificate authority as an Enterprise CA. The server is a member of a domain and an Enterprise CA allows more flexibility in certificate management, including supporting certificate auto-enrollment with domain authentication.
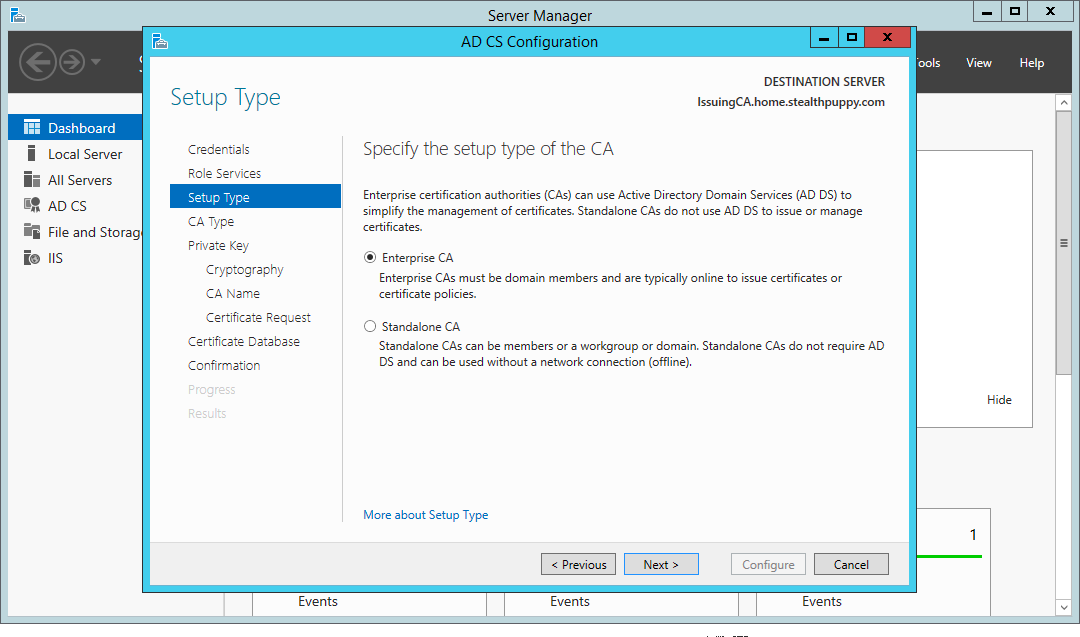
Certificate Services wizard – install an Enterprise CA
Configure this CA as a subordinate CA. After configuration, we will submit a CA certificate request to the offline root CA.
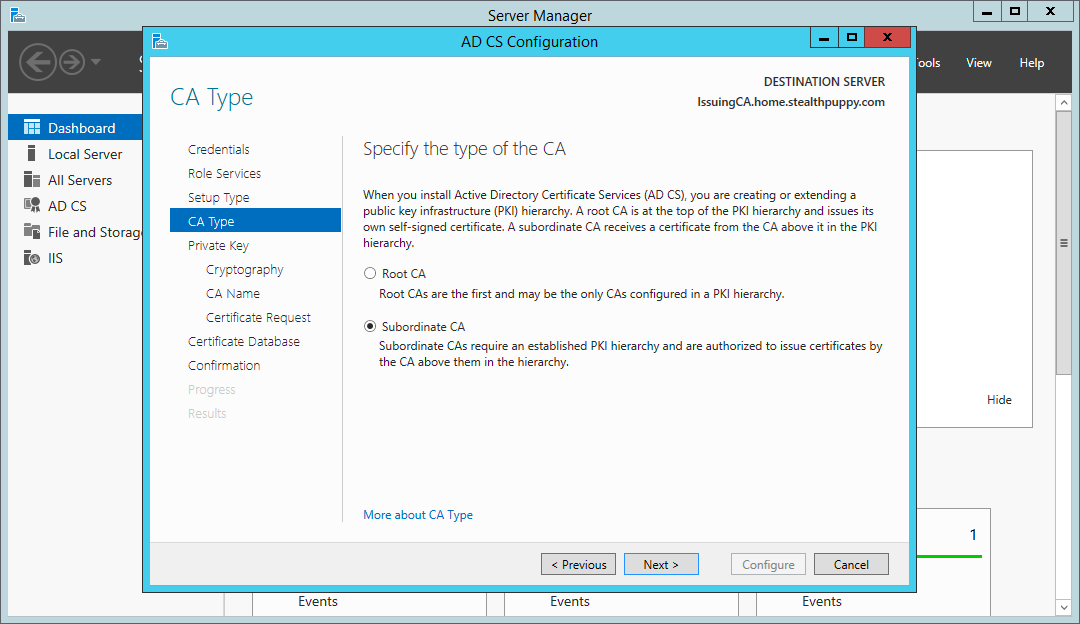
Certificate Services wizard – install a subordinate certificate authority
Create a new private key for this CA as this is the first time we’re configuring it.
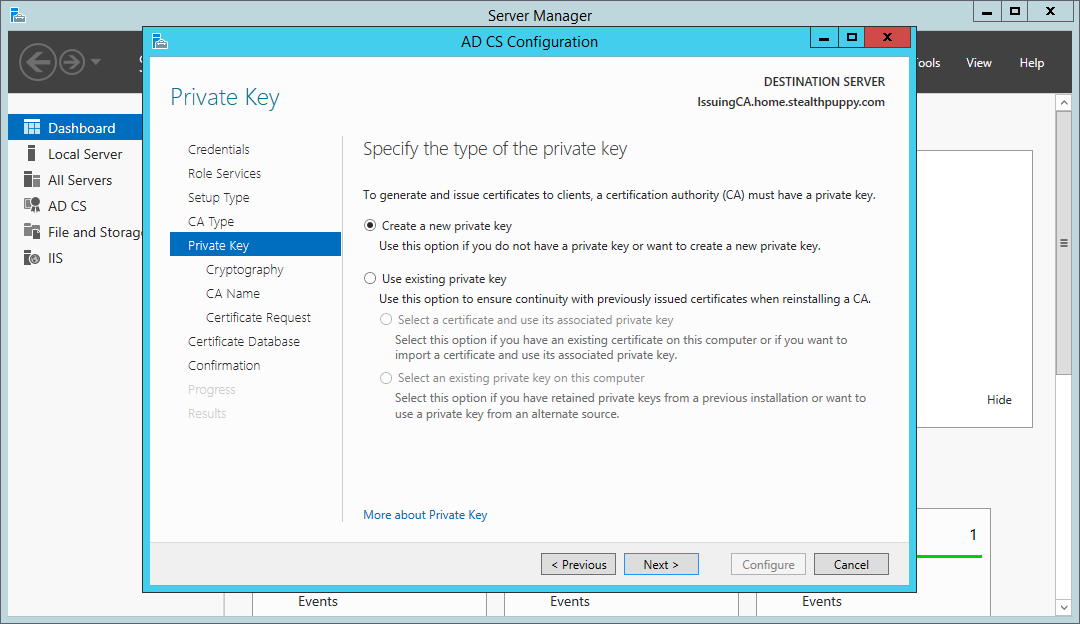
Certificate Services wizard – create a new private key
When selecting a cryptographic provider and a hash algorithm, SHA1 will be the default hashing algorithm; however, Windows will no longer accept certificates signed with SHA1 after 1st of January 2017, so be sure to choose at least SHA256.
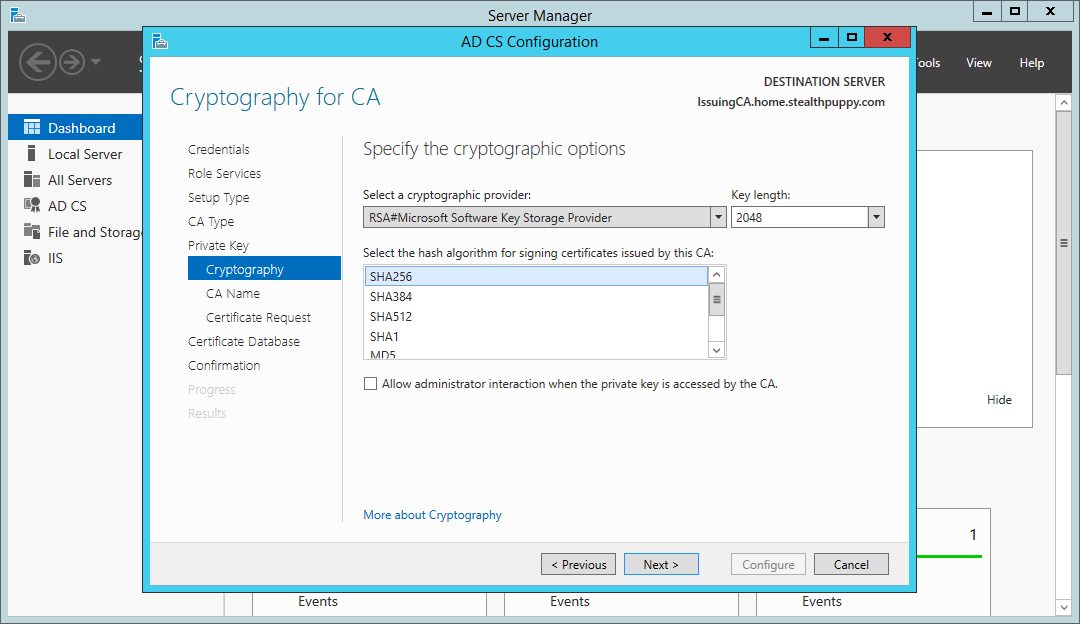
Certificate Services wizard – choose SHA256 as the hashing algorithm
Set a name for the CA that makes sense and somewhat descriptive. Note, that because this CA is a member of the domain the distinguished name includes the domain name automatically.
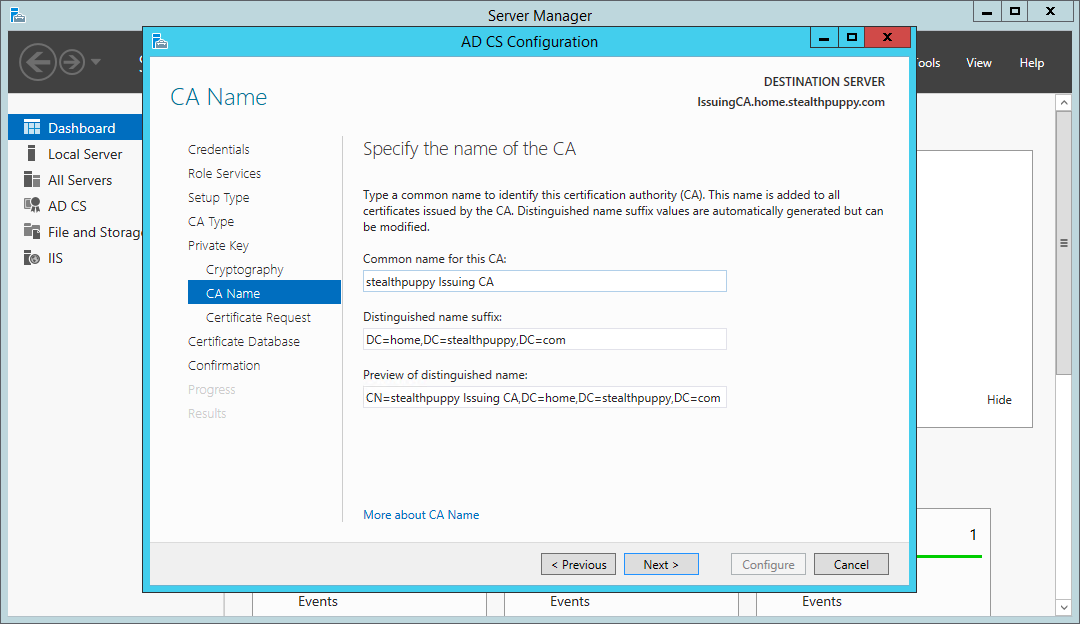
Certificate Services wizard - setting a subordinate certificate authority name
Because this is a subordinate CA, we’ll need to send a CA certificate request to the offline root CA. Save the request locally which will be used later to manually request and approve the certificate. This is saved to the root of C: by default.
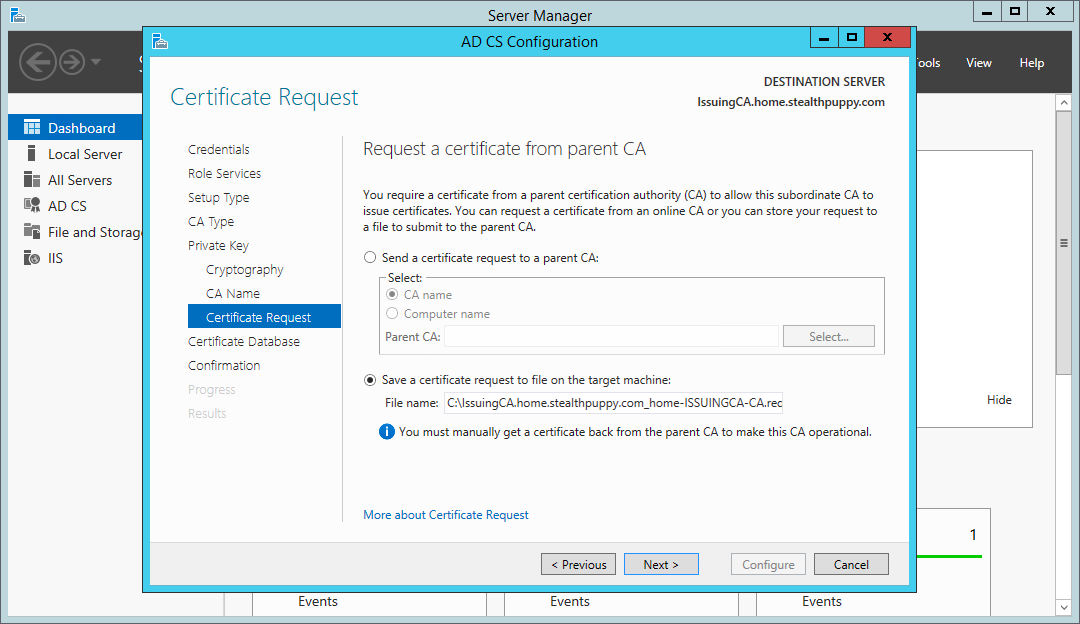
Certificate Services wizard - the CA certificate request
On the next page of the wizard, you can choose the location of the certificate services database and logs location (C:\Windows\System32\Certlog), which can be changed depending on your specific environment.
On the last page, you will see a summary of the configuration before committing it to the local certificate services.
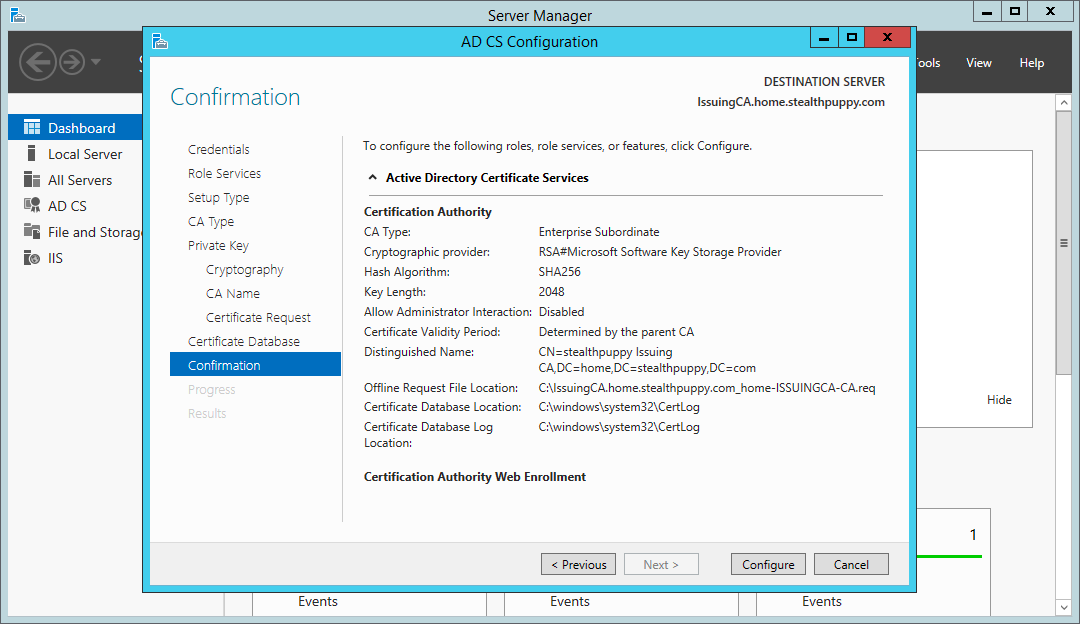
Certificate Services wizard - summary page
Click Configure and the wizard will configure the certificate services roles. Note the warning that the configuration for this CA is not complete, as we still need to request, approve and import the CA certificate.
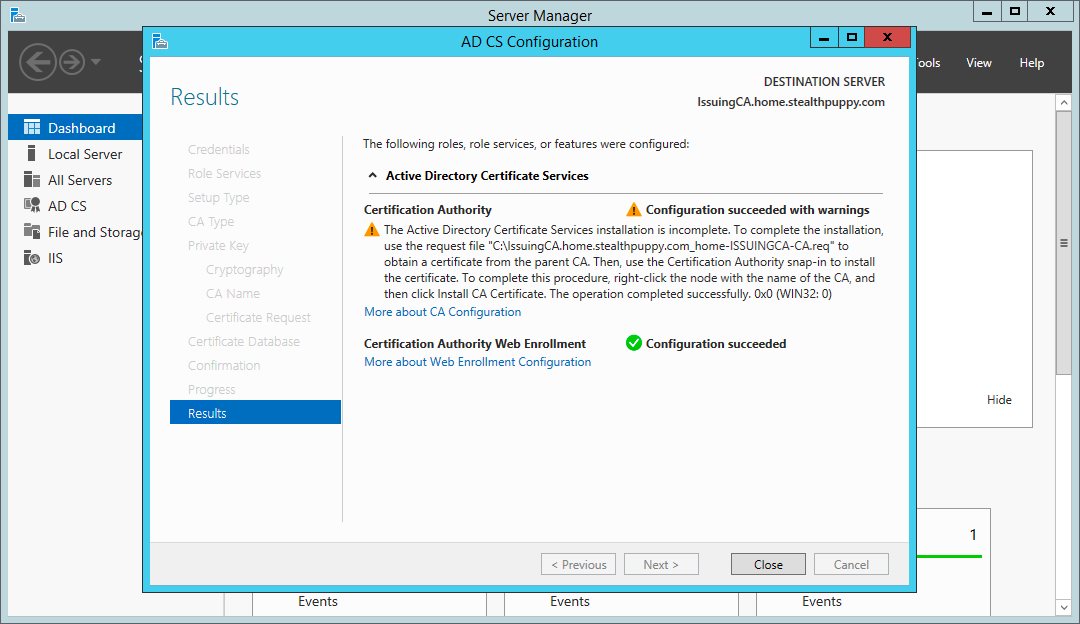
Certificate Services wizard - configuration results
Configuring the CRL Distribution Point
Before configuring the Certification Authority itself, we’ll first copy across the certificate and CRL from the root CA.
Ensure the root CA virtual machine is running and copy the contents of C:\Windows\System32\certsrv\CertEnroll from the root CA to the same folder on the subordinate CA. This is the default location to which certificates and CRLs are published. Keeping the default locations will require the minimum amount of configuration for the CRL and AIA distribution points.
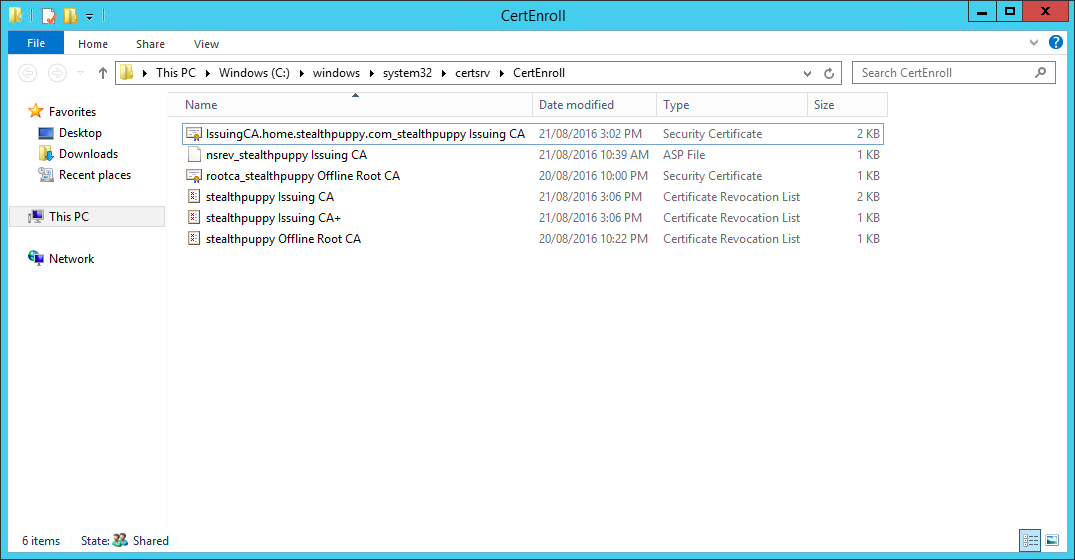
The result on the subordinate certificate authority will look something like this - note that the CRL for the root CA is located here:
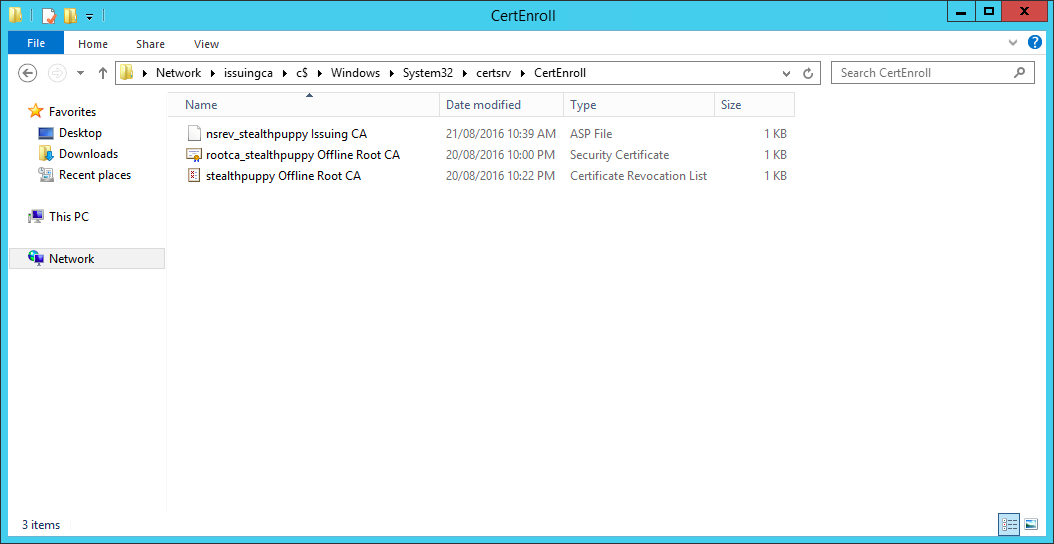
The CertEnroll folder after copying certificates and CRLs from the root CA
Now double check that the alias you’ve selected for your CRL host is resolvable. In my case, I’ve checked that I can ping crl.home.stealthpuppy.com.
Issuing the Subordinate CA Certificate
Next, we will request, approve the certificate request for the subordinate CA. At this point, the subordinate CA is un-configured because it does not yet have a valid CA certificate.
On the root CA, open the Certificate Authority console and submit a new certificate request:
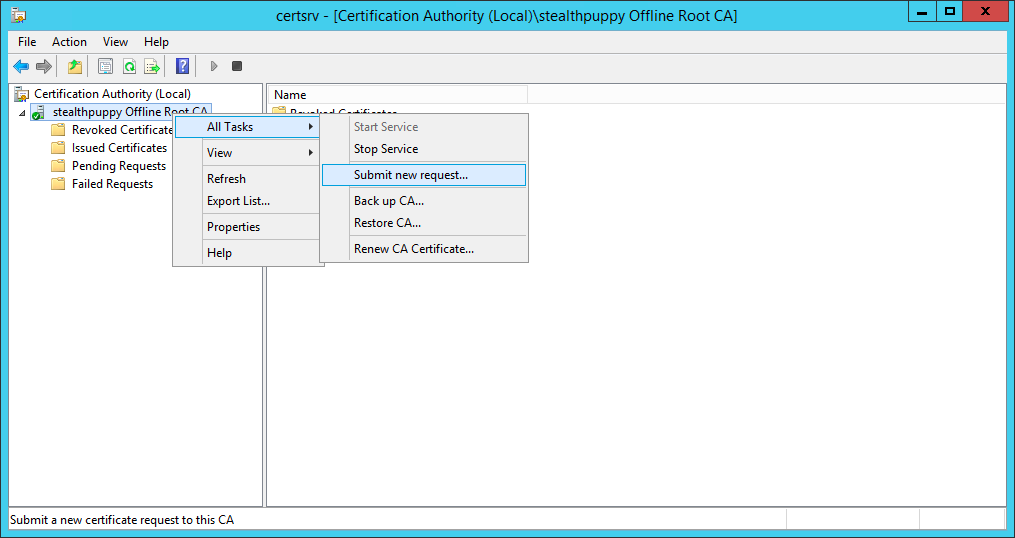
Submitting a new certificate request on the root CA
Browse to where the certificate request for the subordinate certificate authority is located and open the file. The certificate request will then be listed under Pending Requests on the root CA. Right-click the request, choose All Tasks and Issue.
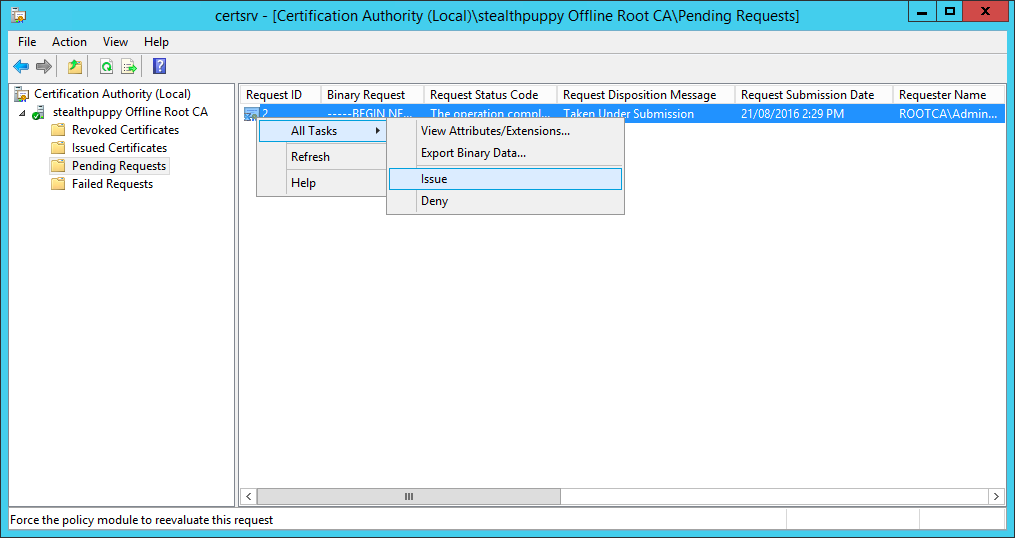
Issue the new certificate request from the subordinate CA
The subordinate CA’s certificate will now be issued and we can copy it to that CA. View the certificate under Issued Certificates. Right-click the certificate, click Open and choose Copy to File… from the Details tab on the certificate properties.
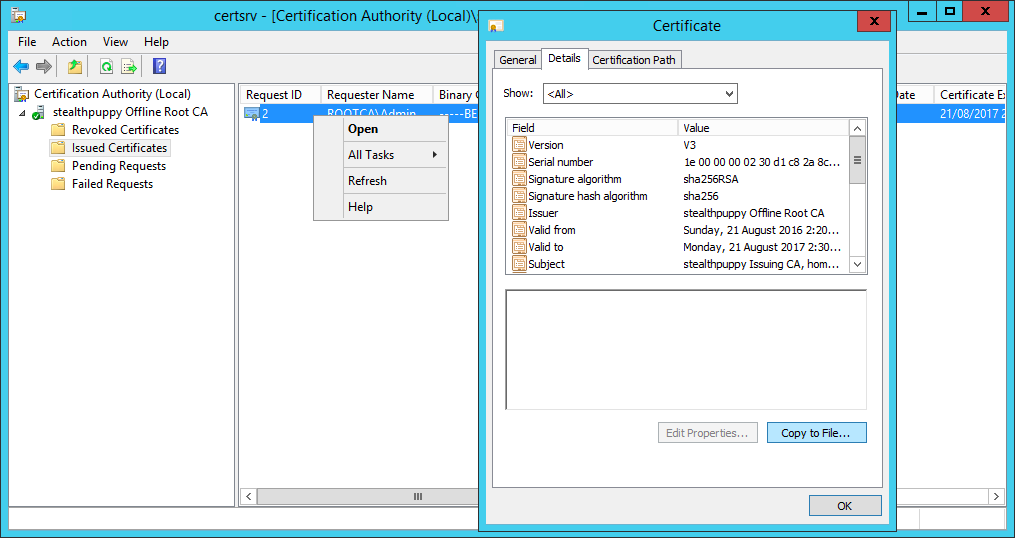
Open the properties of the issued certificate and copy to a file
Export the new certificate to a file in PKCS format. Copy the file back to the subordinate certificate authority, so that it can be imported and enable certificate services on that machine.
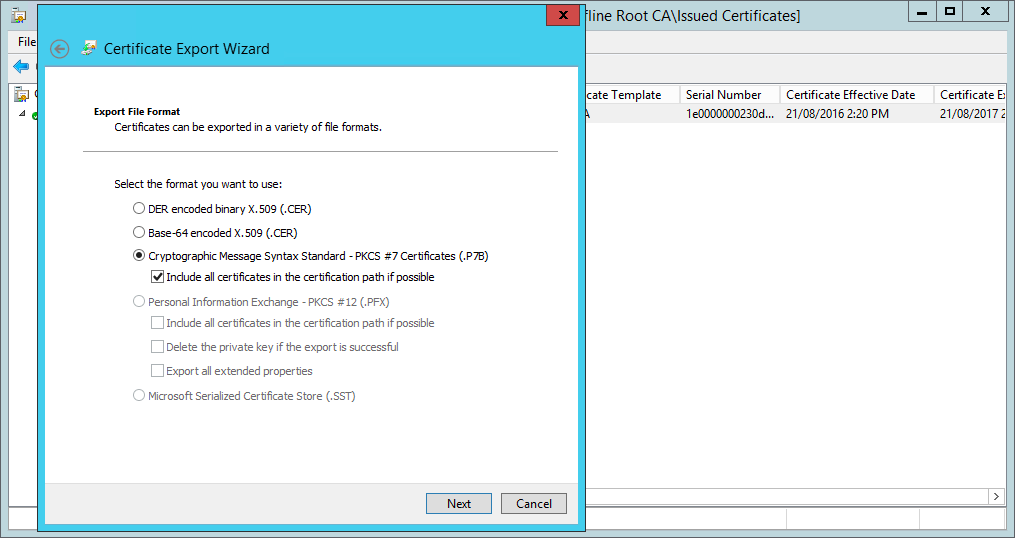
Copying the subordinate CA certificate to a PKCS format file
We have successfully issued and exported the subordinate CA’s certificate, so this CA should no longer be required. You can shut down and secure the root CA - either move the VM to a secure location or ensure it is stored in such a way that it can’t readily be started.
Configuring the Subordinate CA
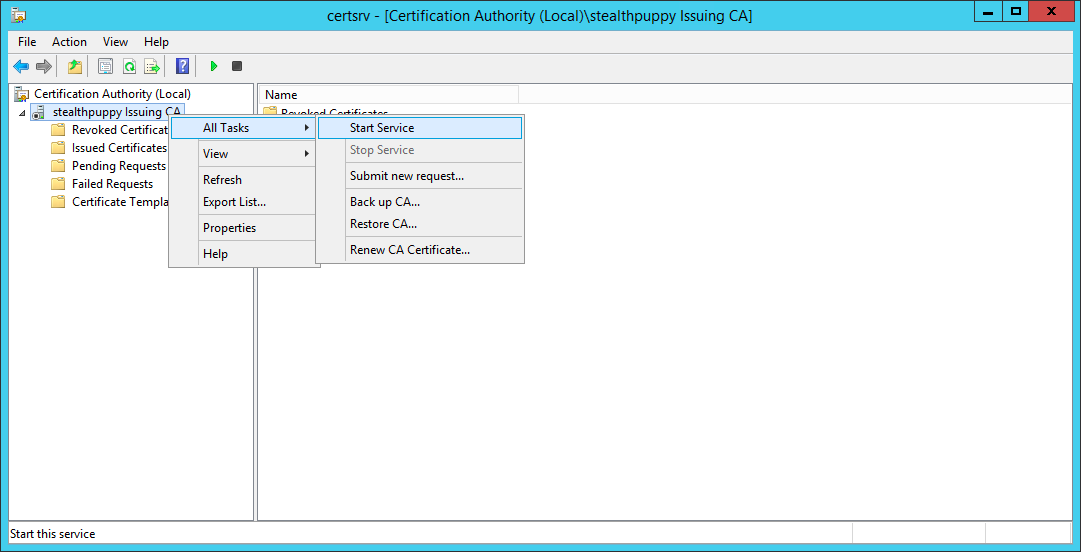
With the certificate file stored locally to the subordinate CA, open the Certificate Authority console - note that the certificate service is stopped. Right-click the CA, select All Tasks and choose Install CA Certificate…
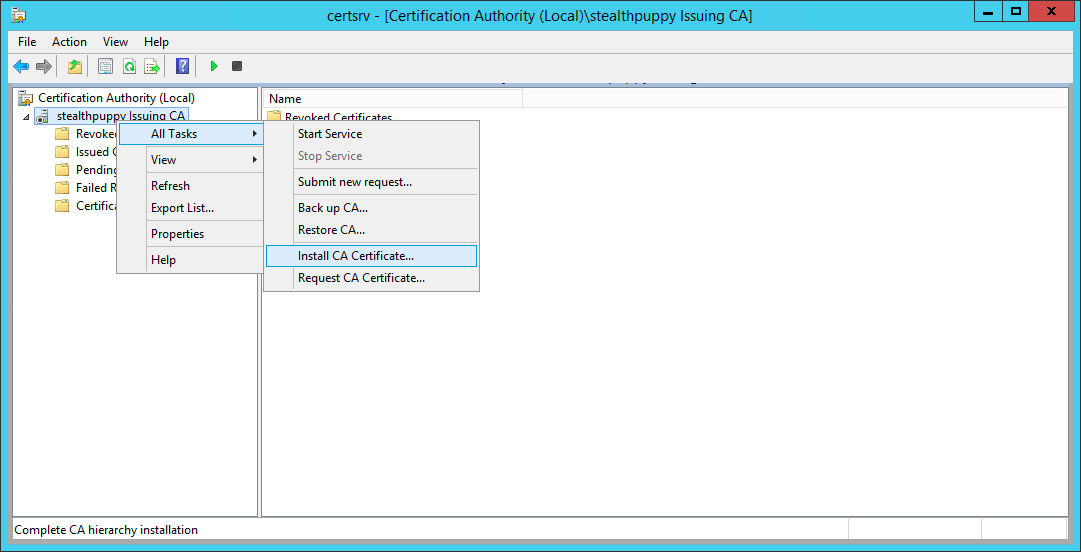
Install the subordinate CA certificate that we’ve just issued from the root CA
Browse to where the certificate file is stored:
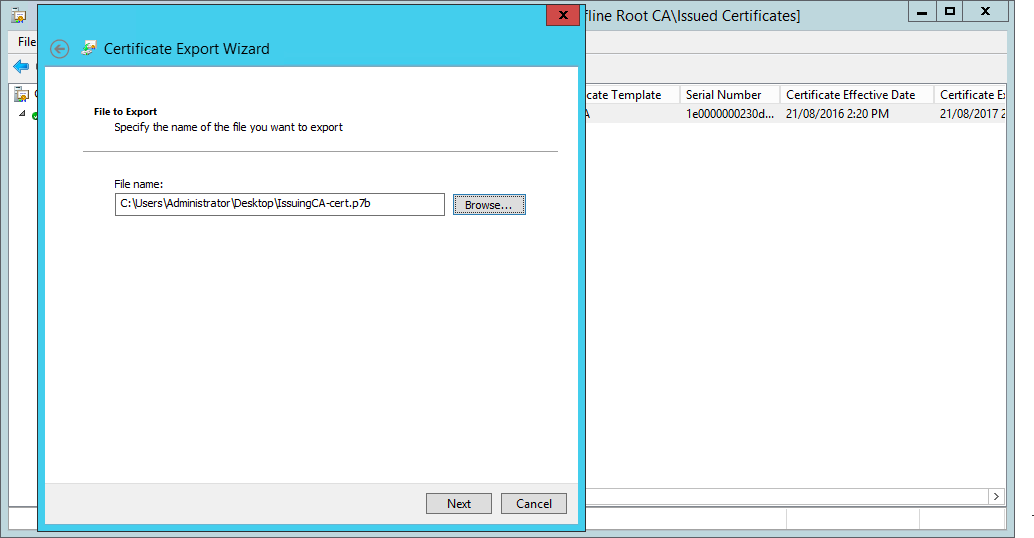
Browse to where the PKCS formatted certificate is stored
Move through the import wizard to import the certificate. If the CRL is online, the certificate should import successfully. If you receive error messages about the CRL, double check the alias created earlier in DNS can be resolved and IIS is online.
Once imported, you should now be able to start the certificate service.
With the certificate installed and the CRL online, start the certificate service on the subordinate CA
If the CRL is online correctly, the service should start without issues.
Just like the root CA, we should now open the properties of this certificate authority and configure the CRL and AIA distribution points. The difference with this subordinate certificate authority is that we will ensure that LDAP is left configured as this machine is a member of the domain.
Open the properties of the CA, choose the Extensions tab and ensure that the options for the existing HTTP entry are deselected. Now add a new CRL distribution point.
You can select the existing HTTP distribution point and press Ctrl-C to copy the existing location. For this CA we can leave the default <ServerDNSName> variable; however, to be consistent with the root CA, I’ve chosen to add the same crl alias:
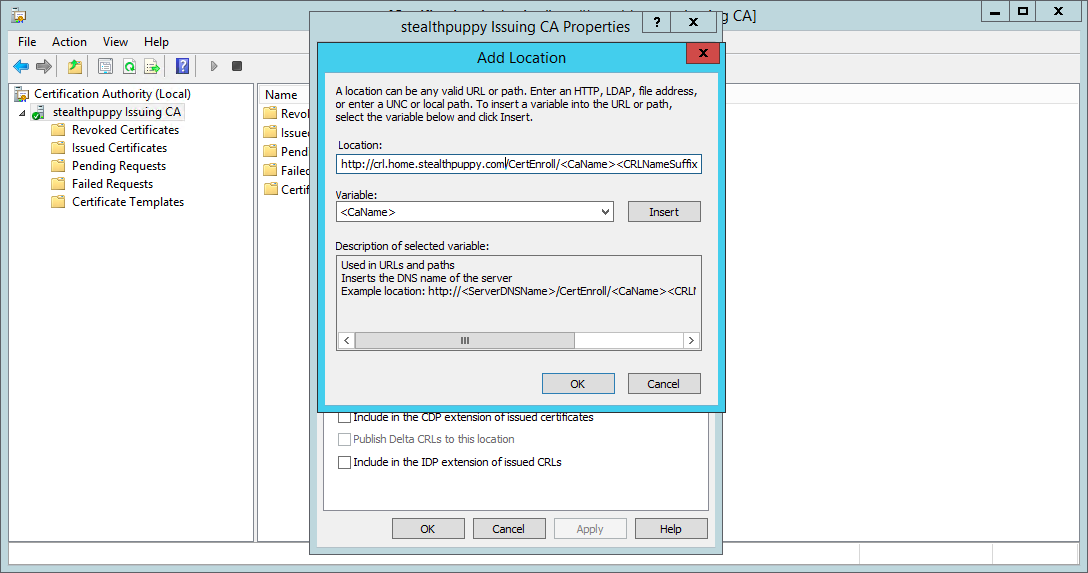
Adding a new HTTP CRL distribution point to the CA
http://crl.home.stealthpuppy.com/CertEnroll/<CaName><CRLNameSuffix><DeltaCRLAllowed>.crl
For this new DP, I’ve enabled ‘Include in CRLs’ and ‘Include in the CDP…‘ options (and disabled these for the existing http:// DP). Also check that the ldap:// distribution is enabled, which it should be by default.
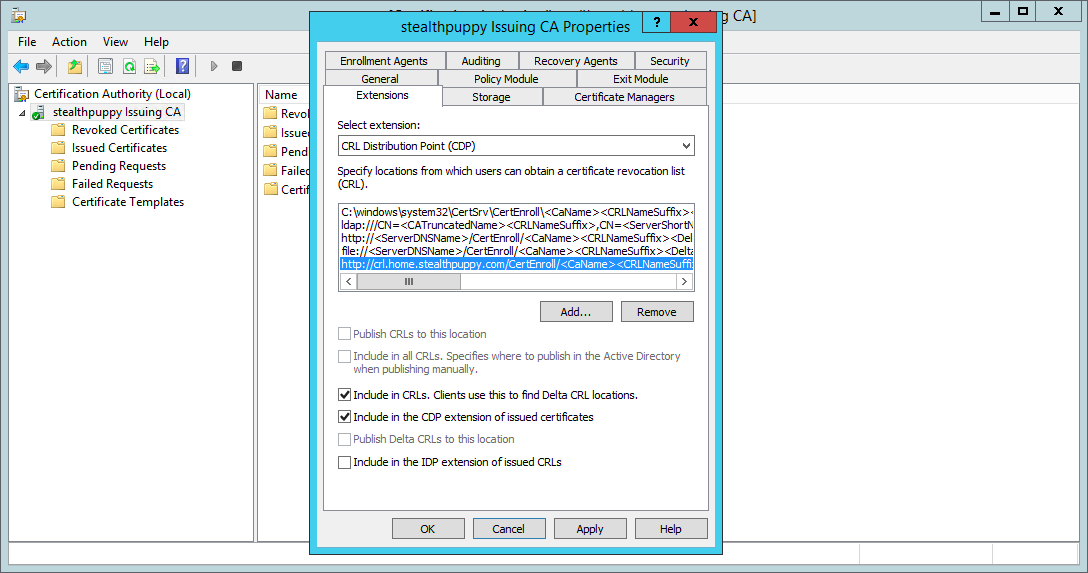
HTTP CRL distribution point properties
This configuration allows clients to check for the CRL from Active Directory or via an HTTP request - useful for clients that are not a member of AD (e.g. stand-alone machines or other devices such as non-Windows PCs.).
Repeat for the AIA extension:

Configuring an AIA extension on the subordinate CA
Once clicking OK, you will be prompted to restart the Active Directory Certificate Services for these changes to take effect.
After the service is restarted, publish the Certificate Revocation List - right-click Revoked Certificates and choose All Tasks / Publish. Publish a new CRL:
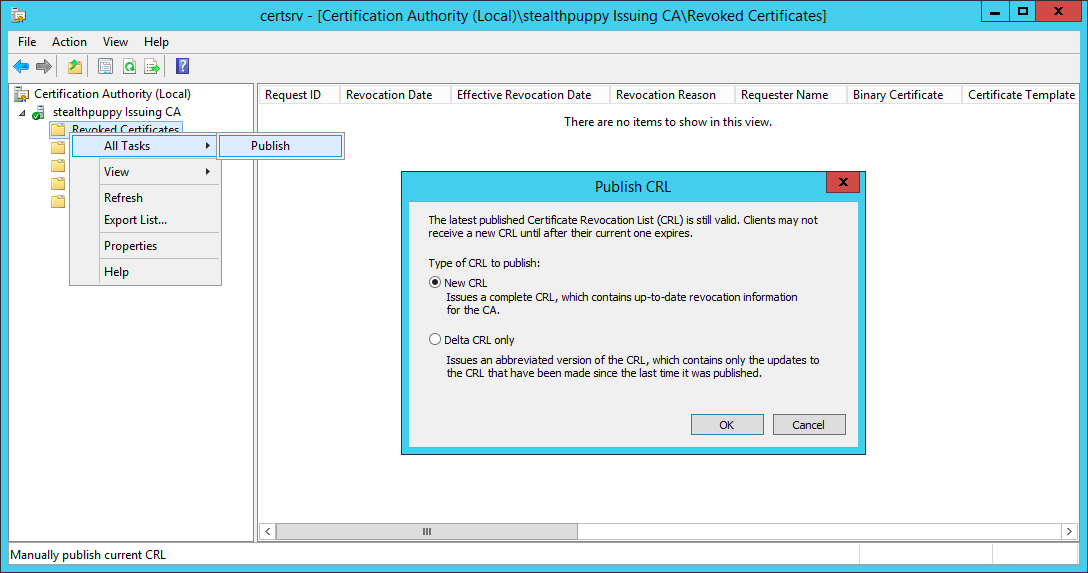
Publishing a new CRL on the subordinate CA
View the C:\Windows\System32\certsrv\CertEnroll folder to view the certificates and CRLs for both the root CA and the subordinate CA.
Viewing the populated CertEnroll folder on the subordinate CA
If the CRL of the root CA ever needs to be updated (e.g. if new subordinate CAs are provisioned), manually boot the root CA, publish the CRL and copy over to this location on the subordinate certificate authority.
Viewing the CA configuration in Active Directory
The certificate services configuration in Active Directory can be confirmed with the Enterprise PKI snap-in. Open a Microsoft Management Console instance (mmc.exe) and add the Enterprise PKI snap-in.
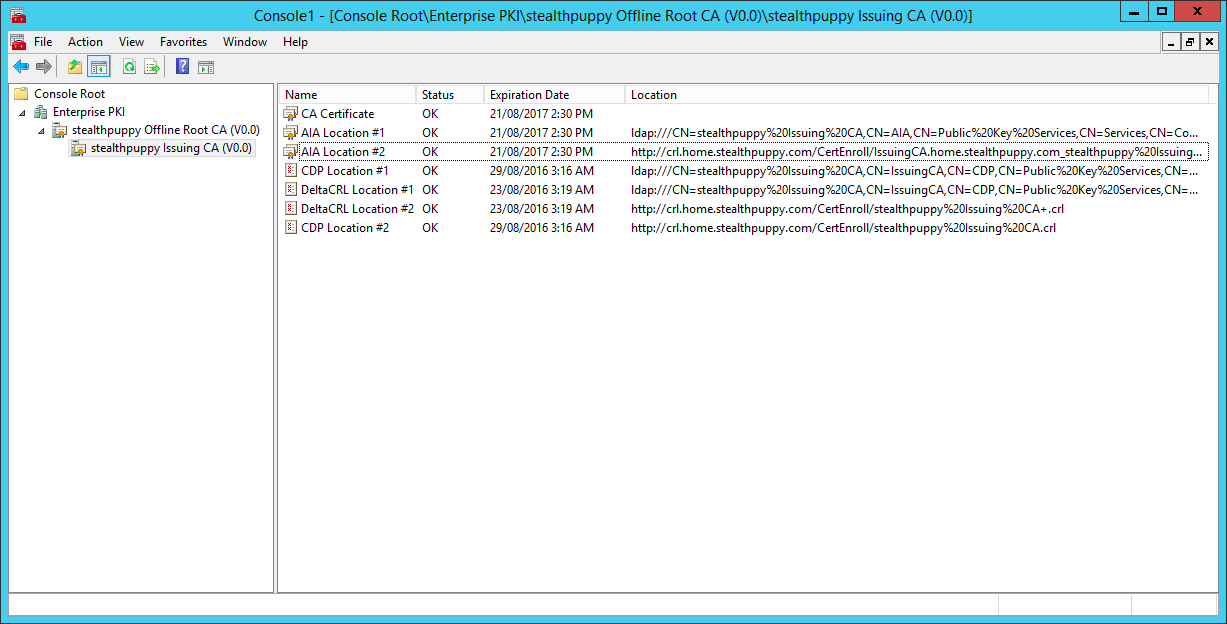
Viewing the Active Directory Certificate Services configuration with the Enterprise PKI snap-in
In my example, you can see the configuration in Active Directory and the act of configuring certificate services on the subordinate CA and issuing the CA certificate has imported the certificate chain into AD and I can see CRL and AIA distribution points listed.
Conclusion
Setting up Active Directory Certificate Services consists of quite a reasonable number of steps and doing so successfully requires paying attention to the details. If you ensure that you’ve configured an offline root CA, a subordinate certificate authority and correct locations for the certificate revocation list, installing and configuring certificate services should be easy.
For those readers who are consultants, I would generally be recommending close to a day to deploy and test certificate services correctly and that’s without looking at a design phase.
Hopefully, I’ve provided enough to qualify for the lazy admin’s guide to setting up AD Certificate Services.
