Default Start Menu Customisation via Intune
Improve the end-user experience on Windows Autopilot provisioned, and Microsoft Intune managed Windows PCs.
- Customise with PowerShell?
- Looking for Alternatives
- Packaging a Start menu Customisation
- Configure the Enrolment Status Page
- User Experience
- Wrapping Up
The promise of a modern management approach to deployment and management of Windows 10 is that you no longer create and manage a custom SOE image. User experience is still important though and a large part of that experience in an enterprise environment, is the default Start menu.
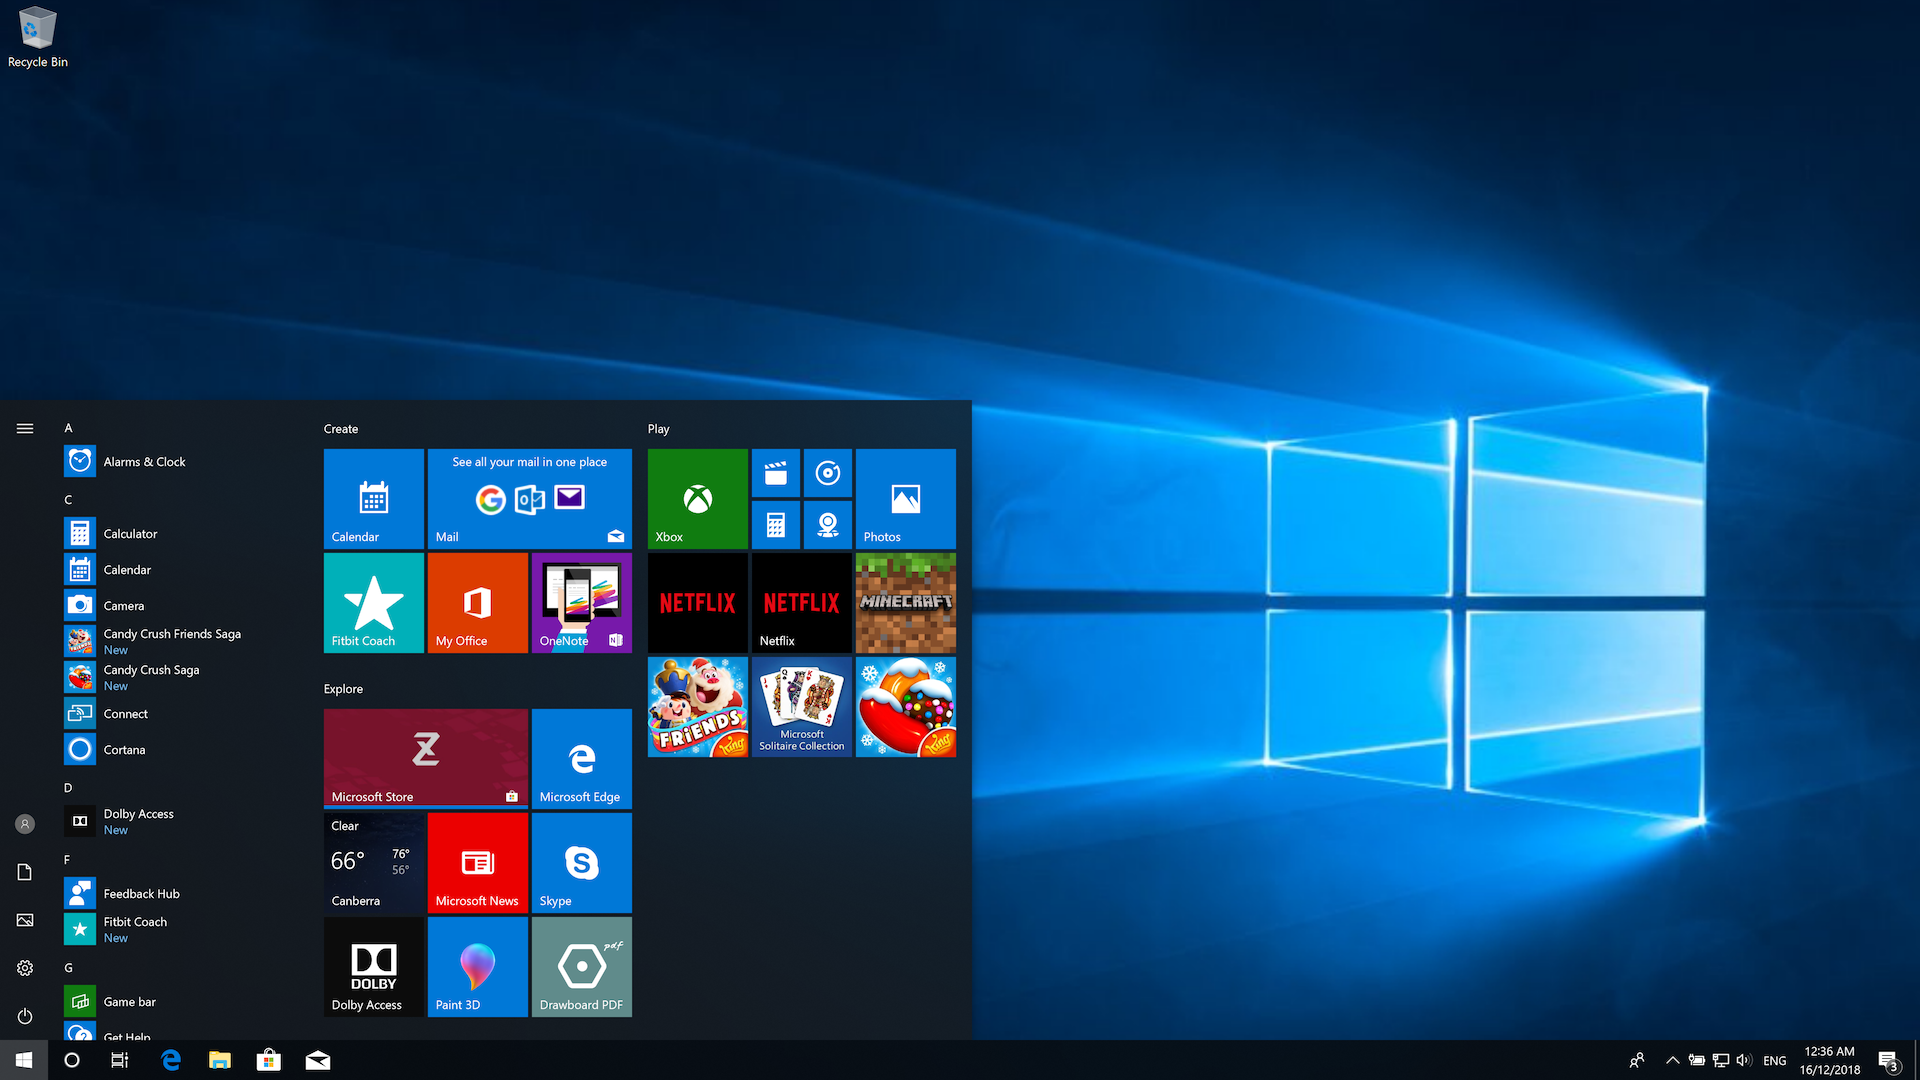
The default Start menu, especially on Windows 10 Pro, is far from enterprise ready right? Take a look at this mess:
Windows 10 Pro 1809 default Start menu
Over-the-air provisioning of PCs via Windows AutoPilot & Azure AD, Microsoft Intune (or insert your MDM solution here), limits the possibilities of customising the target PC before the user logs on. The administrator can define a Start menu, but that’s a policy, not a preference. One size does not fit all, and users should be able to customise the Start menu to suit their style.
UWP / Microsoft Store apps can be targeted for removal, but those apps won’t be removed until well after login. Compounding the issue of default apps pinned to the Start menu is that some of them aren’t actually installed, so removal won’t occur until the Store downloads and installs updates. That can be hours after the user has provisioned the PC.
Customise with PowerShell?
PowerShell scripts can be used to remove user and system provisioned Store apps (I have a couple of scripts in my Intune GitHub repository); however, PowerShell scripts in Intune can only be targeted to users and don’t fire until after the first logon. Additionally, I’ve had a crack at using PowerShell to pin and unpin tiles from the Start menu, but found that I can’t interact with the shell (or at least the pin / unpin has no effect) when the script is delivered via Intune.
Looking for Alternatives
With the availability of the Windows Autopilot Enrolment Status page in Windows 10 1803 and above, plus the recent addition of the feature to ‘Block device use until these required apps are installed’, we might have an opportunity to deploy a customised default Start menu.
The Enrolment Status page tracks security policies and line-of-business (MSI) applications, so a custom default Start menu will have to be packaged into an MSI. Fingers and toes crossed then that this approach works.
Packaging a Start menu Customisation
To package a customised Start menu, we need to create the desired layout and export it with theExport-StartLayout command. It’s likely you’re familiar with this approach. To export the Start menu layout, I’ve used the following command - note the use of the UseDesktopApplicationID switch which will make pinning desktop application shortcuts as tiles successful.
Export-StartLayout -Path .\LayoutModification.xml -UseDesktopApplicationID
The next step is to create a custom Windows Installer package to deliver the layout file. I’m using Advanced Installer to create my deployment package. For this particular project, the Freeware version of Advanced Installer provides all of the features you’ll need to deploy the custom layout file.
Create a Windows Installer Package
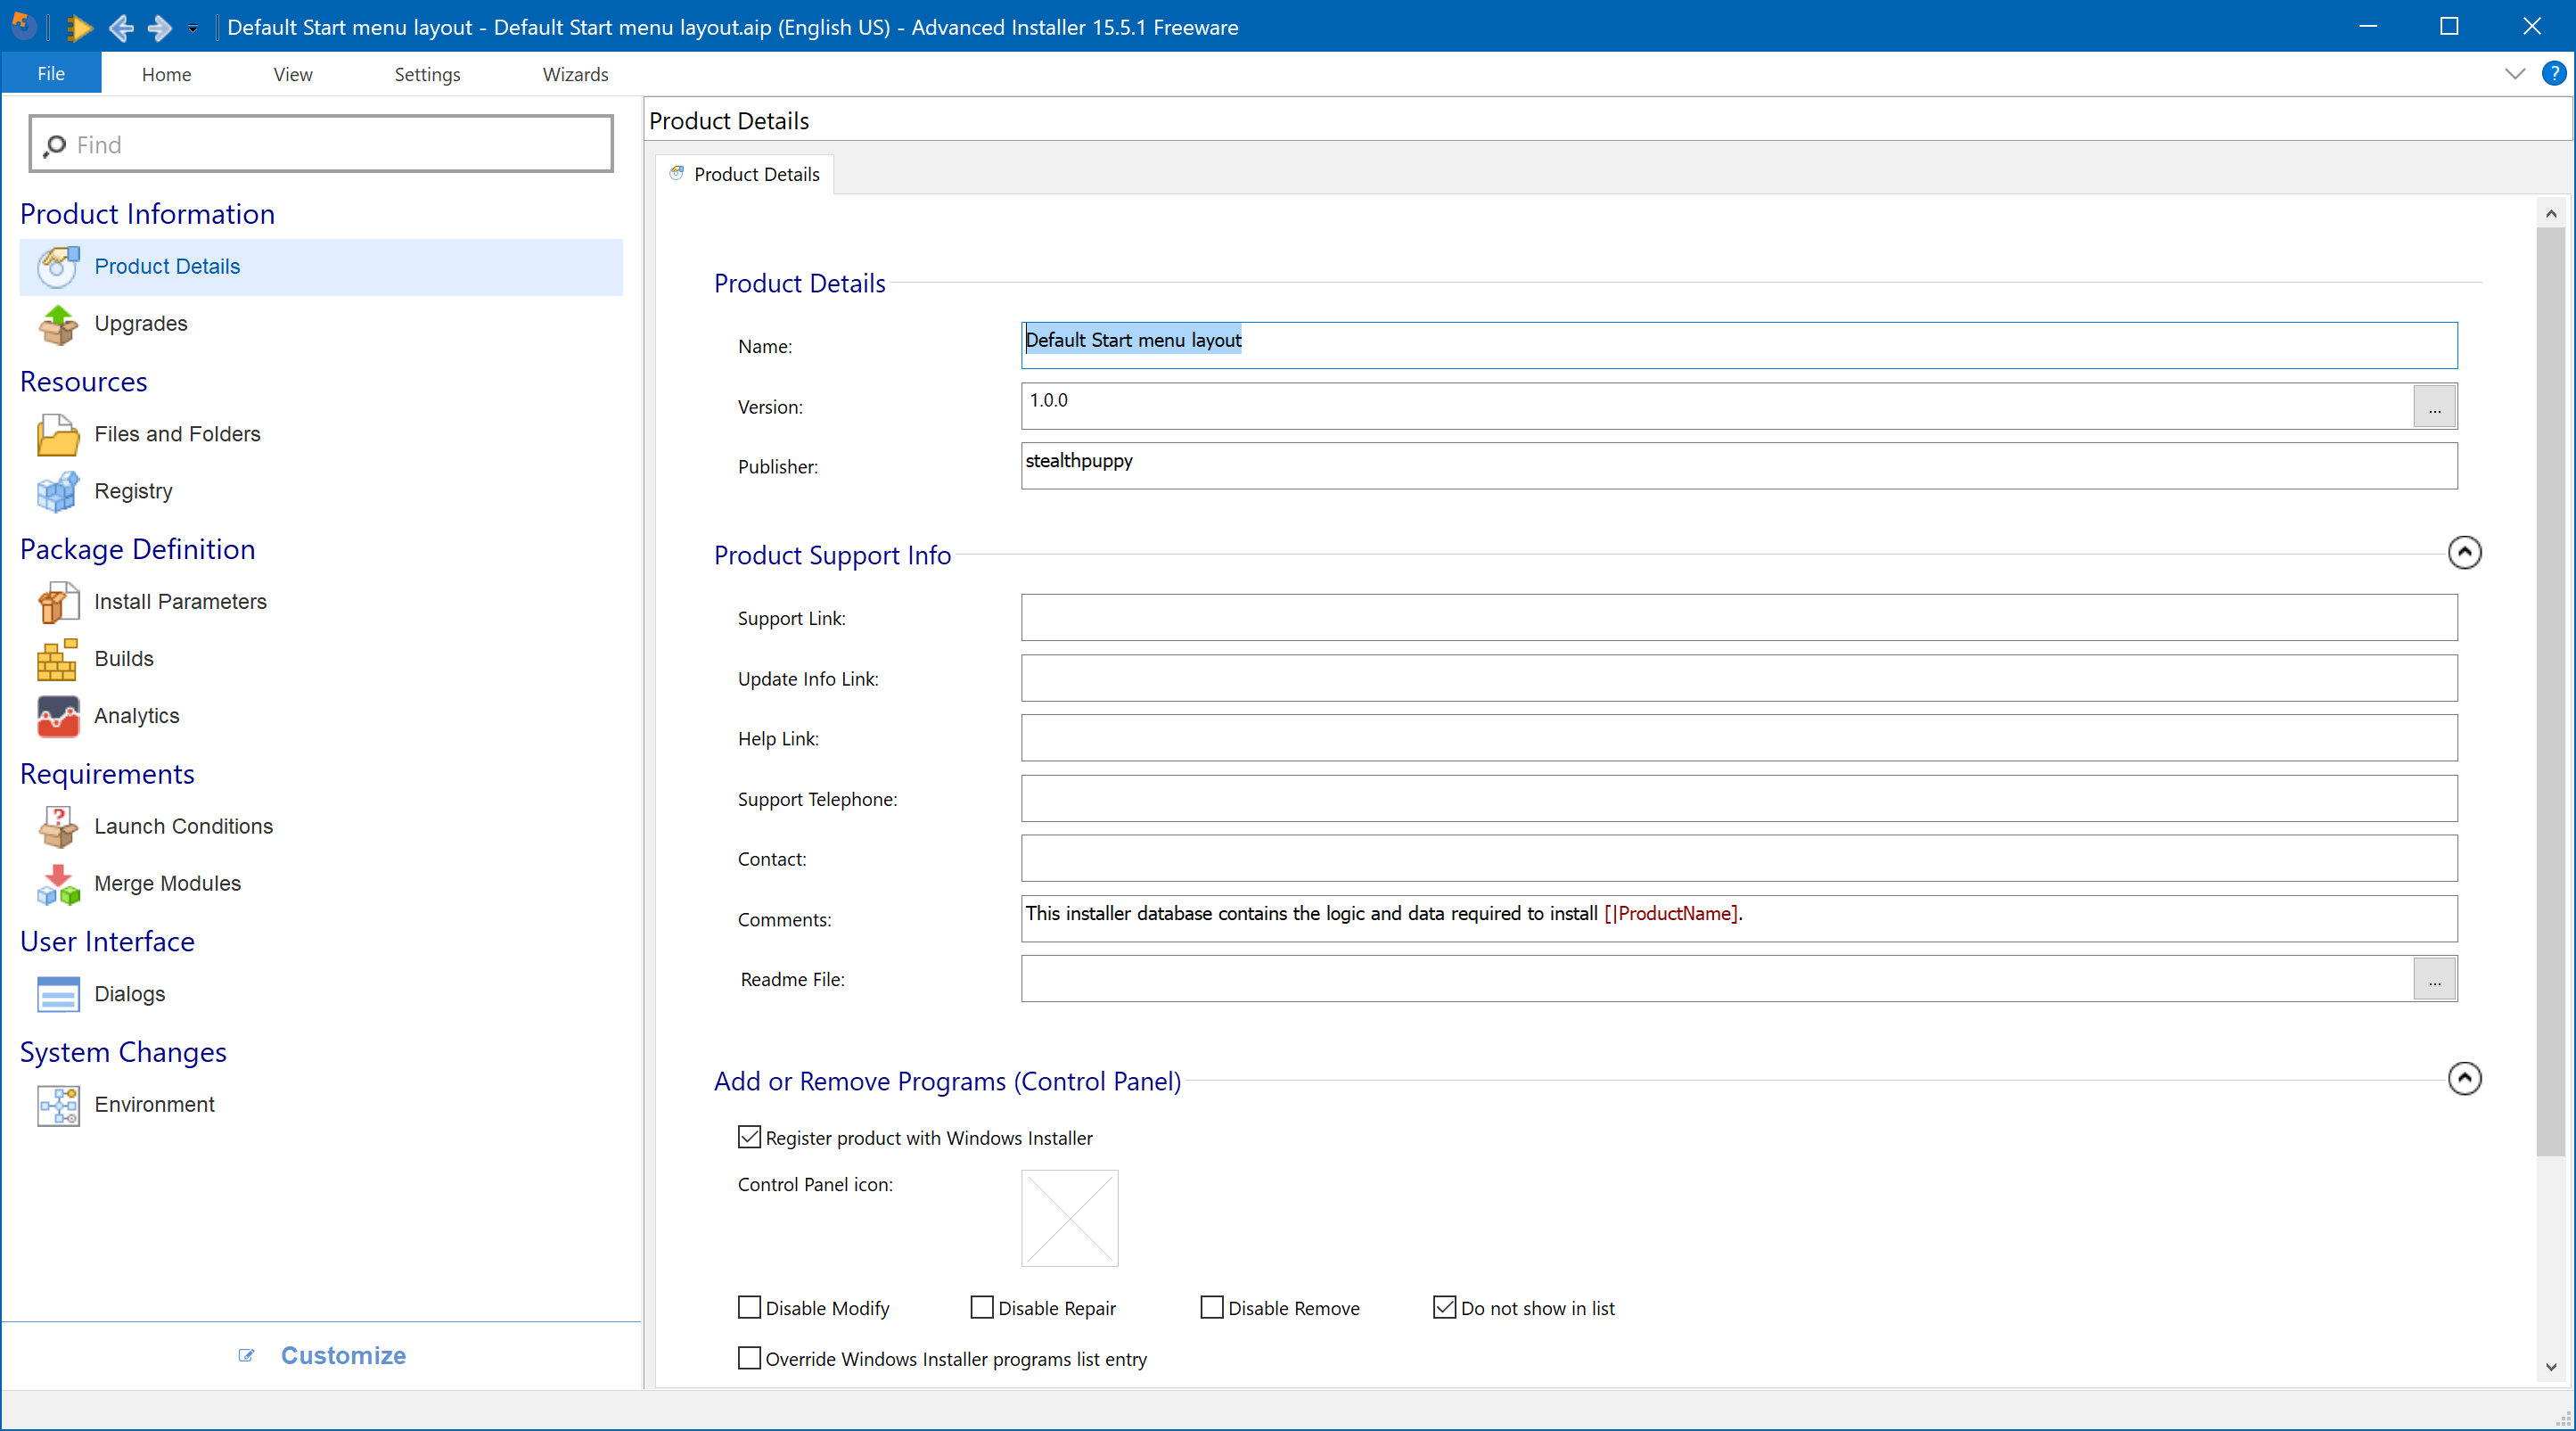
Advanced Installer makes short work of creating the package - create a new Simple Installer package and configure the product name, version and publisher. Note that if you want to update the package, save your project and update the version number each time you produce an updated installer.
Add the Start menu layout file to the project under Files and Folders. The project must define the correct target path and file name because it will be deployed into the default profile. Use this path:
Windows Volume\Users\Default\AppData\Local\Microsoft\Windows\Shell
And add the LayoutModification.xml file that you’ve exported with Export-StartLayout into this path. If your target path and file name aren’t correct, this won’t work so ensure your package looks the same as the screenshots here.

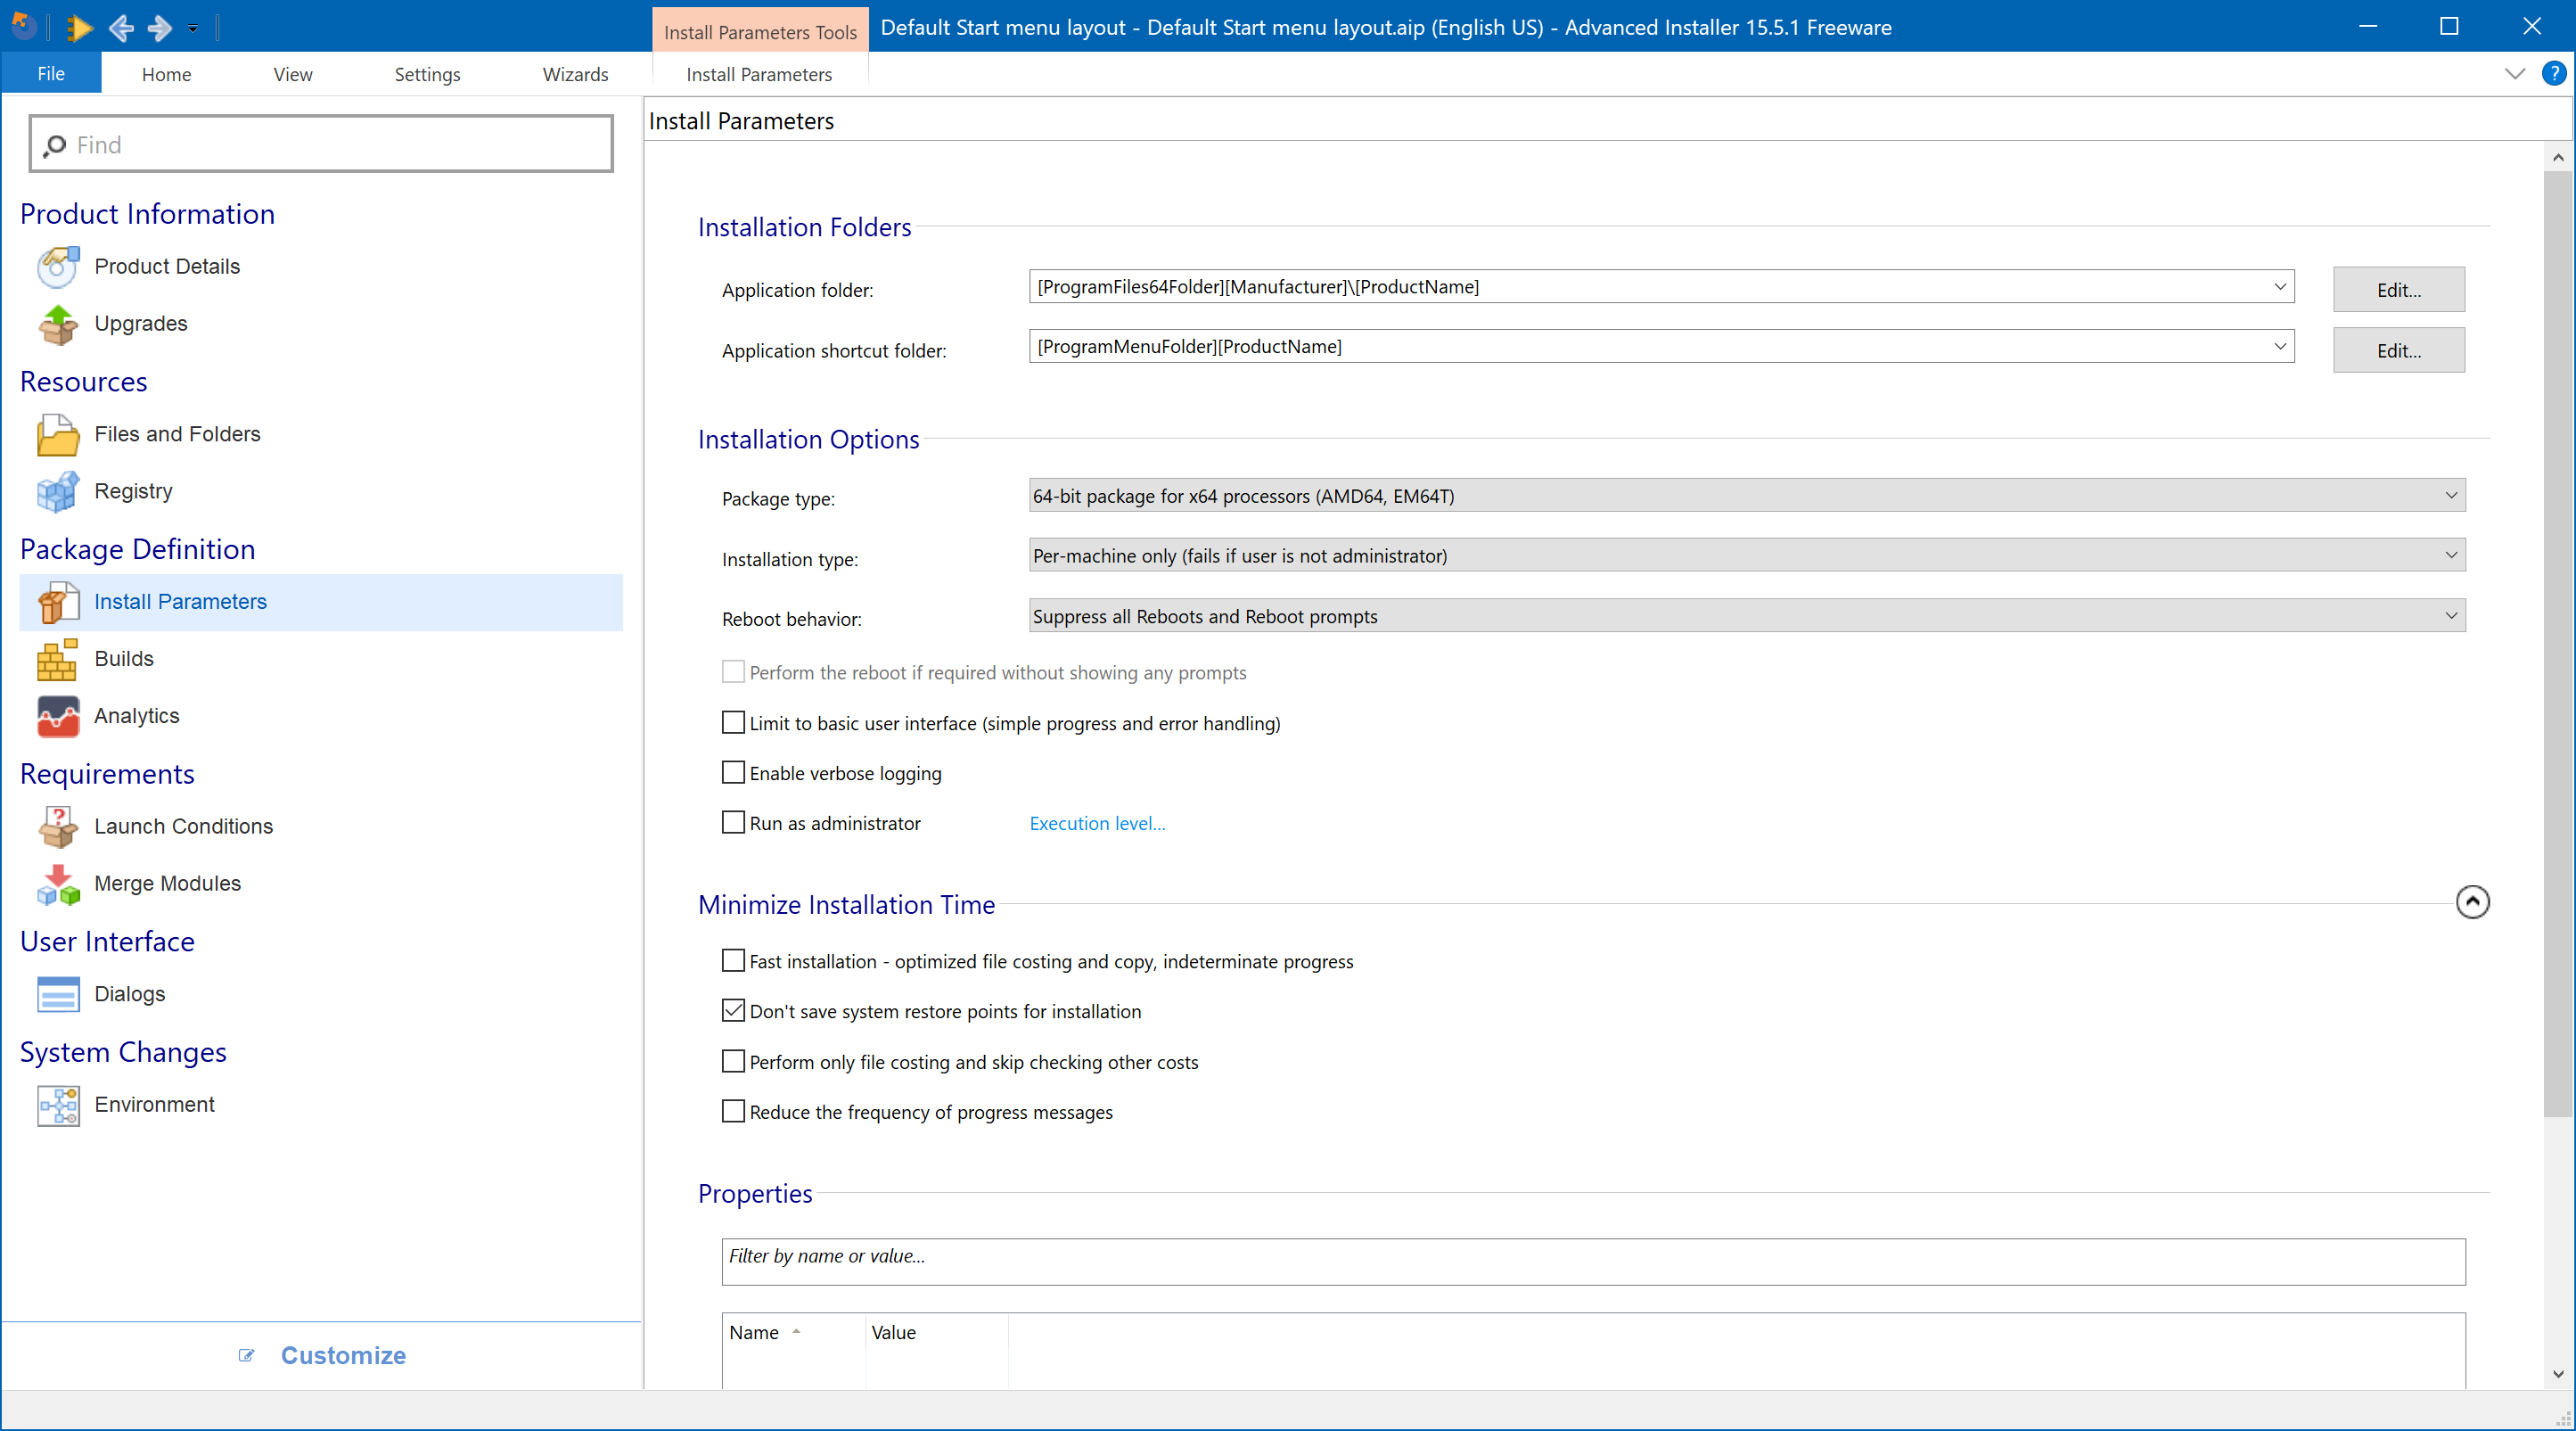
For this package, I’ve configured the following install parameters:
- Package type - 64-bit package
- Installation type - Per-machine only
- Reboot behaviour - Suppress all reboots and Reboot prompts
Configure the default build to produce a Single MSI file and define the name. In the example below, I’ve used DefaultStartMenuLayout.msi.
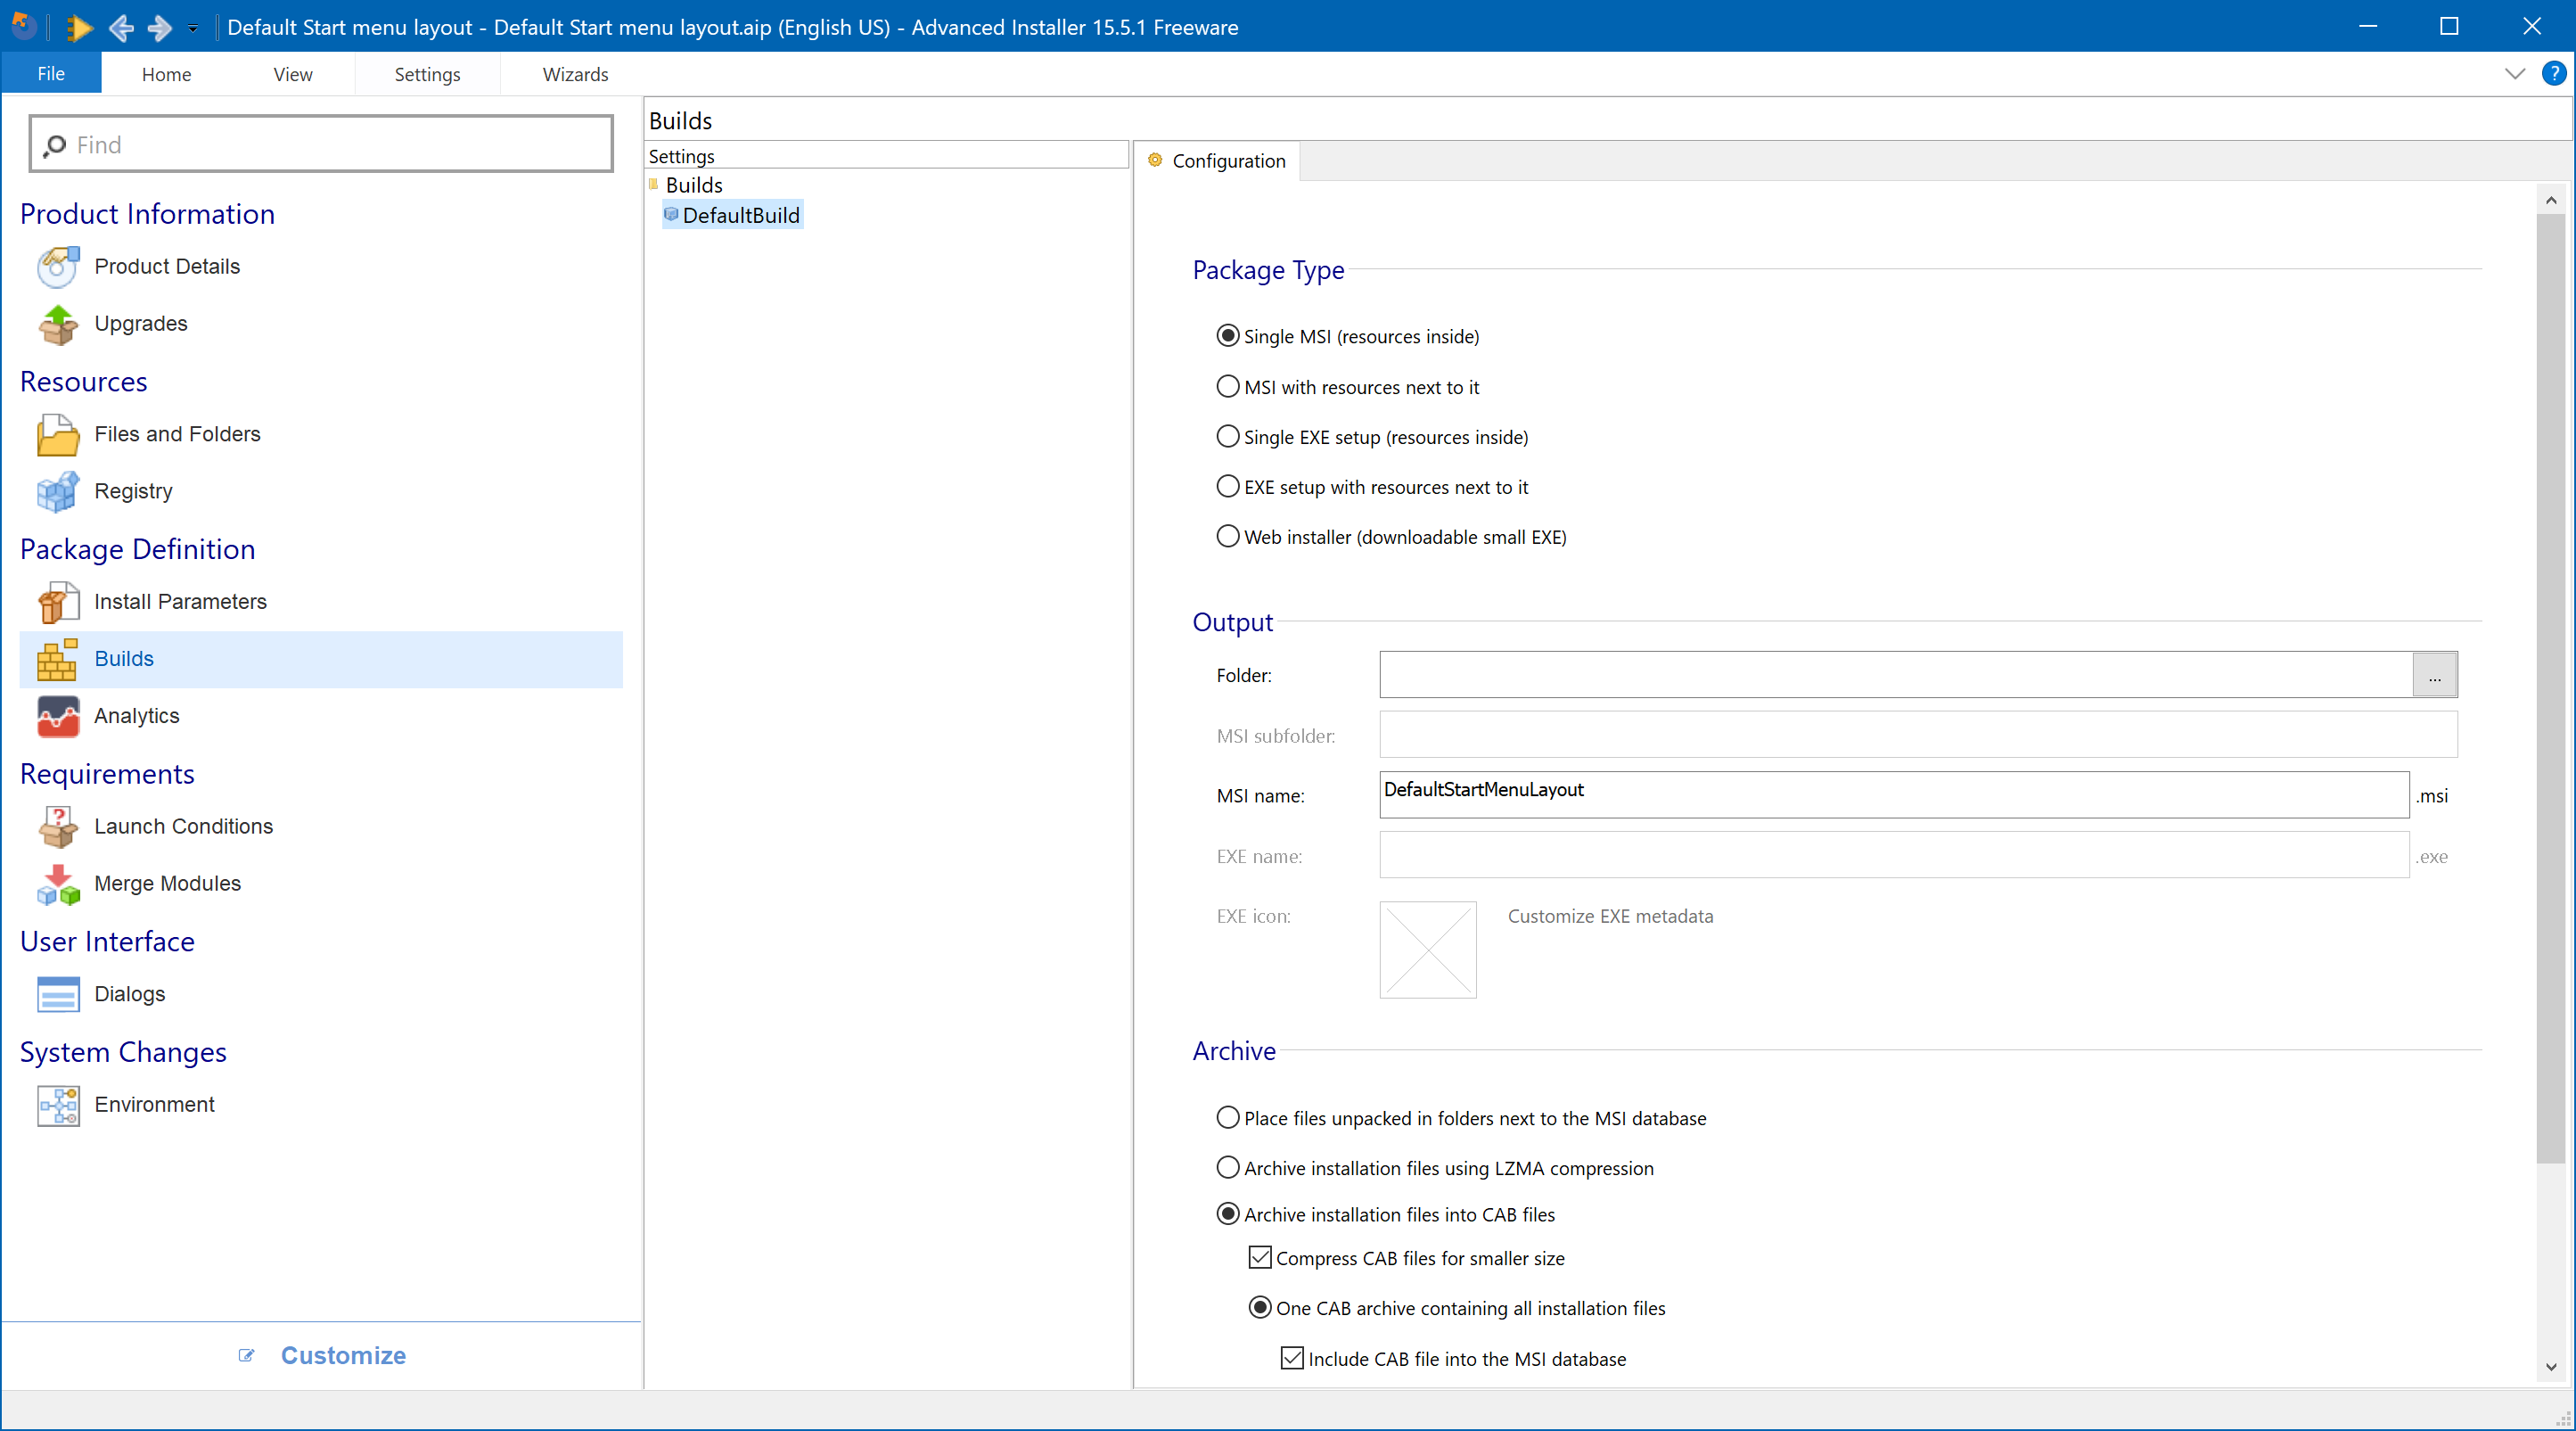
Build your package and add the MSI into Microsoft Intune as a line-of-business application. Assign the new application as Required for All Devices, so that the Enrolment Status Page can track the installation before the user logs on.
Configure the Enrolment Status Page
To ensure that the package is delivered to the target PCs before the user logs on, we’ll leverage the Enrolment Status Page (ESP). The ESP is supported on Windows 10 1803 and above, so if you’ve gotten this far into the article and haven’t yet updated to 1803 or higher, you should stop reading and update those machines.
Configure the ESP and enable the ‘Block device use until these required apps are installed if they are assigned to the user/device’ feature. Here select at least the applications whose shortcuts you have configured in your Start layout customisation. This list must include the MSI package containing the customisation itself.
Here’s the applications that I’ve configured in my test environment:
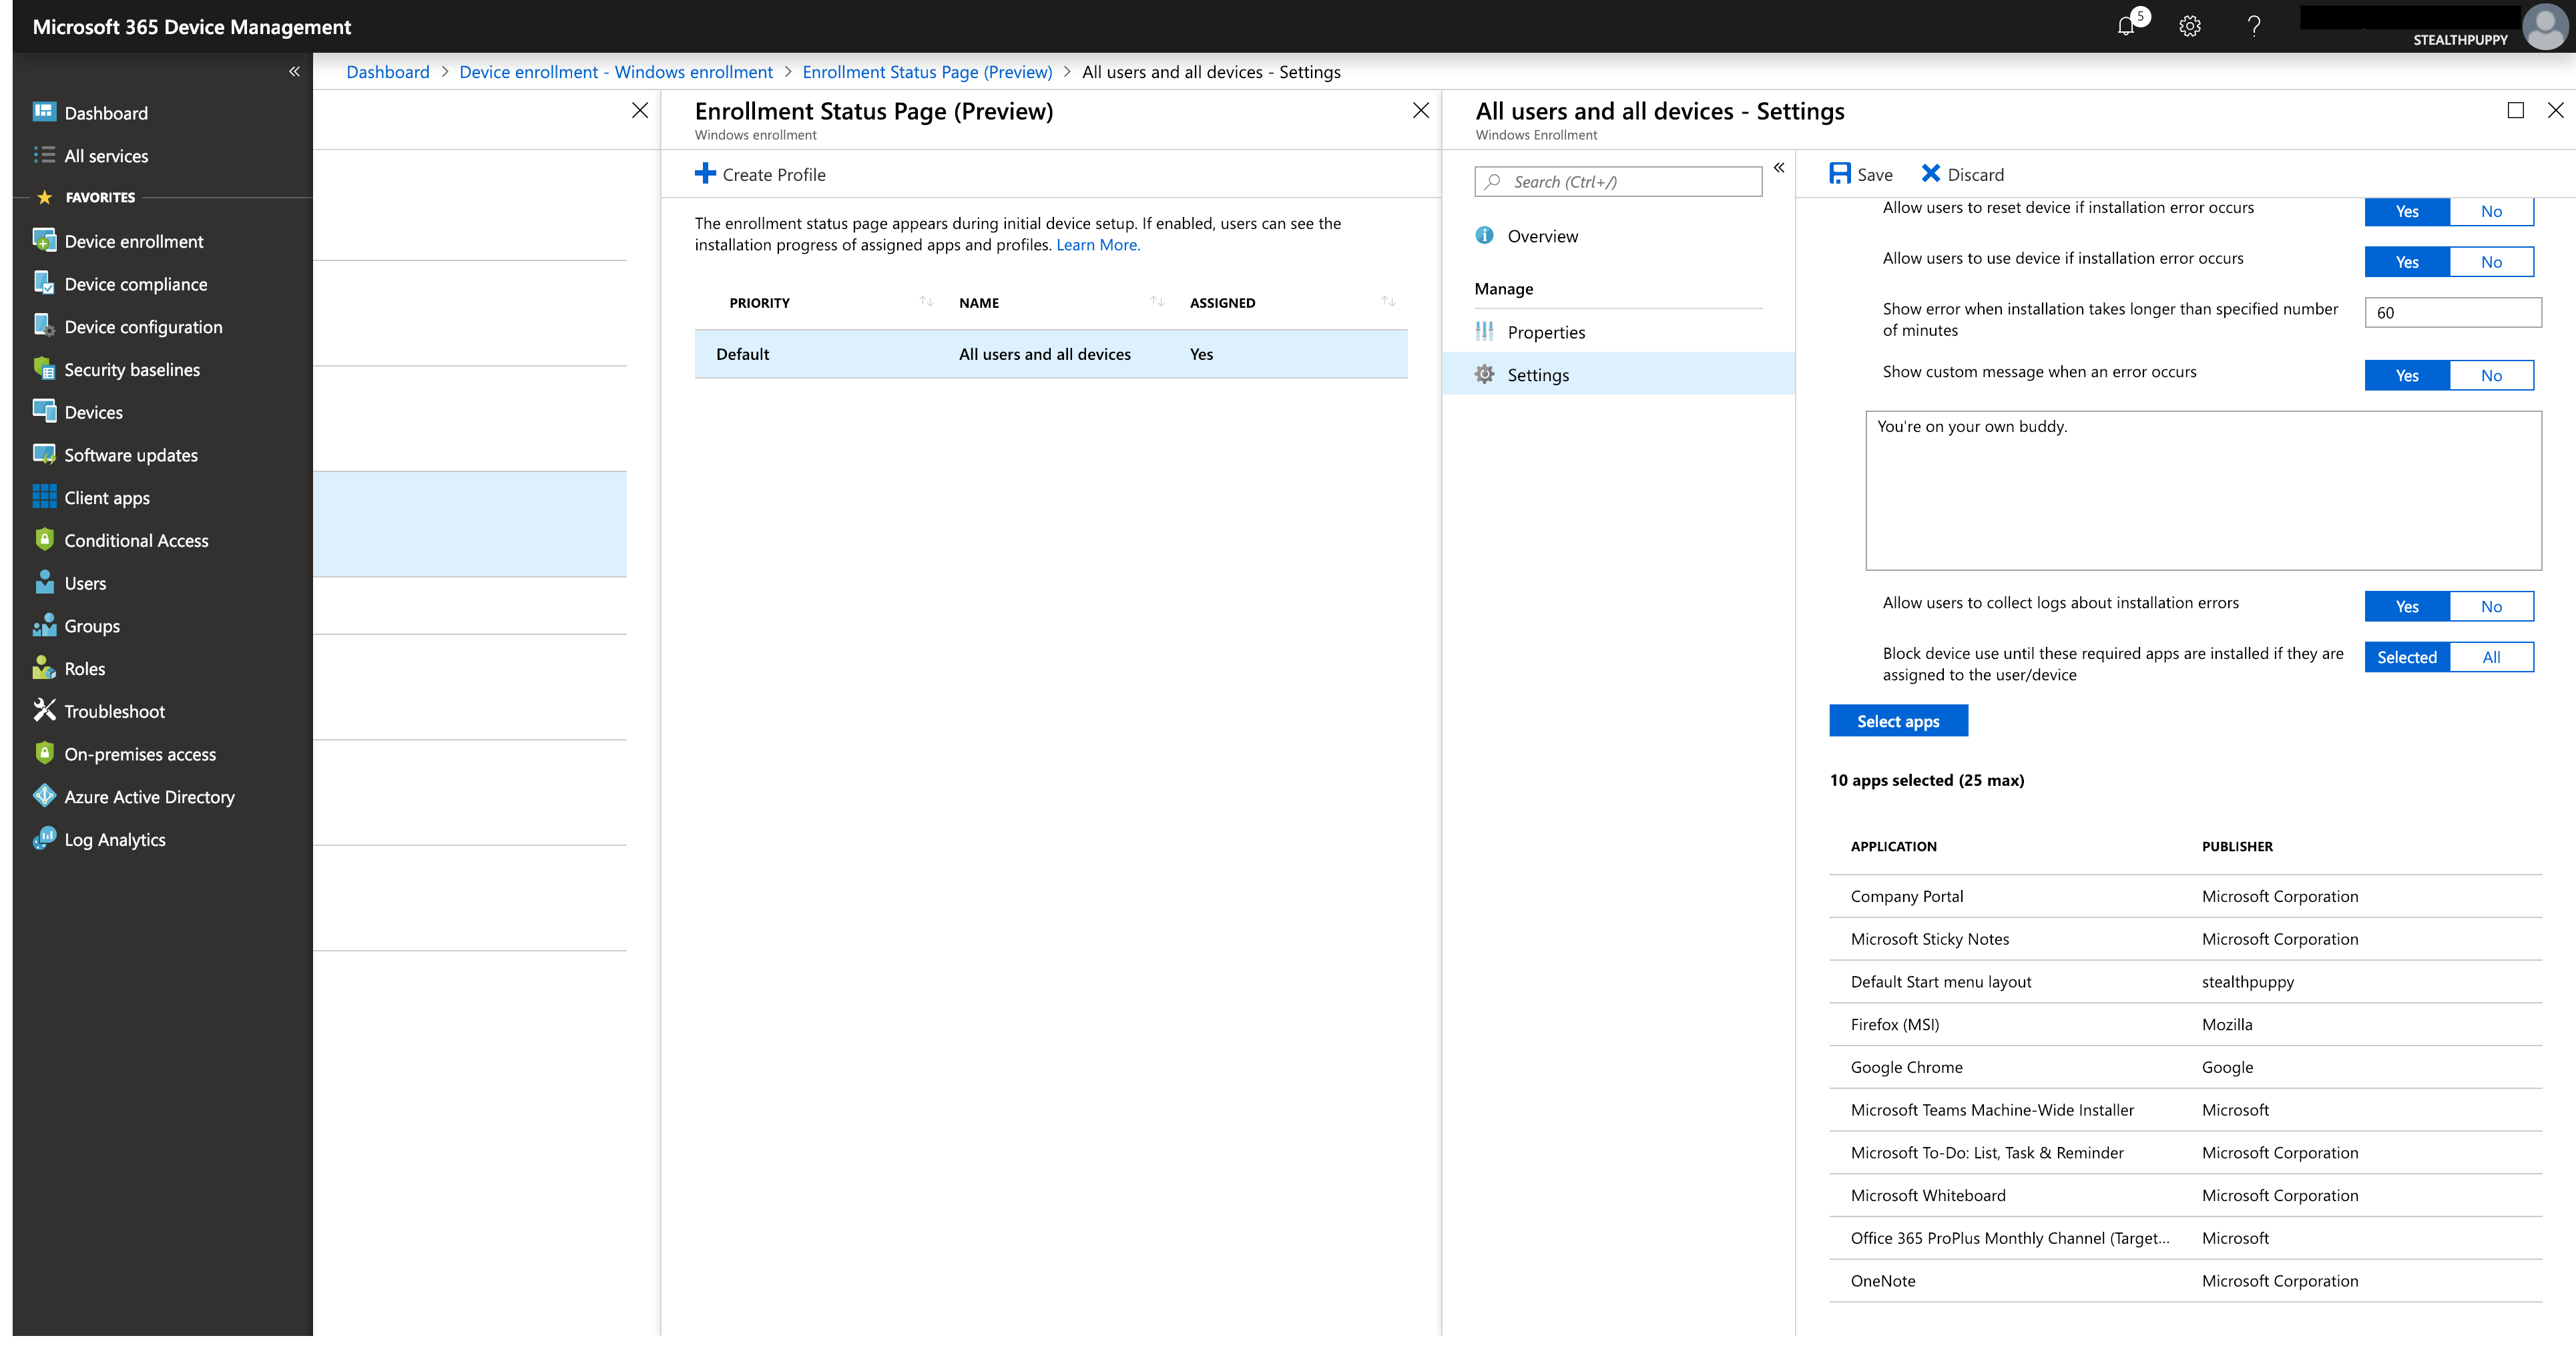
Today the ESP tracks specific application deployments - Microsoft Store apps and single MSI files, while Office 365 ProPlus applications are tracked on Windows 10 1809 and above.
User Experience
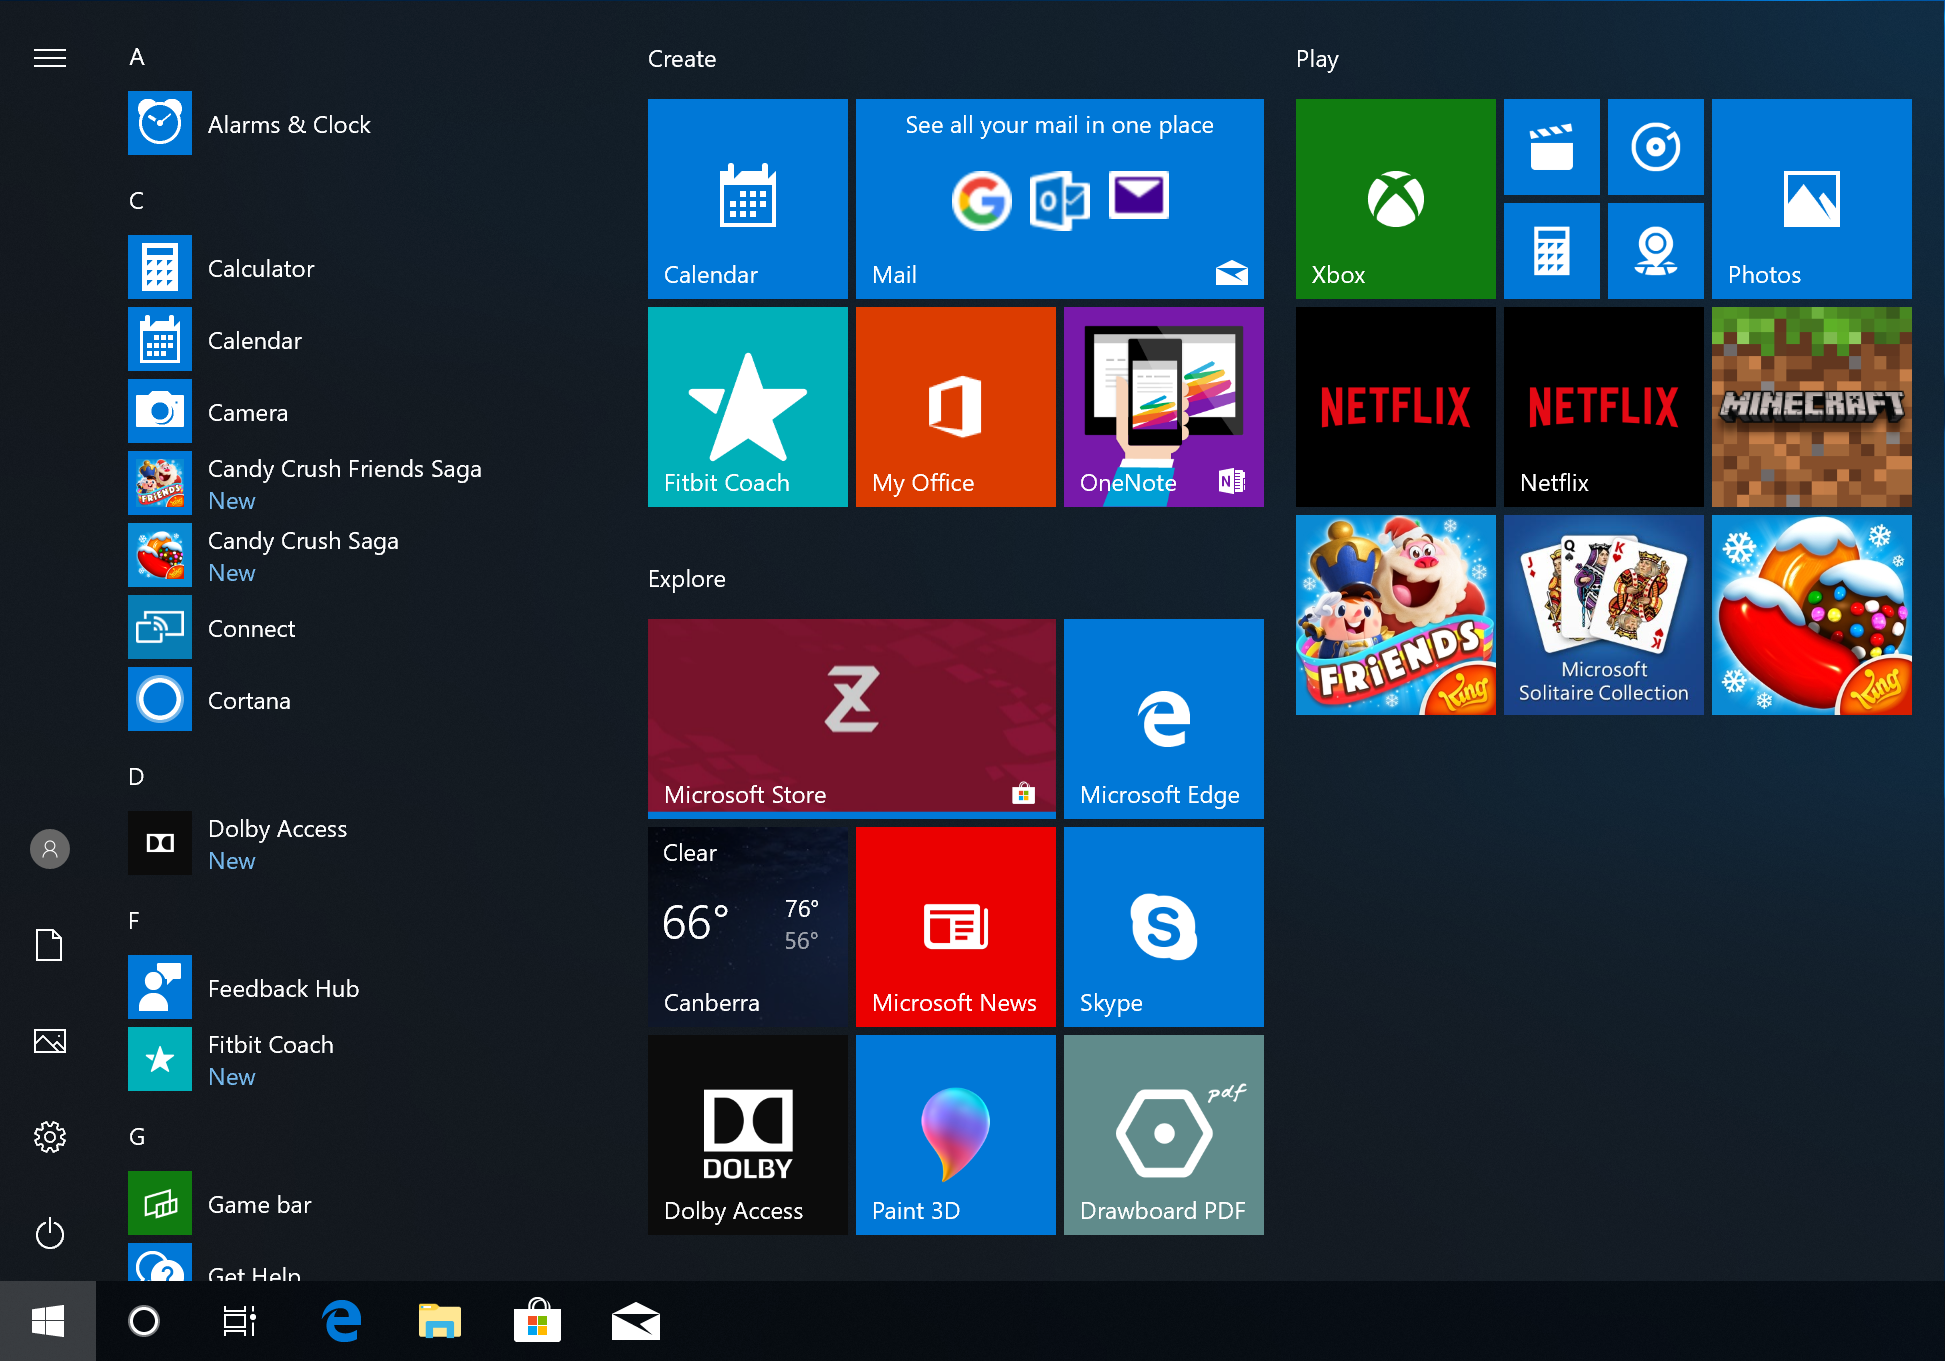
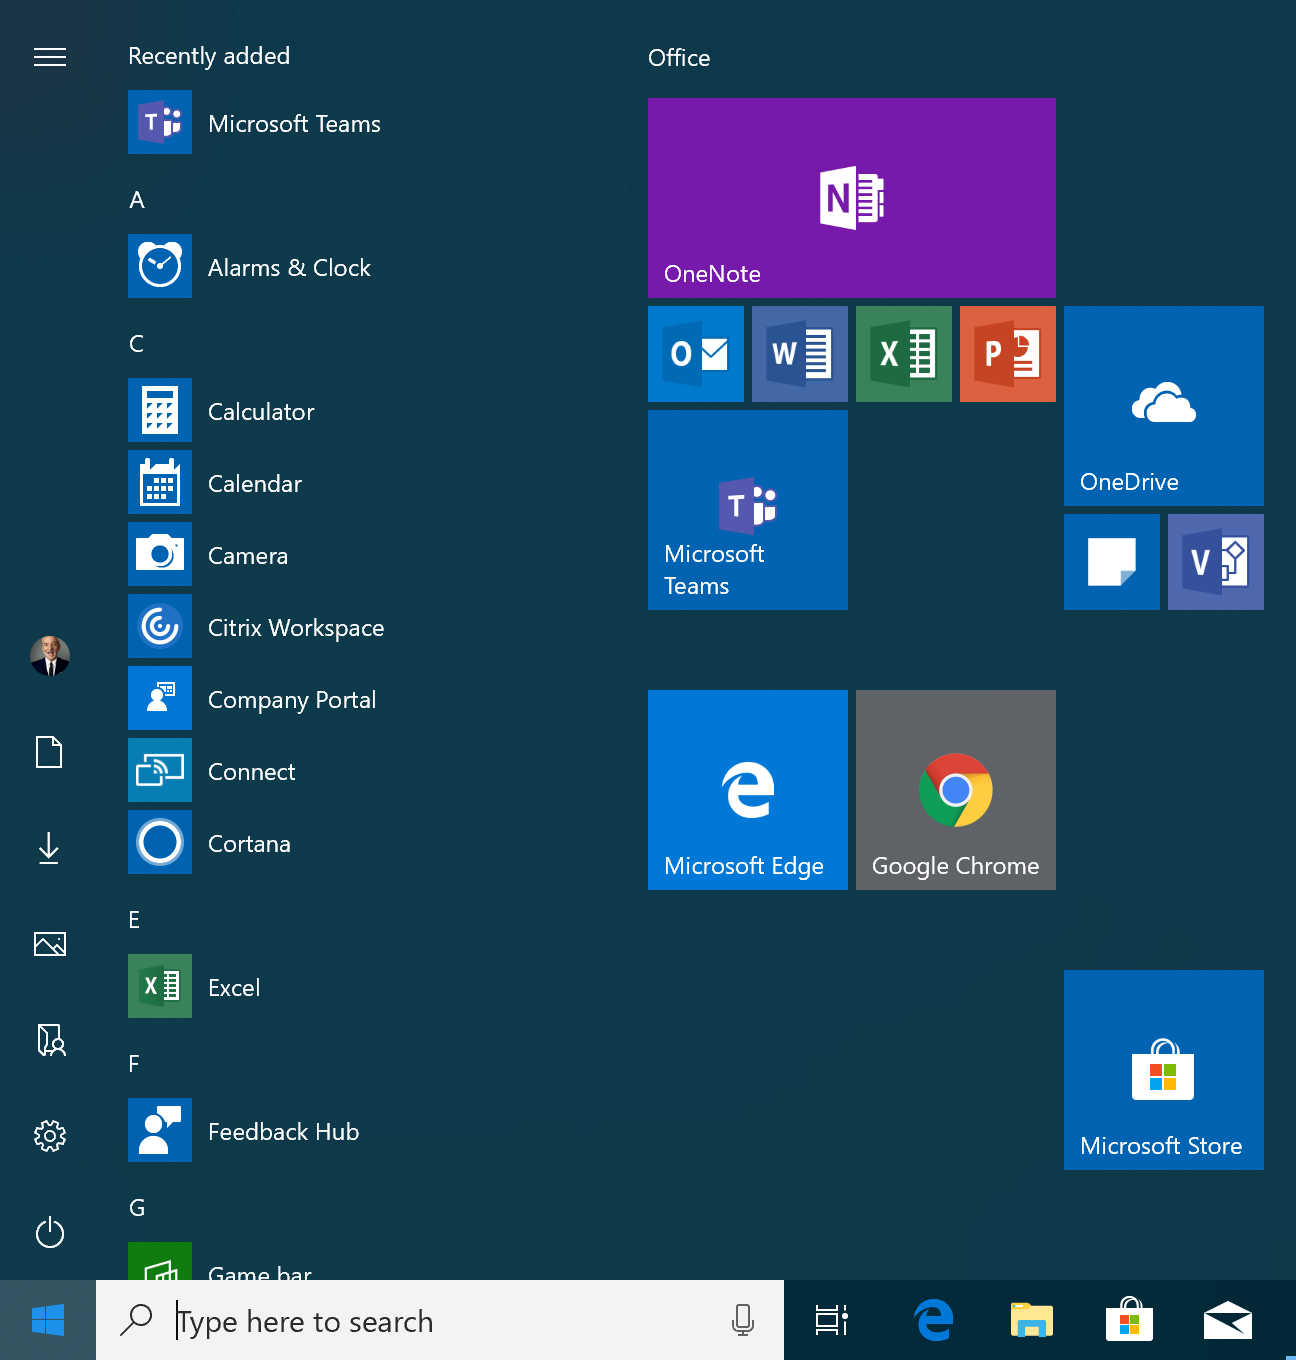
Most of my testing is on Windows 10 1809 - with a PC enrolled into Azure AD and Microsoft Intune during the out of box experience, the Enrolment Status Page tracks the installation of policies and applications, including our Start menu customisation.
After the enrollment and deployment is complete, the user sees a customised Start menu after first logon. There’s a few tiles that didn’t remain pinned from the default customisation, but this is much cleaner and enterprise ready than what we end up with out of the box.
Wrapping Up
Provisioning PCs via Windows AutoPilot and Microsoft Intune is a rapidly changing landscape. So what may not be possible today, is likely to be addressed quickly. In the meantime, there’s usually a custom approach to achieving the end-user experience that you need and this is a great example.