Virtualising Paint.NET 3.x
Virtualising Paint.NET is a simple two step process:
- Configure an unattended installation that installs Paint.NET to configure specific options, including disabling automatic update checks
- Capture the Paint.NET package and customise it for execution
Prerequisites
Paint.NET requires Windows XP SP2 and above and the .NET Framework 3.5 or 4.0. The .NET Framework should be installed on your sequencing machine and be deployed to client computers before delivering Paint.NET.
Creating an unattended installation for Paint.NET
The Paint.NET documentation explains how to create an unattended installation. There are a number of options that are important when virtualising Paint.NET:
TARGETDIR- specify an installation folder on the virtual drive. This is not required and you can successfully sequence a VFS install of this applicationCHECKFORUPDATES- it is important to set this value to 0 to disable prevent Paint.NET from automatically prompting users to update the package. Users will still be able to access the Utilities / Check for Updates menu item - Resource Hacker or other tools such as AppSense Environment Manager can be used to disable this menu itemCHECKFORBETAS- ifCHECKFORUPDATESis set to 0 then this option should automatically be set to 0 as well; however I have set this option in my install script
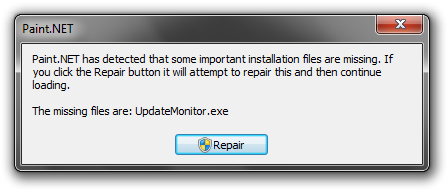
Unfortunately the updater component is in process so it is difficult to remove from the installation. Additionally deleting files associated with the updater results in Paint.NET attempting to repair itself on start-up:

JPGPNGBMPEDITOR- if you want Paint.NET to be the default editor for JPG, PNG and BMP files, set this to 1TGAEDITOR- if you want Paint.NET to be the default editor for TGA files, set this to 1DESKTOPSHORTCUT- setting this to 0 will prevent setup from creating a desktop shortcut
I have included a sample script below, that shows the unattended options that I have used during sequencing:
Virtualising (or Sequencing) Paint.NET
Before sequencing, ensure your sequencing image has been configured with the Microsoft .NET Framework 3.5 or 4.0 - if you are sequencing on Windows 7, version 3.5 is already included. Here’s what you should configure before sequencing:
- Install or enable the .NET Framework - use the same version of the .NET Framework that is deployed to your client computers
- Disable System Protection (or System Restore) - setup creates a restore point during install which we don’t want to capture
- Add an exclusion for CSIDL_DESKTOP - if Paint.NET crashed during sequencing it will place a log file on the desktop which we don’t want to capture
- Add an exclusion for CSIDL_Windows\Installer so that the cached MSI file is not captured in the package
- Copy the installation script and the Paint.NET installer to a local path inside the sequencing machine
The sequencing process that should be followed will look like this:
- Start monitoring
- Install Paint.NET using the silent install script. Do not run Paint.NET at this point as it will crash on launch
- Stop Monitoring to allow the sequencer to process the changes
- Start Monitoring
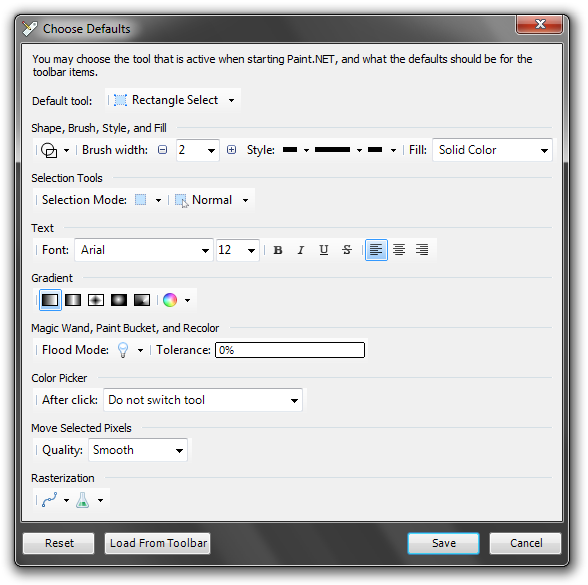
- Run Paint.NET and configure defaults if required. Check that automatic updates has been disabled.
- Stop Monitoring and continue
- Customise the shortcut and file type associations
- Configure feature block 1 only if required
The Choose Defaults options are available from the Tool drop down button on the toolbar:

Conclusion
Virtualising Paint.NET should be very quick and can be sequenced on 32-bit and 64-bit Windows. Even if sequenced on 32-bit Windows, Paint.NET will execute as a 64-bit application under Windows x64 - no re-sequencing required.
One final item to fix up when creating the package is the file type icon that is extracted from the Paint.NET executable is only a 32x32 pixel icon. To make associated files look better under Windows Vista and Windows 7, you could replace this with an icon that includes a 256x256 pixel size image.
