Virtualising Apple QuickTime 7.x
Here’s how to create a custom Apple QuickTime 7.x installation for virtualisation. This post specifically deals with virtualising QuickTime with Microsoft App-V, but the general process should be similar for any application virtualisation product.
If you’ve ever looked at deploying Apple QuickTime on Windows you have no doubt run into the challenges in configuring settings for this application. Successfully virtualising QuickTime requires that users receive the correct preferences before they run the application.
For some absurd reason QuickTime stores part of it’s preferences in the registry, while the other half is stored in the file system. It’s the those preferences that have the most visual impact on users that are stored in the file system.
Preferences are stored in the local portion of the user profile, which by default is not virtualised. Because of this, any settings you may configure will not be included in a QuickTime App-V package. Preferences are stored here:
%USERPROFILE%\AppData\LocalLow\Apple Computer\QuickTime\QuickTime.qtp(Windows Vista and above)%LOCALAPPDATA%\Apple Computer\QuickTime\QTPlayerSession.xml(Windows Vista and above)%USERPROFILE%\Local Settings\Application Data\Apple Computer\QuickTime\QuickTime.qtp(Windows XP / Windows Server 2003)%USERPROFILE%\Local Settings\Application Data\Apple Computer\QuickTime\QTPlayerSession.xml(Windows XP / Windows Server 2003)
There are several ways of addressing this issue when virtualising QuickTime:
- Change the preferences folder location. A single registry change can tell QuickTime to store preferences in the roaming profile
- Copy the preferences files to the local profile at runtime using scripts in the OSD file or other tools (e.g. Group Policy Preferences)
- Include the local AppData location which is excluded by default; however the cache is also stored here
Installing QuickTime
Before I look at setting preferences, I’ll address automating the installation of QuickTime, because I want to make this sequence repeatable and I want to control which components are installed. Specifically I want to avoid installing the Apple Software Updater.
Download the QuickTime installer (without iTunes), available from the Apple web site (7.6.6 at the time of writing). Extract this file to obtain the included Windows Installer files.
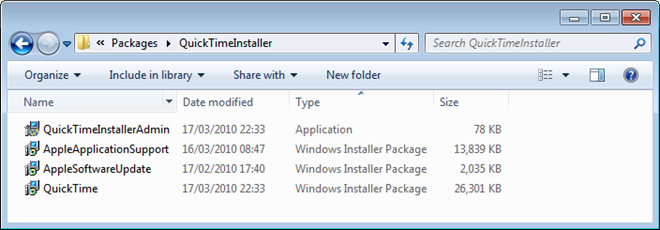
Automating the installation of QuickTime is very simple once you know how. An excellent source for finding that information is at AppDeploy.com. The installation script I have created does not use custom transforms and will perform the following basic steps:
- Install Apple Application Support, which is now a required component
- Install Apple QuickTime to the virtual drive although you could use VFS install if you prefer
- Ensure Apple Software Updater is not installed (by not installing
AppleSoftwareUpdate.MSI) - Delete any icons not required – I recommend not giving users access to Picture Viewer because it does not honour preferences correctly
- Delete the
QTTASK.EXEapplication from the Run registry key - Ensure users are not prompted to reclaim file associations by the ActiveX control
QuickTime preferences
There are a number of settings that you should consider in your QuickTime package, which can include registration information for QuickTime Pro:
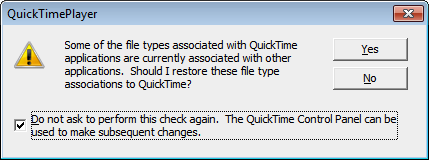
File type associations – don’t forget to prevent QuickTime from attempting to re-associate file types at launch. Selecting Yes here, will capture the default file types.
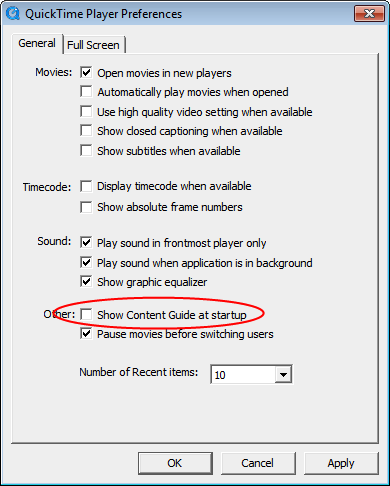
When the player starts, open Edit / Preferences / Player Preferences and prevent the Content Guide from displaying at application start.
Open Edit / Preferences / QuickTime Preferences to star the QuickTime Control Panel. You may want to prevent movies from playing automatically. Useful for the HD videos that may take some time to download.
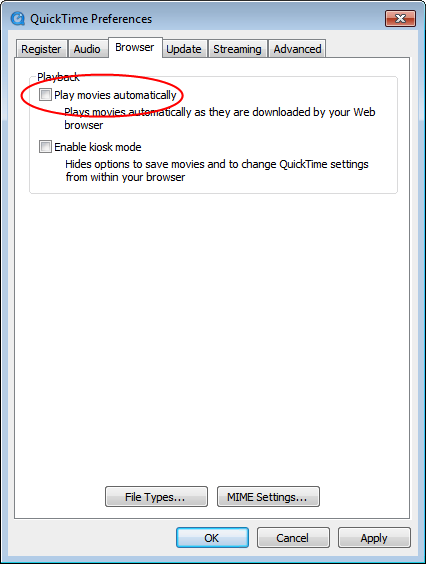
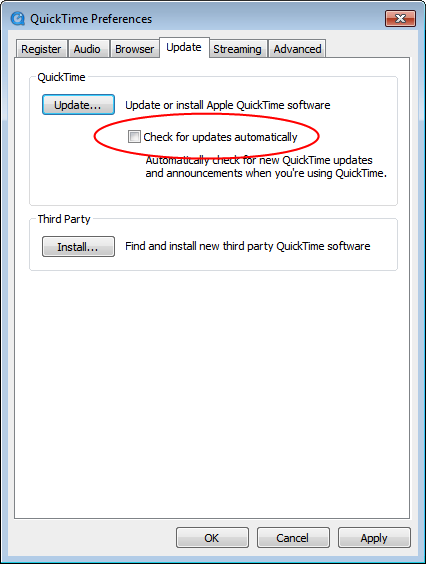
Prevent QuickTime from checking for updates on launch. When virtualising it would also be useful to prevent access to this control with a 3rd party tool such as AppSense Environment Manager (or hack the DLL with Resource Explorer yourself).
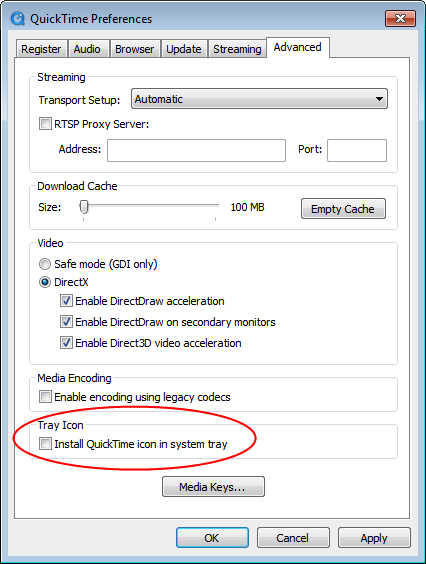
The QuickTime notification area icon should be disabled by default, but check that here:
If you configure QuickTime via a standard installation, you can automate this process by copying the preferences files to the correct locations during installation.
Note: If you want to prevent users from accessing the QuickTime Control Panel applet when running QuickTime Player, rename or delete the CPL file: <Install folder>\QTSystem\QuickTime.cpl. When users access the QuickTime Preferences menu item, nothing will happen.
Change the preferences folder location
To change the folder location for storing preferences modify the following registry value as a part of your capture process:
HKEY_CURRENT_USER\Software\Apple Computer, Inc.\QuickTime\LocalUserPreferences\FolderPath
For this to work correctly, you must add a trailing slash to the path, for example: %APPDATA%\Apple Computer\QuickTime\
This will tell QuickTime to store preferences in the roaming profile and thus any changes will be captured by the sequencer.
Copy the preferences file at runtime
If you would prefer to leave the preferences file in it’s default location, you will have to copy a pre-configured preferences file at launch.
Create the QuickTime preferences by first installing QuickTime onto a test machine, configuring the required preferences, then copy the preferences file to a folder under the asset folder. Then modify the OSD file to copy the configured preferences file when QuickTime is launched:
@XCOPY /E /I /Q Q:\QTIME7.001\Prefs "%USERPROFILE%\Local Settings\Application Data\Apple Computer\QuickTime"
If you’re using Windows Vista or above change the path slightly:
@XCOPY /E /I /Q Q:\QTIME7.001\Prefs "%LOCALAPPDATA%\Apple Computer\QuickTime"
To support current and previous operating systems in the same package you could use this script instead:
IF EXIST "%LOCALAPPDATA%" (@XCOPY /E /I /Q Q:\QTIME7.001\Prefs "%LOCALAPPDATA%\Apple Computer\QuickTime") ELSE @XCOPY /E /I /Q Q:\QTIME7.001\Prefs "%USERPROFILE%\Local Settings\Application Data\Apple Computer\QuickTime"
3rd party user environment management tools such as AppSense Environment Manager or RES PowerFuse can do these actions on demand, so you could avoid scripting and copy the files when QuickTimePlayer.exe launches.
Include local AppData for capturing preferences when sequencing
If you want to leave the preferences in their default locations, then before virtualising remove these default preferences from the project:
%CSIDL\_LOCAL\_APPDATA%%CSIDL_PROFILE%\Local Settings
Then add back the QuickTime cache folder as an exclusion:
%CSIDL\_LOCAL\_APPDATA%\Apple Computer\QuickTime\downloads
This will capture the preferences and ensure the QuickTime cache folder is not captured in the user’s virtualised profile (the .PKG file).
Virtualising the QuickTime package
You may additionally like to add %CSIDL_WINDOWS%\Installer as an exclusion to reduce the size of the final package, as a copy of the QuickTime setup files are stored there.
Capturing QuickTime should be straight-forward; however you will most likely need to create separate packages if you support multiple operating systems. Sequence on the lowest common denominator and test to see if this is required.
You will also need to create a shortcut to Internet Explorer (or your browser of choice) so that users can use QuickTime to view media on the web - just as you would when virtualising any other ActiveX controls.