Automating Nerdio Manager Shell Apps, with Evergreen, Part 1

An automated pipeline for creating and updating Nerdio Manager Shell Apps with Evergreen.
- Winget vs. Shell Apps + Evergreen
- PowerShell Module
- Application Definitions
- Importing a Shell App
- Summary
Nerdio Manager for Enterprise 7.2 introduces API endpoints for managing Shell Apps. This provides an exciting opportunity for automating Shell Apps management for a repeatable and structured method for creating and updating Shell Apps. Even better, we can integrate this approach with Evergreen for automatic discovery of new application binaries.
Winget vs. Shell Apps + Evergreen
Nerdio Manager supports deployment of applications via Winget with Unified Application Management supporting the public Winget repository or a private repository.
There’s an inevitable comparison then between using Winget or Shell Apps + Evergreen to deploy applications. Winget is certainly the simpler approach and supports a wide range of applications, but relies on application deployment from the internet. Nerdio Manager can create private Winget repositories to keep application deployment within the customer tenant; however, private repositories require several Azure resources including a Cosmos database.
Shell Apps with Evergreen requires just an Azure storage account, keeping application binaries within the customer tenant while using the simplest architecture possible. Additionally, using Evergreen provides you with clear visibility into and auditing of application discovery and download, all within your environment.
Using Evergreen as a source for discovery of application version and installers, enables the deployment of Shell Apps from a library of 374 applications and 6712 unique application installers.
PowerShell Module
To create this integration, I’ve created a custom PowerShell module - the official Nerdio Manager PowerShell module will be updated in the future and may replace some of the functions in this custom module.
The custom module is hosted in my nerdio-actions repository on GitHub - see NerdioShellApps.psm1. The repository also includes files for a set of supported applications that can be imported into Shell Apps.
Create-ShellApps.ps1 demonstrates how to use the module to import applications into Nerdio Manager Shell Apps.
These support modules are also required: Az.Accounts, Az.Storage, Evergreen.
Application Definitions
Several files are required for defining a Shell App. The module expects a directory for each application with the following files:
- Definition.json - includes a definition of the Shell App required during import. This file also includes logic that tells Evergreen how to find the application version and binaries
- Detect.ps1 - is used in the Shell App to detect the installed application
- Install.ps1 - installs the Shell App
- Uninstall.ps1 - uninstalls the Shell App
For details on the detect, install and uninstall scripts, see this article: Shell apps technical reference guide.
Here’s a look at an example Definition.json - this example defines Microsoft Visual Studio Code, including placeholder values that will be replaced later, and values that Evergreen will use to find the 64-bit version of the Stable release of Visual Studio Code.
{
    "name": "Visual Studio Code",
    "description": "Visual Studio Code is a code editor redefined and optimized for building and debugging modern web and cloud applications.",
    "isPublic": true,
    "publisher": "Microsoft",
    "detectScript": "#detectScript",
    "installScript": "#installScript",
    "uninstallScript": "#uninstallScript",
    "fileUnzip": false,
    "versions": [
        {
            "name": "#version",
            "isPreview": false,
            "installScriptOverride": null,
            "file": {
                "sourceUrl": "#sourceUrl",
                "sha256": "#sha256"
            }
        }
    ],
    "source": {
        "type": "Evergreen",
        "app": "MicrosoftVisualStudioCode",
        "filter": "$_.Architecture -eq \"x64\" -and $_.Channel -eq \"Stable\" -and $_.Platform -eq \"win32-x64\""
    }
}
Importing a Shell App
To import a Shell App with the module and an application definition, this high-level workflow is followed:
- Create a storage account and blob container
- Import the module
- Authenticate to Azure and Nerdio Manager
- Read the application definition
- Find the latest application version and binary with Evergreen
- Create the Shell App, or add a new version to an existing Shell App
Create a storage account
We need an Azure storage account to store application binaries. We just need a standard tier storage account to host blob storage and a blob container to upload files to. The container can be configured for Private access, because we configure a SAS token for each file hosted in that container.
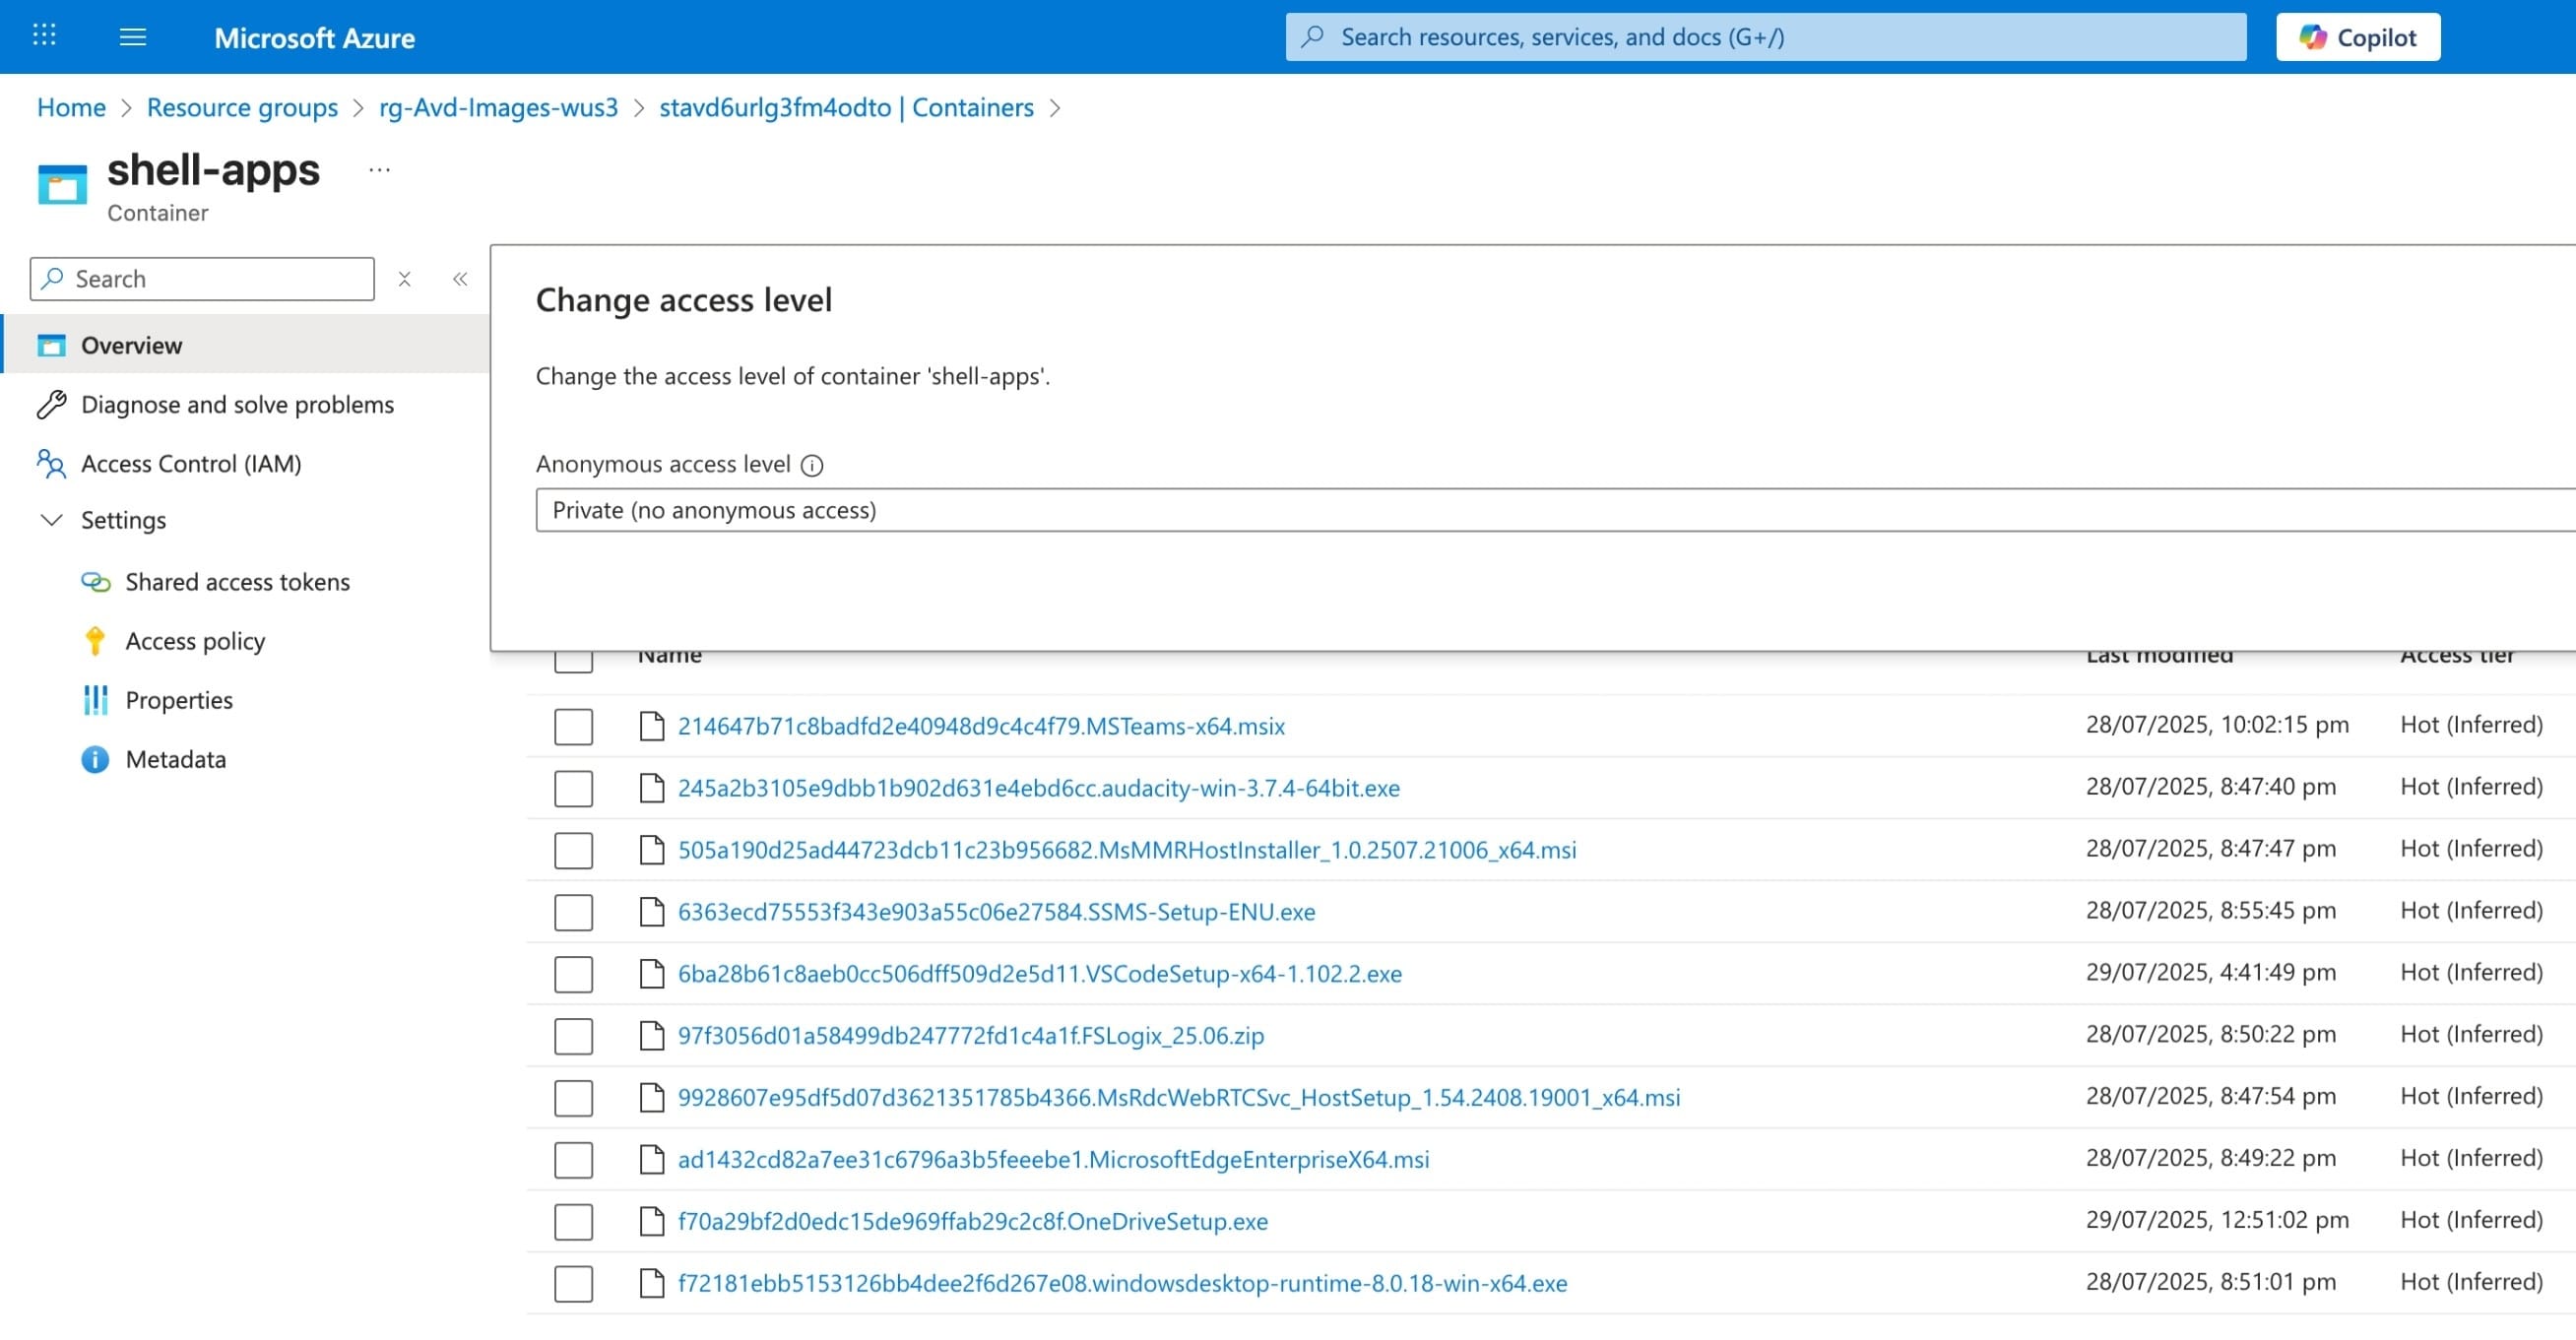
Azure storage account blob storage with Private access configured.
Import the module
This step is simple enough, save the NerdioShellApps.psm1 file locally and import with:
PS > Import-Module -Name ".\NerdioShellApps.psm1" -Force
Authentication
Authentication to Azure is required - you will need to authenticate with an account that has at least the Storage Blob Data Contributor role. When run manually, use the Connect-AzAccount cmdlet to authenticate.
Authentication to Nerdio Manager is similar to Connect-Nme in the official Nerdio Manager PowerShell module; however, we also need to authenticate to the target Azure subscription to upload files to a storage account.
The following credentials, secrets and values are required - in my lab environment I have these saved in JSON files that my script reads when executed; however, these would be best stored securely - for example, in an Azure Key Vault:
- ClientId - Id of the Entra ID app registration configured with the Nerdio Manager REST API
- ClientSecret - Secret used to authenticate with the app registration
- TenantId - Entra ID tenant Id
- ApiScope - API scope provided by the Nerdio Manager REST API
- OAuthToken - OAuth token provided by the Nerdio Manager REST API
- NmeHost - Nerdio Manager hostname
- SubscriptionId - Azure subscription Id
- ResourceGroupName - Azure resource group that contains the storage account
- StorageAccountName - Azure storage account used to host application binaries
- ContainerName - Azure storage account blob container where application binaries will be uploaded to
Because I’m storing these credentials locally, authentication looks like the code below where I’m reading the stored values from JSON files and passing them to Set-NmeCredentials. This function stores the credentials, secrets and values for use later with other functions.
$EnvironmentFile = "/Users/aaron/projects/nerdio-actions/api/environment.json"
$CredentialsFile = "/Users/aaron/projects/nerdio-actions/api/creds.json"
$Env = Get-Content -Path $EnvironmentFile | ConvertFrom-Json
$Creds = Get-Content -Path $CredentialsFile | ConvertFrom-Json
$params = @{
    ClientId           = $Creds.ClientId
    ClientSecret       = (ConvertTo-SecureString -String $Creds.ClientSecret -AsPlainText -Force)
    TenantId           = $Creds.TenantId
    ApiScope           = $Creds.ApiScope
    SubscriptionId     = $Creds.SubscriptionId
    OAuthToken         = $Creds.OAuthToken
    ResourceGroupName  = $Env.resourceGroupName
    StorageAccountName = $Env.storageAccountName
    ContainerName      = $Env.containerName
    NmeHost            = $Env.nmeHost
}
PS > Set-NmeCredentials @params
To authenticate to Nerdio Manager use the Connect-Nme function. Note that this function name clashes with the official Nerdio Manager PowerShell module, so configure your environment appropriately if you have both modules installed:
PS > Connect-Nme
Authenticated to Nerdio Manager.
Token expires: 29/7/2025 5:17:18 pm
Read the application definition
Our first step after authentication is to read the application definition. Get-ShellAppDefinition accepts a path to a directory that contains the Definition.json, Detect.ps, Install.ps1, and Uninstall.ps1 files, and returns a single object which is the application definition (still with some placeholder values).
$Path = "/Users/aaron/projects/nerdio-actions/shell-apps/Microsoft/VisualStudioCode"
$Def = Get-ShellAppDefinition -Path $Path
Find the application details
The application definition should have details that Evergreen will use find the application version and download URL:
$App = Get-EvergreenAppDetail -Definition $Def
Be sure to test that this function returns a single object only. In this example, we have an object that describes the 64-bit, Stable channel version of Visual Studio Code:
Version      : 1.102.2
Platform     : win32-x64
Channel      : Stable
Architecture : x64
Sha256       : cfd0ce29f75313601ae5cd905c7cd12e4b2b759badfc2c1c9ec1691fa82a2060
URI          : https://vscode.download.prss.microsoft.com/dbazure/download/stable/c306e94f98122556ca081f527b466015e1bc37b0/VSCodeSetup-x64-1.102.2.exe
Create the Shell App
Now that we have authenticated to the target environment and have the details requires to create the Shell App, we should first check whether the Shell App aleady exists before attempting to import. Right now we only match by the application name defined in the definition, so unless we first perform a check, we will have two Shell Apps imported with the same details.
The following code should either return null or an existing Shell App that matches the name defined in the application definition:
$ShellApp = Get-ShellApp | ForEach-Object {
    $_.items | Where-Object { $_.name -eq $Def.name }
}
If no Shell App is returned, we can then use New-ShellApp to create the Nerdio Manager Shell App for Visual Studio Code. This function requires the application definition object from Get-ShellAppDefinition and the Evergreen object from Get-EvergreenAppDetail:
if ($null -eq $ShellApp) {
    New-ShellApp -Definition $Def -AppDetail $App
}
This function provides output that looks similar to the below. Note that file name for the uploaded binary, in this case 6ba28b61c8aeb0cc506dff509d2e5d11.VSCodeSetup-x64-1.102.2.exe. The MD5 hash of the Sha256 file hash is appended to the file name to create a idempotent file name for the uploaded binary so that we can uniquely identify the installer for a specific Shell App version.
Downloaded file: /Users/aaron/Temp/shell-apps/VSCodeSetup-x64-1.102.2.exe
Get storage acccount key from: rg-Avd-Images-wus3 / stavd7urlg3fm4odtn
Uploading file to blob: 6ba28b61c8aeb0cc506dff509d2e5d11.VSCodeSetup-x64-1.102.2.exe
Uploaded file to blob: https://stavd7urlg3fm4odtn.blob.core.windows.net/shell-apps/6ba28b61c8aeb0cc506dff509d2e5d11.VSCodeSetup-x64-1.102.2.exe
Using SAS token for source URL.
Shell App created successfully. Id: 20620
Update the Shell App with a new version
Where a Shell App already exists and a new version is available, we can use the following code to add a new version to an existing Shell App. This reads the version from the Shell App and compares the version against what Evergreen has found. If Evergreen finds a newer version, New-ShellAppVersion will add a new version to the same Shell App:
$ExistingVersions = Get-ShellAppVersion -Id $ShellApp.Id | ForEach-Object {
    $_.items | Where-Object { $_.name -eq $App.Version }
}
if ($null -eq $ExistingVersions -or [System.Version]$ExistingVersions.name -lt [System.Version]$App.Version) {
    New-ShellAppVersion -Id $ShellApp.Id -AppDetail $App
}
Downloaded file: /Users/aaron/Temp/shell-apps/VSCodeSetup-x64-1.202.2.exe
Get storage acccount key from: rg-Avd-Images-wus3 / stavd7urlg3fm4odtn
Uploading file to blob: 6ba28b61c8aeb0cc506dff509d2e5d11.VSCodeSetup-x64-1.202.2.exe
Uploaded file to blob: https://stavd7urlg3fm4odtn.blob.core.windows.net/shell-apps/6ba28b61c8aeb0cc506dff509d2e5d11.VSCodeSetup-x64-1.202.2.exe
Using SAS token for source URL.
Shell App version created successfully. Id: 20623
Summary
Using this approach, we can define a set of application to import as Shell Apps into Nerdio Manager and use a script that reads each application definition, finds the latest application version, downloads the binaries, uploads to the Azure storage account and creates the Shell App in Nerdio Manager. See the sample script here: Create-ShellApps.ps1.
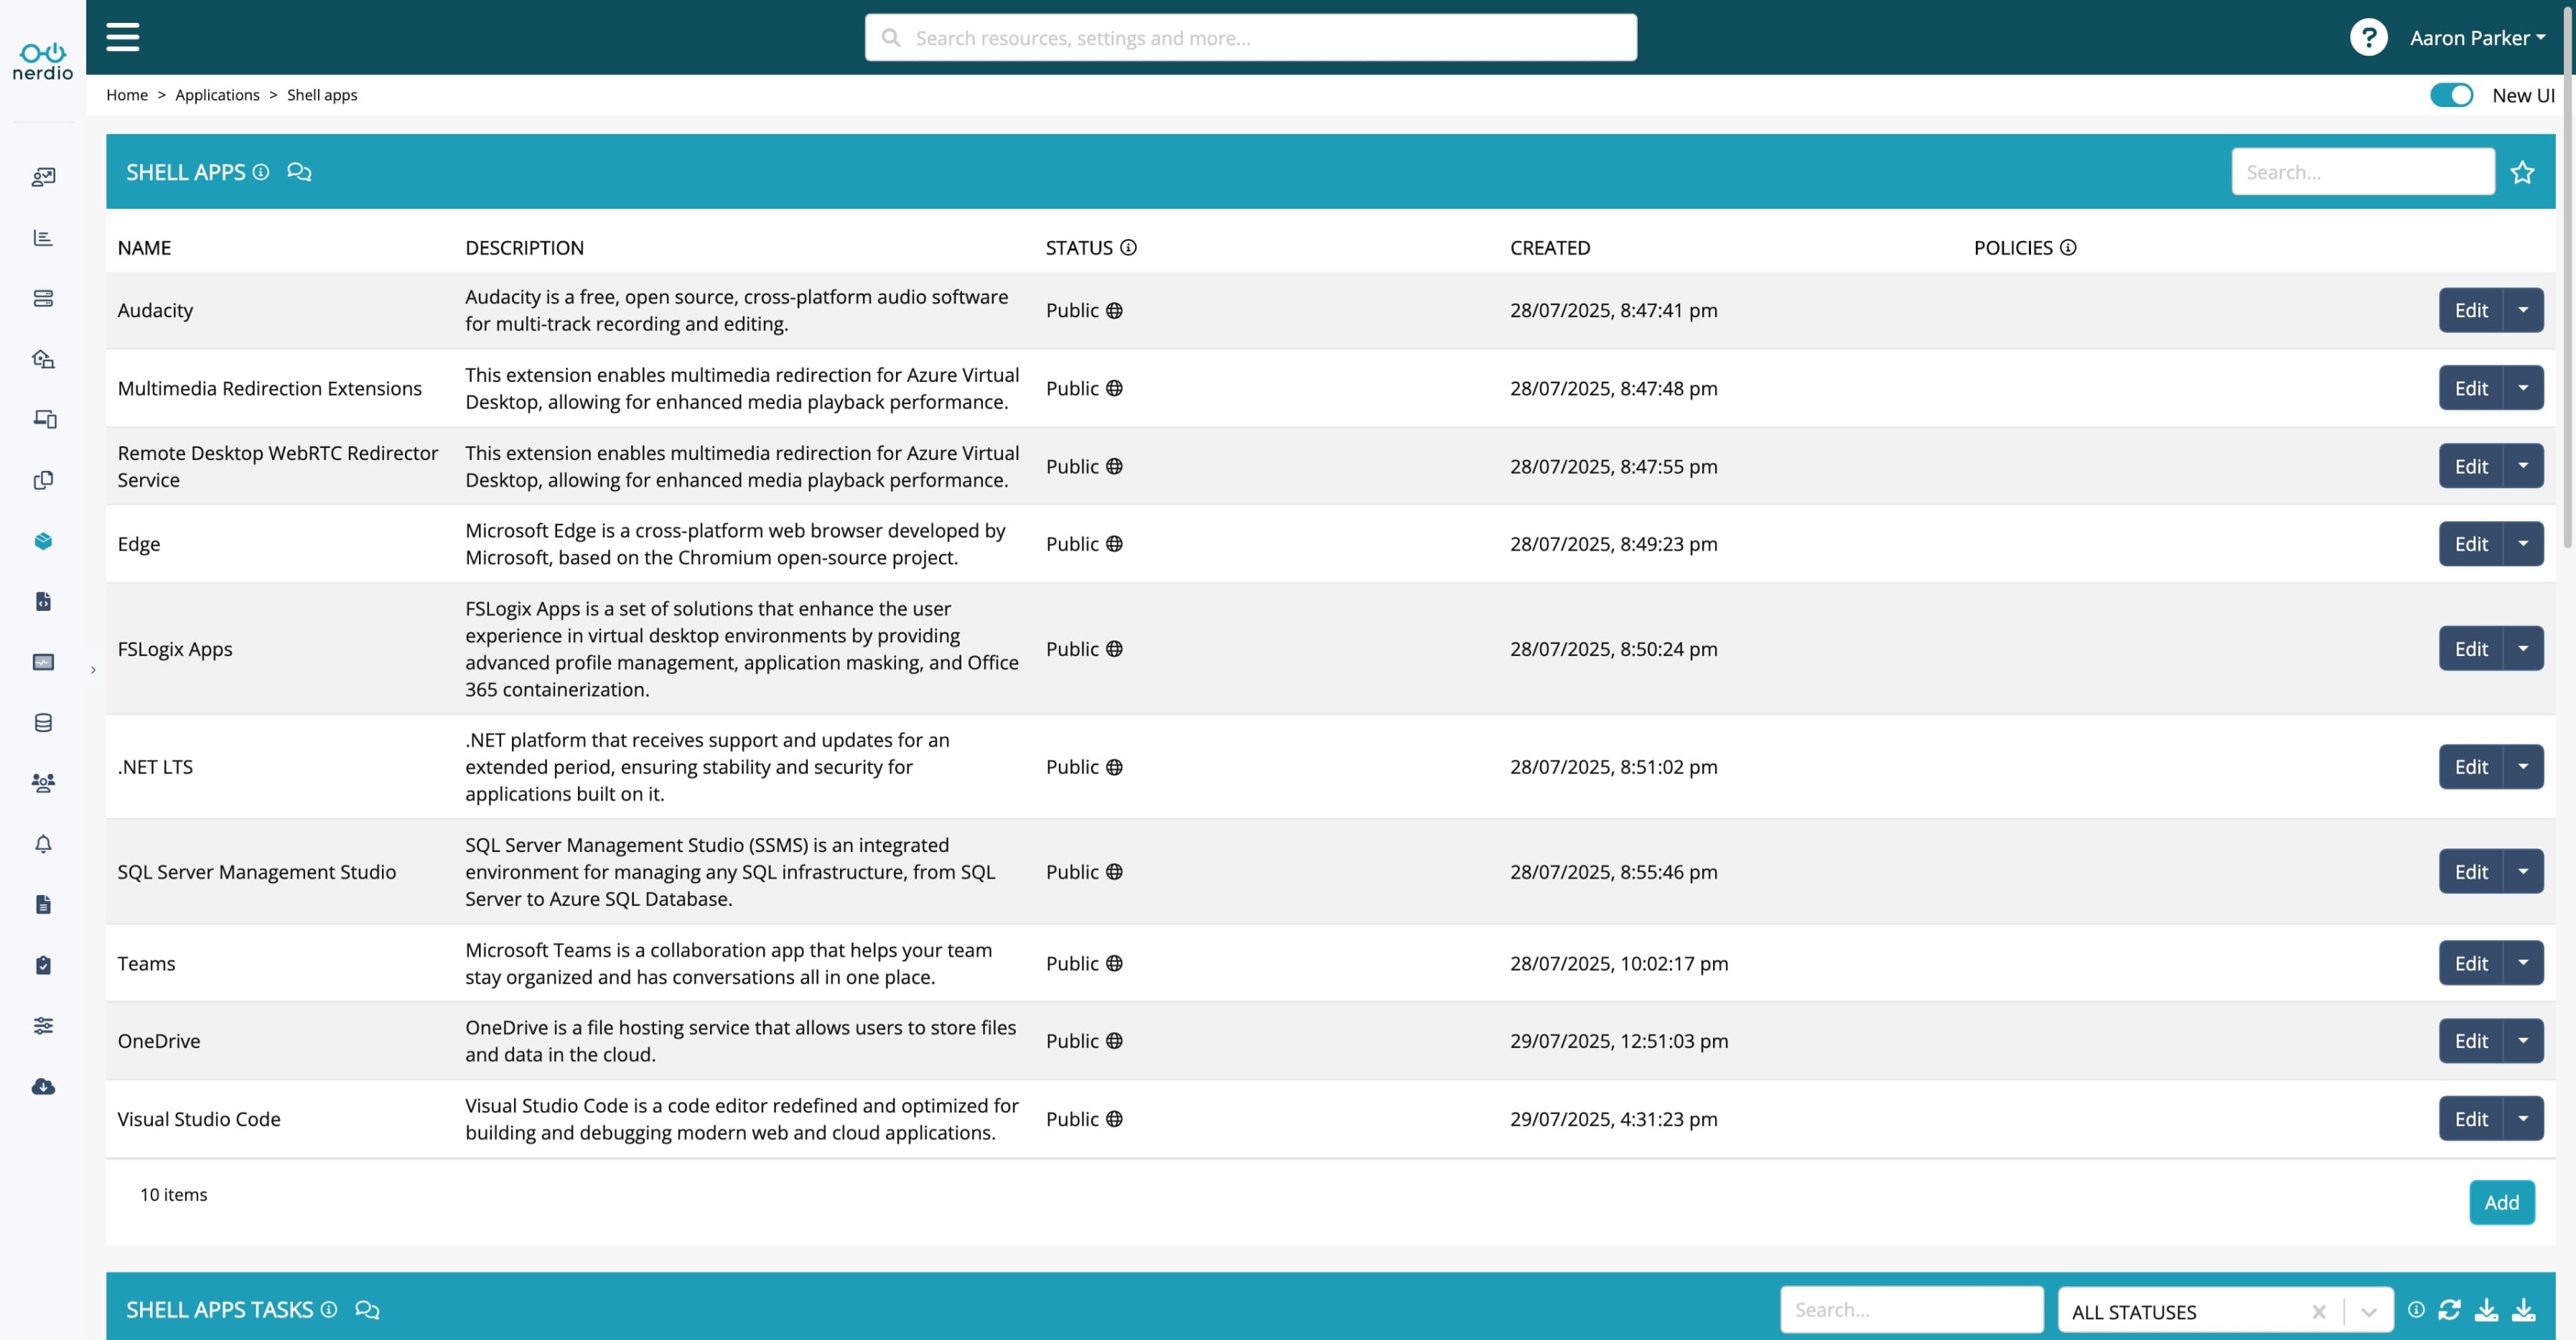
Nerdio Manager Shell Apps imported via PowerShell.
In this article, I’ve shown you how to interactively import a set of applications to Nerdio Manager Shell Apps; however, we don’t really want to be sitting in front of a console and running this each time we want to import new apps. In the next artcile, I’ll cover updating this workflow for use in an Azure Pipeline to automate the entire process.