Juggling Sun Java Runtimes in App-V
I’ve written about before, but it’s not because I like Java… So before I get into a tirade about it, here’s yet another post on the subject..
Introduction
We’ve had some issues taking an existing sequence of the Sun JRE created in 4.2 and running it on a 4.5 client (maybe more on that at a later date), so I’ve gone back to drawing board to get version 1.3.1_10 working in the bubble, while 1.6.0._03 and 1.6.0_07 exist on our client machines.
Justin Zarb has a post on running different versions of the JRE which works great, but I would prefer to get it working without resorting to scripting. To do that I’ve taken advantage of behaviour of the sequencer that takes registry keys deleted during the sequencing process, and hiding them from the resulting bubble when the application is executed on the client.
To achieve separation between the JRE in the bubble and the JRE installed on the system, I’ve followed this basic process:
- Configure a sequencing virtual machine that does not have (or ever had) any version of the JRE installed
- Add the registry keys for the version or versions installed on your client machines
- During sequencing, delete those keys added in the previous step and create dummy entries for other keys and folders you want to fully virtualise
- Install the older version of the JRE
By implementing steps 2 and 3 you essentially create the anti-JRE which enables you to completely hide the versions of the JRE installed on workstations in your environment – no scripting at runtime required.
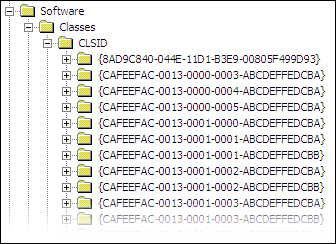
Here’s an example of this process in play: the first image below shows some of the HKCUSoftwareClassesCLSID keys, added by 1.6.0_07, seen in the real (non-virtualised) registry:
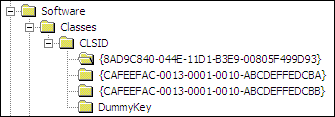
By adding those keys to the sequencer machine and deleting during sequencing, we end up with only the keys added by the 1.3.1_10 installer. Here is the same HKCU\Software\Classes\CLSID key seen inside the bubble:
Building the Pre-sequencing Environment
All sequencing was performed on a clean installation of Windows where no versions of the JRE had ever been installed. This was done to ensure complete control over the sequencing environment and to ensure
To capture the keys that are installed by 1.6.0_03 and 1.6.0_07, I sequenced those versions and opened the resulting package in the most excellent SFT Explorer. From there you can export the registry keys created by the installer.
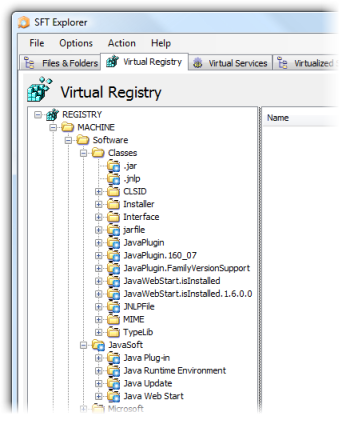
From that exported registry file I’ve created a script that will add those keys to the sequencing machine (keys only, values are not required):
Download the pre-sequence script here
This script is then run before sequencing takes place so that the same keys can be deleted before installing the older version of the JRE, and those deletions are then picked up by the sequencer.
Installing and Capturing the JRE
I’ve scripted the install process to make things simple, so here’s the process the occurs during sequencing:
- Delete the keys created during by the pre-sequencing step. The JRE installer does recreate some of those keys, but with different values, and the sequencer will pick them up and virtualise correctly;
- Install version 1.3.1_10 of the JRE using an unattended script (SETUP.ISS created using SETUP –R, before sequencing);
- A dummy registry key is created under
HKCU\Software\Classes\CLSID, but this step isn’t completely necessary; - A dummy file is created in the default install location of the Sun JRE (%ProgramFiles%Java%). This will allow the default install folder to be fully virtualised, hiding the real folder from the bubble;
- The Control Panel applet for the just installed JRE is run, so that the sequencing engineer can check settings, such as Internet Explorer integration, is enabled.
Here’s a copy of the install script:
Download the install script here
After installation and capture is complete, a few steps must be completed in the Sequencer before saving:
- Remove the JAVAW.EXE application item that the sequencer picks up;
- Add a shortcut to IEXPLORE.EXE. You can then copy and customise the resultant OSD file if you are using this process for web applications;
- Ensure that CSIDL_PROGRAM_FILESJava is set to ‘Override Local Directory’;
- Ensure the registry key USER%SFT_SID%SoftwareJavaSoft is set to ‘Override Local Key’;
Testing the Package
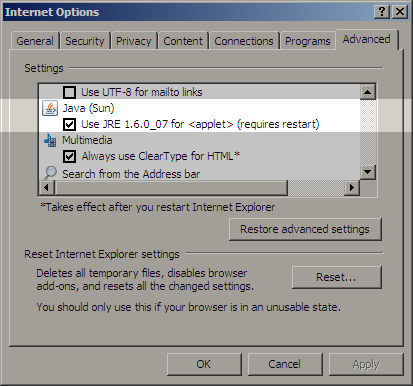
Once you have completed the sequence and are running the package on your client, you should see the virtualised JRE as the default Java machine in Internet Explorer inside the bubble:
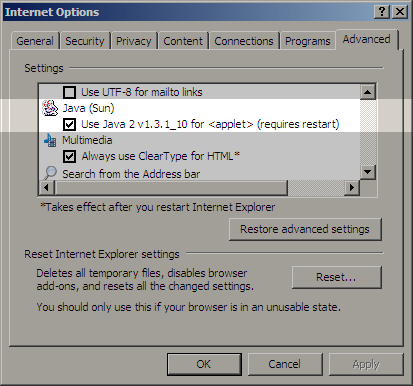
Whilst running Internet Explorer normally, the installed version of the JRE will be the default:
