Hands off my gold image - The Task Sequence
If you’ve been following along so far you’ll have read my follow up coverage of my (and co-host, Jonathan Eyton-Williams) Geek Speak talk at Citrix Synergy in Barcelona, with Hands off my gold image – Automating Citrix XenApp/PVS Image Creation and Hands off my gold image – Microsoft Deployment Toolkit details. In this article I’ll cover the task sequence that deploys Windows Server, installs XenApp and captures the image into PVS.
Task sequences in the Microsoft Deployment Toolkit (MDT) are core of what makes MDT tick. Think of a task sequence as the steps that will deploy and configure Windows. Note that there is no post-deployment management with MDT, as there is no agent (that’s what ConfigMgr is for).
Importing the Task Sequence
To create a new task sequence, use the MDT Deployment Workbench, navigate to Task Sequences, right-click on that node and select ‘Create Task Sequence’:
- Set a unique ID and task sequence name
- Use the Standard Server Task Sequence as the template
- Select the operating system - in this case Windows Server 2008 R2 SP1. I usually recommend deploying Standard Edition
- Specify settings such as a product key, name, organisation and IE home page and local administrator password
- Customise the task sequence and unattend.xml to automate the deployment of Windows Server, XenApp and applications
The download that I have supplied (MDT-XenApp-PVS-automation1.zip) includes a pre-configured task sequence and unattend.xml for Windows Server 2008 R2 Standard Edition. To import these into a MDT Deployment Share, follow the steps above and then replace the resultant TS.XML and UNATTEND.XML that you’ll find in the \Control folder.
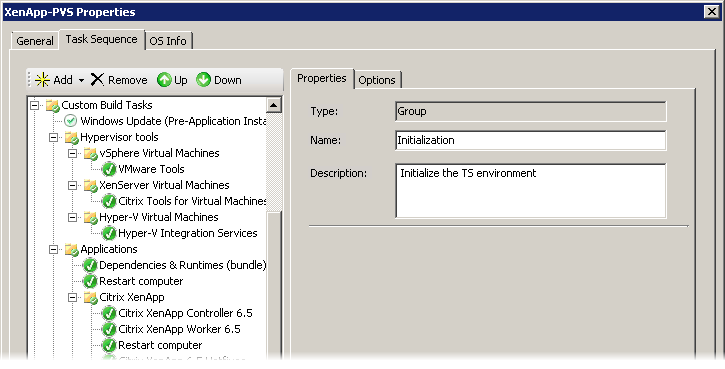
Re-open the task sequence properties and you should see something like this:
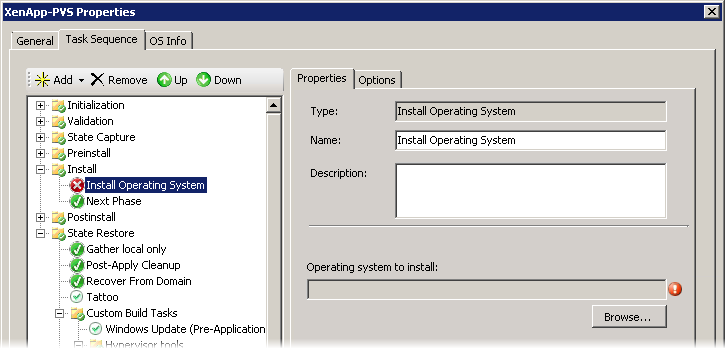
Importing the supplied pre-configured task sequence into your own Deployment Share, will result in some errors because the task sequence will reference applications and operating systems that either don’t exist in your Deployment Share or have different names.
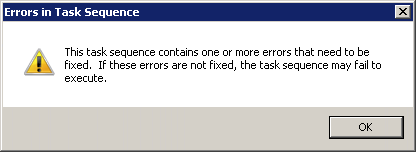
For example, after I’ve imported this task sequence, I need to fix the reference to the Windows Server 2008 R2 SP1 source files:
The download also includes the scripts/applications referenced by the task sequence, so you’ll need to ensure they exist in your Deployment Share before fixing the task sequence.
About the Task Sequence
Put 10 people in a room and you’ll probably find 11 different approaches to MDT and task sequences, so keep in mind that this is only one way to deploy Windows and XenApp and capture that image into PVS. If you have any updates or improvements to this process, I would love to hear your feedback.
Here’s a rough breakdown of what the task sequence is doing:
- Install and configure Windows. This utilises unattend.xml to perform some configuration including enabling the Remote Desktop Session Host role
- Apply packages to Windows including Internet Explorer 9 (or 10)
- The folder/group Custom Build Tasks contains the tasks that I’ve added to a vanilla server task sequence
- Update Windows after deployment using either Windows Update or WSUS. This occurs before any additional applications are added to the build
- Install hypervisor tools. The standard MDT property VMPlatform can be used to detect the underlying hypervisor and filter the install of the right tools
- Install Dependencies and Runtimes (.NET Framework, Visual C++ etc.) using an Application Bundle
- Control the installation of Citrix XenApp Controllers or Worker z. Deployment via PVS most likely means that you’ll deploy Workers rather than Controllers
- Install some additional XenApp related components including hotfixes, Receiver, the Offline Plugin etc
- Install core applications using an Application Bundle (this might include Office, Reader, Flash etc)
- Run a Windows Update task again once the dependencies and applications have been deployed
- Prepare and capture the image into PVS using custom properties. This might install and configure the EdgeSight Agent, but will install XenConvert, prep the image and then perform a capture
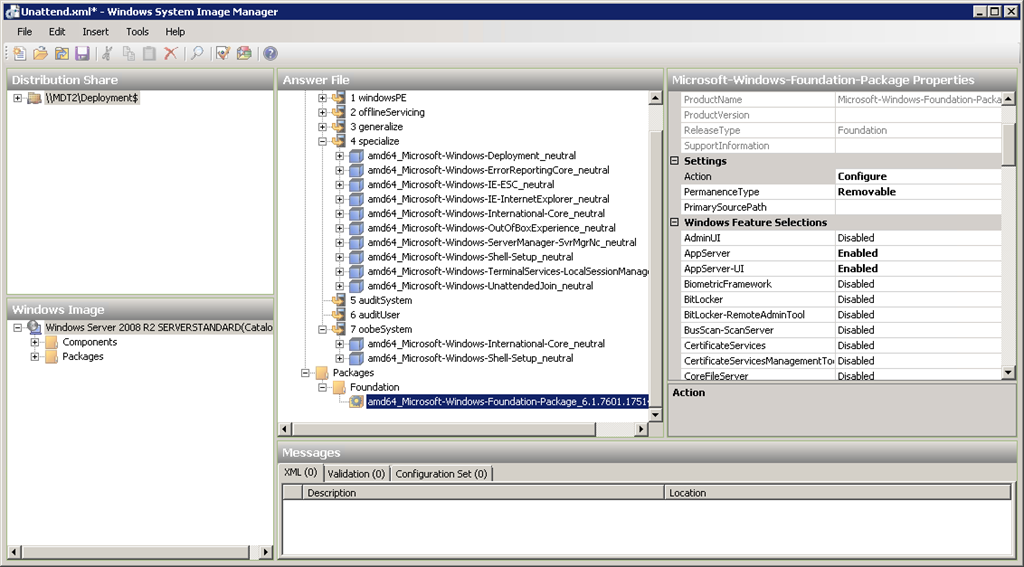
About Unattend.xml
Whilst MDT provides a far friendlier interface than Windows System Image Manager, there are still a number of configuration items that I’ve included in unattend.xml. These include configuring the following:
- Disable Internet Explorer Enhanced Security Configuration
- Disable the OOBE console and Server Manager from starting at first logon
- Enabling Remote Desktop Services Session Host as a role during the install instead of post-install
The included unattend.xml has configuration items applied to two configuration passes, plus features/roles enabled in the Packages section:
- specialize; and
- oobeSystem
Together the task sequence and unattend.xml create what should be a fairly clean (and importantly, repeatable) deployment of a XenApp server.
In the last article of this series, I’ll discuss some of the included scripts, but as always, if you’d like to ask some specific questions, email me - aaron (at) stealthpuppy.com.