Customising Office 2010 before deployment
The Office 2010 planning, deployment and configuration documentation is far better than what was available for Office 2007 at launch, however it’s worth updating my Office 2007 deployment notes for the changes in Office 2007.
Here’s a walkthrough of the Office 2010 customisation process and some of the key considerations you should make when you’re ready to create your custom Office 2010 deployment.
Obtaining and running the Office Customization Tool
Starting with Office 2007, Microsoft included the tools necessary for customising the Office deployment directly within the installation source rather than having to download the tool separately. However this has changed slightly with Office 2010.
If you attempt to run the Office Customization Tool (OCT) from the Office 2010 media you have downloaded from TechNet, MSDN or the Volume License site, you may receive the following error:
Taking a look at the Office installation source, you’ll notice that the Admin folder is not included with any of the Office 2010 products, as it was with the 2007 versions:
Office installation source without the Admin folder
Volume license editions of Office should include this folder; however to obtain the Admin folder and the files necessary to run the OCT, you will need to first download the Office 2010 Administrative Template files (ADM, ADMX/ADML) and Office Customization Tool (read more about this download here). Files for 32-bit and 64-bit versions of Office 2010 are available; so download the file to suit the version of Office you are deploying.
Extract the files by running AdminTemplates_32.exe or AdminTemplates_64.exe (or use the /extract:<folder path> /quiet switches), then copy the Admin folder to the Office 2010 installation source.
Office 2010 ADM, ADMX and Admin folders
The Admin folder containing the OCT files is suitable for all of the Office 2010 products, for example you can copy the same folder to a Visio 2010 source folder to start creating a customisation file for that product.
Before Customising Office 2010
Before attempting to create an Office customisation for unattended deployment, it’s worth manually installing Office, understanding the components that are installed and seeing the first run experience on a clean machine (and with a clean user profile too).
On first run, Office will prompt users some choices that, in a corporate environment, should probably be made for them. These are Windows Update settings:
And the default file type choice – will you continue to use the Microsoft file types or go with the OpenDocument formats instead?
Office 2010 default file types
Both of these dialog boxes can be disabled by setting options in a customisation file.
Creating a custom installation
In this section, I’ve outlined the key steps for creating a customisation file, but you can read about customising your Office 2010 deployment in more detail on TechNet.
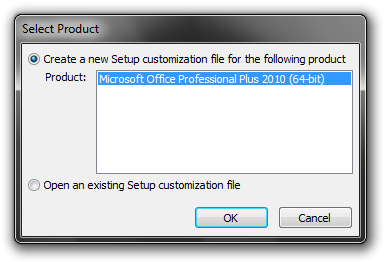
The process for creating a customisation file for Office 2010 is almost the same as for Office 2007 – start the Office Customisation Tool (SETUP /ADMIN) and create a new file or open an existing file for modifying.

Tip: to avoid the UAC prompt when running Setup, set the __COMPAT_LAYER environment variable to run Setup in the current context. Run SET __COMPAT_LAYER=RunAsInvoker before running Setup (both commands should be run from the same Command Prompt).
Just as you would be prompted once Office 2010 is installed, you will need to choose the default file types. Most organisations will probably choose to stick with the Microsoft Open XML formats. Making a choice here will modify the user settings that you will see in a later step.

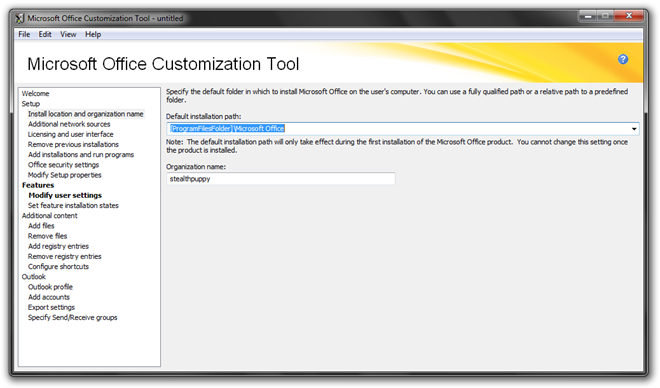
A install location for Office can be specified if you don’t want to accept the default. Change this location to a folder on the virtual drive, if you are virtualising Office 2010 with App-V.

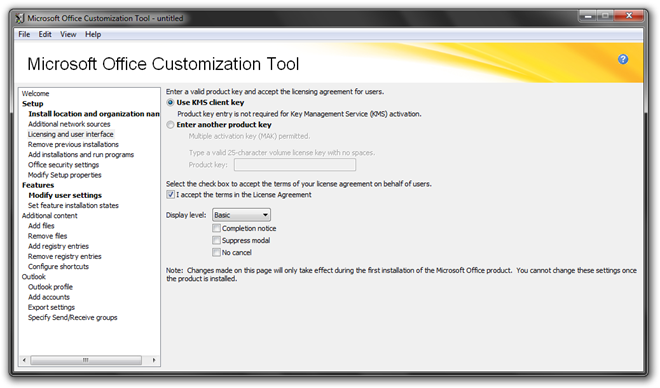
Office 2010 enforces activation with Volume Activation 2.0 – the best strategy for activating Office 2010 is to use a KMS host, which will avoid deploying the product key in your deployment and manual activations. If you do not have access to a KMS key, a MAK key is required (without a key, Setup will fail).
Accept the license agreement and choose the type of user interface that setup will display during installation. SCCM and other ESD deployments should use no user interface.

The OCT allows you to choose default security settings for Office 2010. I won’t go into that here, instead read this article on TechNet: Configure security for Office 2010.
One of the most important (and time consuming) aspects of the the customisation file is modifying the default user settings. What you set here will depend on the environment you are deploying to, but it’s worth investing in some time to get these default settings correct.
By modifying these settings in the customisation file, users can get up and running with Office 2010 sooner; however treat these as default preferences. Group Policy should be used to enforce settings, not set defaults – the less settings you have in Group Policy the better (less time spent processing policies at logon).
Modify Office 2010 default user settings
The table below lists they most common settings to modify based on my experience deploying Office:
| Product | Path | Setting | Value |
|---|---|---|---|
| Microsoft Excel 2010 | Excel Options - Save | Default file format | Enabled, Excel Workbook (*.xlsx) |
| Microsoft Outlook 2010 | Outlook Social Connector | Turn off Outlook Social Connector | Disabled / Enabled |
| Microsoft Outlook 2010 | Outlook Options - Other - AutoArchive | AutoArchive Settings | Disabled |
| Microsoft PowerPoint 2010 | PowerPoint Options - Save | Default file format | Enabled, PowerPoint Presentation (*.pptx) |
| Microsoft Word 2010 | Word Options - Save | Default file format | Enabled, Word Document (*.docx) |
| Microsoft Office 2010 | Global Options - Customize | Allow roaming of all user customisations | Enabled |
| Microsoft Office 2010 | Privacy - Trust Center | Disable Opt-in Wizard on first run | Enabled |
| Microsoft Office 2010 | Privacy - Trust Center | Enable Customer Experience Improvement Program | Disabled / Enabled |
| Microsoft Office 2010 | Privacy - Trust Center | Automatically receive small updates to improve reliability | Disabled / Enabled |
| Microsoft Office 2010 | Office Live Workspace | Turn Off Office Live Workspace Integration | Enabled |
| Microsoft Office 2010 | Services - Fax | Disable Internet Fax feature | Enabled |
| Microsoft Office 2010 | Microsoft Office Picture Manager | Disable File Types association dialog box on first launch | Enabled |
| Microsoft Office 2010 | Miscellaneous | Do not allow Save to Web integration | Enabled |
| Microsoft Office 2010 | Miscellaneous | Suppress recommended settings dialog | Enabled |
| Microsoft OneNote 2010 | OneNote Options - Other | Add OneNote icon to the notification area | Disabled / Enabled |
| Microsoft Visio 2010 | Visio Options - Advanced - General Options | Put all settings in Windows registry | Enabled |
Like user settings, feature installation states will impact on the default Office experience, so you will need to know in advance which features you are deploying. Install on First Use for features is no longer available, so features will either be available or not once deployed, although you can change feature states after deployment.
Office 2010 feature installation states
Some features that may not be suitable for some corporate environments include:
- Office Shared Features - Business Connectivity Services
- Office Shared Features - Web Themes
- Office Tools - Hosted Webs
There are several other options available from within the OCT – you can deploy additional files and programs along side Office, automatically configure Outlook profiles when users first start Outlook and configure SharePoint Workspaces.
Once you have finished creating the customisation file, save it and now you’re ready to start the Office 2010 deployment process.
Note: a downloadable version of the Office 2010 deployment resources are available in this document - Deployment guide for Microsoft Office 2010. This is a 216 page document that covers every aspect of Office 2010 deployment
This book provides how-to information: the recommended steps to execute specific deployment tasks, such as customizing the installation and installing Microsoft Office 2010.
