Context based automation in Mac OS X

I currently use a MacBook Pro for my personal and work use every day - it’s my primary computing device. It goes with me almost everywhere, so invariably I am moving between secure (e.g. home) and non-secure or public locations (including the office).
Each location therefore, has different contexts - at home I might connect to my Synology NAS and I don’t need to lock the laptop when I walk away from it. Work is a very different context - I don’t have access to the NAS and I’m in a public location where I should be locking the desktop when it’s not in use.
Manually mounting remote shares or changing security settings for each locations is repetitive and time consuming. Surely there’s a better way?
I’m not that keen on writing shell scripts in OS X to automate the process, so I was impressed to come across ControlPlane. With this tool I can define different contexts and then enable certain actions based on those contexts.
So here’s how I’m using ControlPlane to make life easier by performing tasks as I move between home and work (or any other locations).
Installing ControlPlane
Downloading and installing ControlPlane is very simple - download the disk image (DMG file) and drag ControlPlane to your Applications folder.
Launch ControlPlane and enable ‘Start ControlPlane at login’ (if it’s not running, actions won’t fire). Here I’ve also set a default context (Secure). This is important because I want the secure actions firing by default with other actions only firing if I connect to a specific context (such as Home).
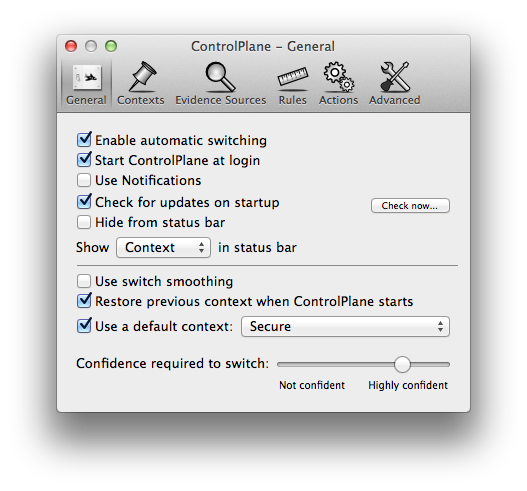
I’ve enabled the display of the context name in the menu bar so that I can easily see which context the laptop is in:

Configuring Contexts
Create a Context with a name, Evidence Sources (properties of a location, physical configuration, peripherals, time of day etc) and Rules (these define evidence sources that describe the context).
I’ve created three Contexts - Home, Mobile (for use with a MiFi-style device) and Secure. Rules are applied to Home and Mobile, whilst Secure has no rules applied and thus applies to any location that isn’t Home or Mobile.
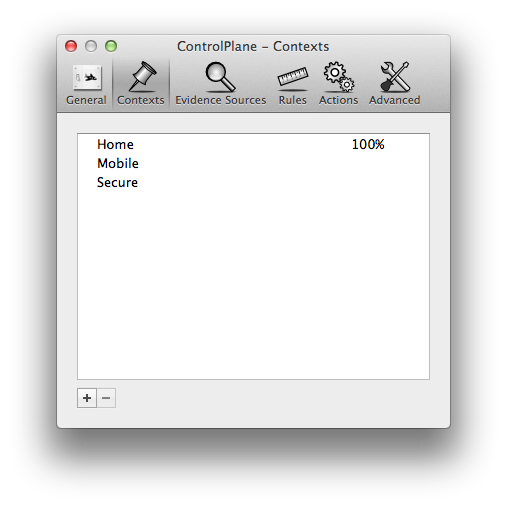
To define the Home context, I’ve used the ‘WiFi BSSID’ rule to define that if the MacBook has a connection to my home router, then I must be at home. 100% confidence is enabled on this rule because I know it’s highly unlikely that I’ll be connected to the same SSID and MAC address at any other location.
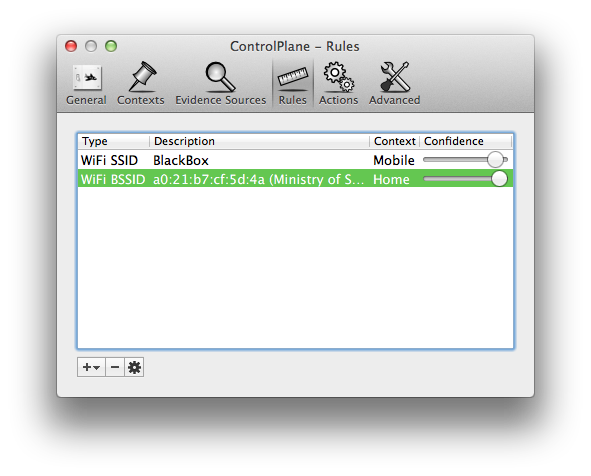
I could use various other evidence sources; however I’ve found that a WiFi connection is the simplest approach for my needs.
Enabling Actions
For each Context I’ve enabled various actions. When the laptop connects to my home WiFi, the following actions will take place:
- Disable the requirement to enter my password when opening the lid or after a screensaver fires (System Preferences / Security & Privacy / General)
- Mounting a share (or shares) on the NAS
- Enabling Time Machine
When the Secure context is enabled, the follow actions take place:
- Enable the requirement to enter a password when the desktop is locked
- Disable Time Machine (without access to the NAS, there’s little use in Time Machine running)
Action Details
ControlPlane provides a plethora of actions and enabling or disabling Time Machine is straight forward. Mounting a remote share or enabling/disabling the screen lock are a little more nuanced.
Mounting or dismounting a remote share requires the full path to that share. That full path can be found via Get Info from the right-click context menu on the share.
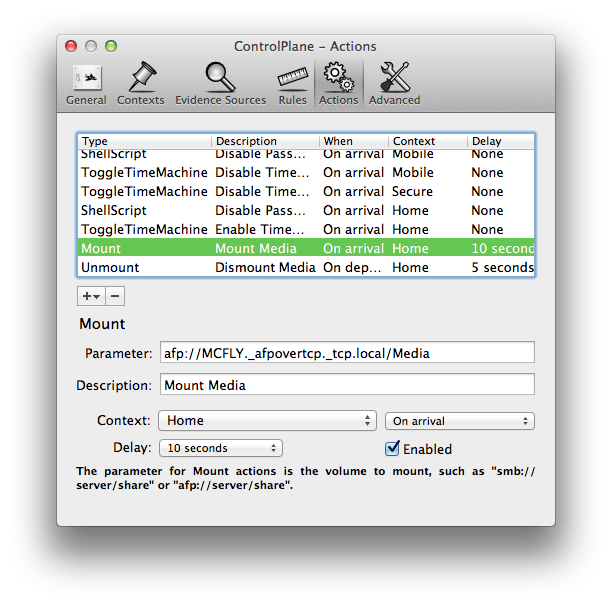
I could also unmount the same share when I leave the Home context.
A shell script is needed to configure the requirement for a password when unlocking OS X. This uses the defaults command to directly modify the system preferences. Here’s the commands to lock:
defaults write com.apple.screensaver askForPassword -int 1
defaults write com.apple.screensaver askForPasswordDelay -int 0
And here are the commands to unlock:
defaults write com.apple.screensaver askForPassword -int 0
defaults write com.apple.screensaver askForPasswordDelay -int 3600
Save these commands in text files on the file system (e.g. enable-passwordlock.sh and disable-passwordlock.sh) and mark them as executable with:
chmod u+x <script name>.sh
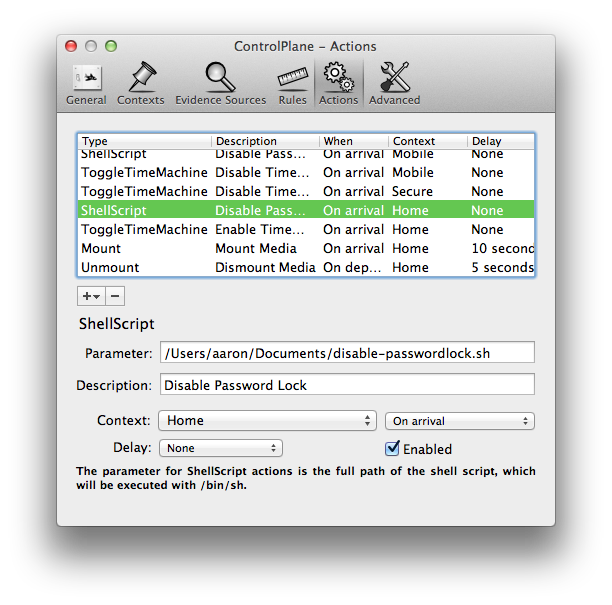
Then add System actions in ControlPlane to execute the shell scripts at in the right context:
Life is Good
With ControlPlane I’ve got a great (and free) solution to automating some common actions that I’ve previously been performing manually as I move between home and work. First world problems solved again.
In this article I’ve only shown a couple of examples of what’s possible with ControlPlane, so I recommend checking it out for yourself to see how it can improve your workflows.